

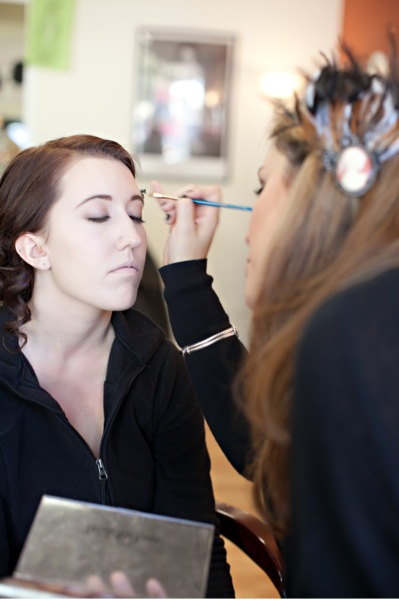
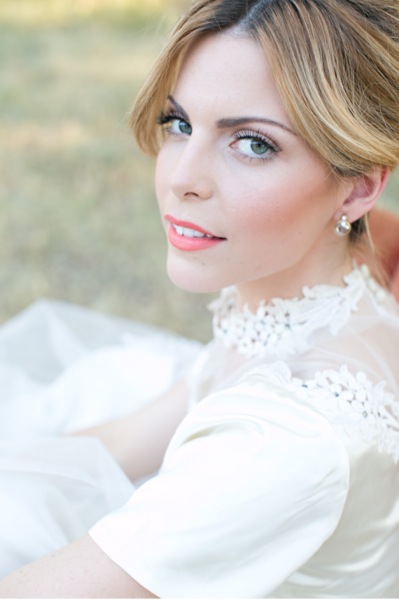
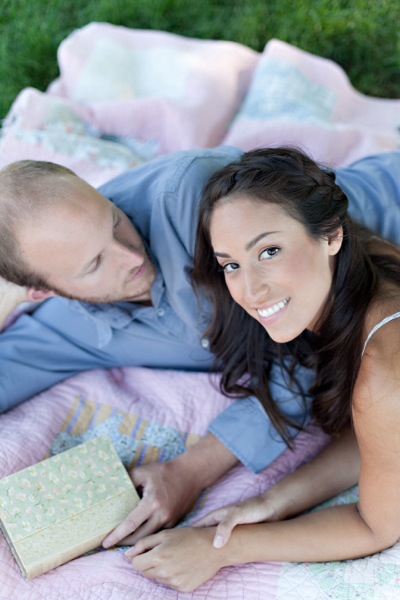
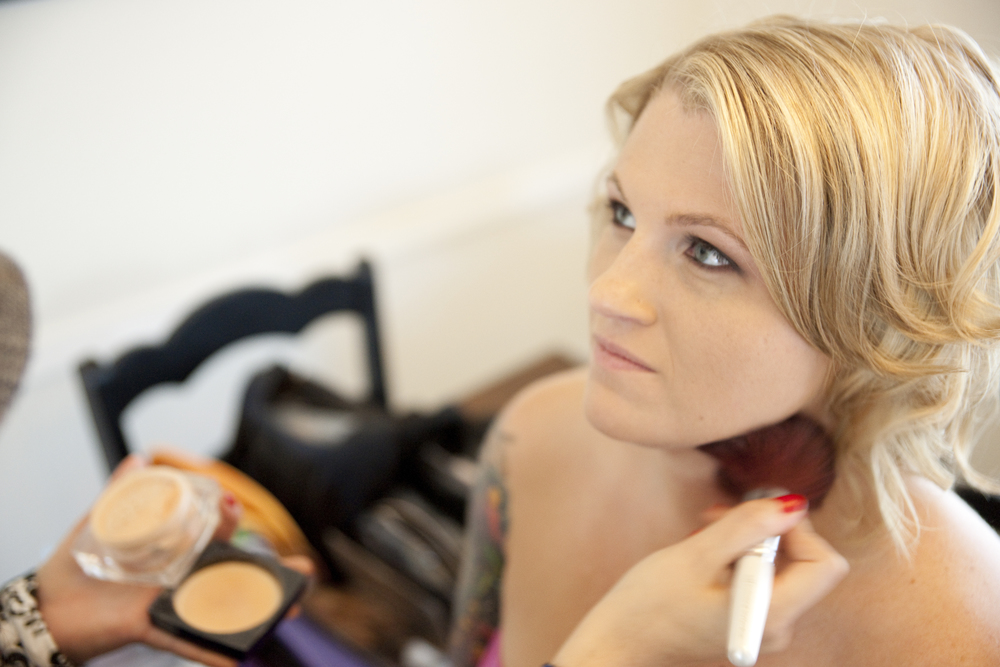
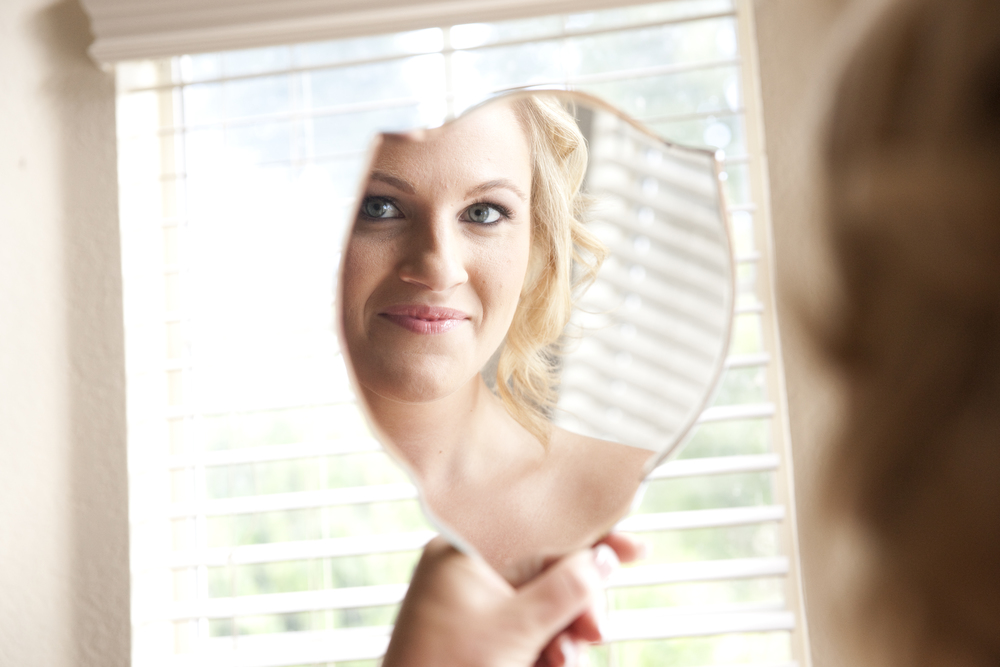
Note: the pictures of these lovely ladies below are NOT examples of looking old or doing things wrong…in fact they are evidence of the opposite! Plus, let’s be honest, the pictures break up my long winded soap box! Thank you Lydia Photographyfor the amazing shots from our previous photoshoots!
Dear Friend,
You asked for my honest opinion, “Am I looking old? Honestly Jess, tell me. I can take it. I know you’ll tell me the truth!,” you said. So here it is. And listen, regardless of my answer, you should ultimately do what you love…how you feel is what is most important, so if you do something in this list and you love it then be my guest! It’s your right to look haggard err umm I mean everyone is entitled to their wrong opinion—uh What I mean is, more power to ya! And yes friend I know you think I’m a little snarky, but it’s only to emphasis my point and because I would NEVER be this unfiltered with a client…but since we are friends, I know you can handle the truth.
1. Your brows are way too thin. Maybe it’s over plucking, maybe you’re just not particularly hairy, or maybe they’ve thinned with age but they are too thin. It seems counterintuitive but fuller brows actually make your eyes look more lifted! Thin brows overexpose the orbital bone and makes your eyes appear droopy. A fuller brow is an instant face lift, so grab some filler and make them fuller! Or head to an Anastasia counter for some brow rehab–Don’t worry, we can tell the press it was just for “exhaustion.”
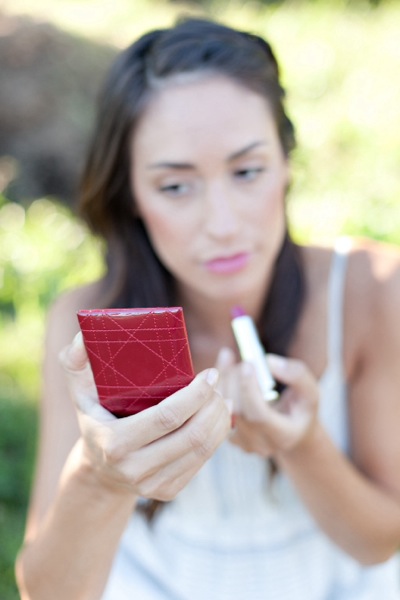
2. Your lipstick is too brown or too dark…Honestly women are pretty religious about their lipstick. I get it. That shade is perfect right? You’ve been wearing it for years ya? Well that’s just it, you’ve been wearing it so long you don’t know any other way to view your lips. That doesn’t make it the best shade for you. Dark lips age, period. Sometimes that’s ok if we are going for a vampy look. But for everyday, you should go with something a little more rosy with more life in it! It will brighten your complexion and your smile.

3. You’re still wearing the same mattifying or oily skin formula foundation from years ago. You’d be surprised at how many women when discussing their skin type claim to be oily when what they really mean is, I was labeled as oily in my teens and I never reevaluated that as I got older. Oily skin formulas tend to combat shine, sucking out radiance…which when we were much more oily was great, we had radiance coming out the wazoo! But now, you aren’t anymore. I mean ya, you may still get shiny or even the occasional zit, but you are not the oil slick gal you used to be (thank God right?!). So using those formulas is essentially making your skin look dull and tired. And you don’t need that mega coverage anymore! Something lighter and more radiant is going to make your skin look fabulous! I know I know, it’s a total paradigm shift. It’s the right thing to do though, I promise.
4. You’re not concealing under your eyes. “But I feel like it makes me look wrinkly, or I feel like it settles in my lines.” First, let’s do some hunting to find a good formula that works best for you! Not all concealers are created equally. Second, darkness under your eyes will make you look more old and run down than a few lines ever will. The lines are there whether you care to acknowledge them or not, the darkness doesn’t have to be.
5. You’re not using good skincare. Whether it’s because you think it’s too late, or you’re in denial of it being necessary…you need to pay attention to your skin. If you’re thinking to yourself: should I start using an eye cream? The answer always is: yes you should of started years ago, regardless of how young you are. It’s never too late to give your skin what’s best for it. That’s like not watering a wilting plant…it’s not dead yet, so give it what it needs! And if you’re old enough to question if you should be using reparative creams or nutrient packed serums, then your answer is yes.
So there you have it friend, I’m only telling you this because I love you…and because you asked my advice. I mean, I think you’re fantastic and have great taste (after all, we are friends!). But you know I will always tell you truth when you ask for it, that’s why we are such good friends.
PS- if we really do know each other personally and you saw something on this list and wondered, “Is Jess talking about me??” Yes, yes I am talking about you. Coffee next week?
Cheers to Honesty, Friendship, and Aging Gracefully,

Beauty, Health, Makeup, Musings, Personal, Photoshoot, Product review, Products, Skincare, Trend, Tutorial
February 19, 2014
Who says that the only daytime drama can be the soaps you watch on tv? A smokey eye doesn’t have to be reserved for the evening! The trick to pulling it off during the day and not looking like you’re headed to the club is to be strategic about the placement and using soft neutral shades! Here’s how…

1. Apply your normal primer, and then start by lining your eyes. It doesn’t need to be perfect. I’m using the Rimmel Scandaleyes pencil in black.
2. Use a smudger brush and smudge the liner back and forth to create our smoke.
3. Using the same brush begin to work the smudged liner upwards. Keep it away from the crease…we are smoking out the lid.
4. Pat a shimmery taupe all over your lid. I’m using Homecoming by Makeup Geek.
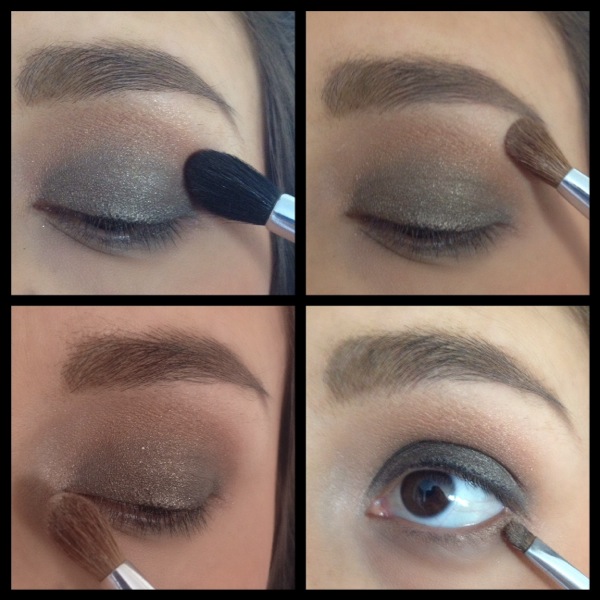
5. Using a windshield wiper motion, blend a soft brown into the crease. I’m using Creme Brulee by Makeup Geek.
6. Sweep a matte vanilla shade under the brow bone, I’m using Foxy from the Urban Decay Naked Basics palette.
7. Place a pop of shimmery vanilla in your inner socket to give the look a little light. I am using Venus from Naked Basics.
8. Using the same smudge brush as before, dip it into the taupe you used on your lid and blend a thin line under your lashes.
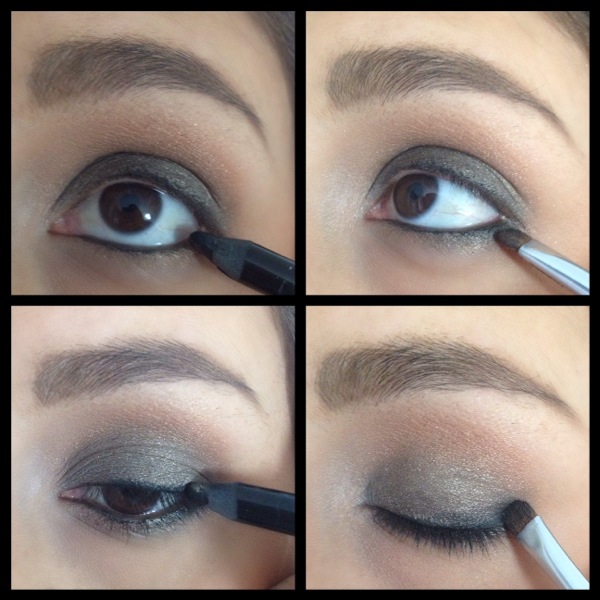
9. Apply your black liner from step one to the inner rim of your lower lashline (waterline).
10. Use your smudger to smear the liner into the outer third of your lower lashline.
11. Line the top of your eyes again to bring the look together.
12. Smudge the liner up slightly on the outer third of your top lashline.
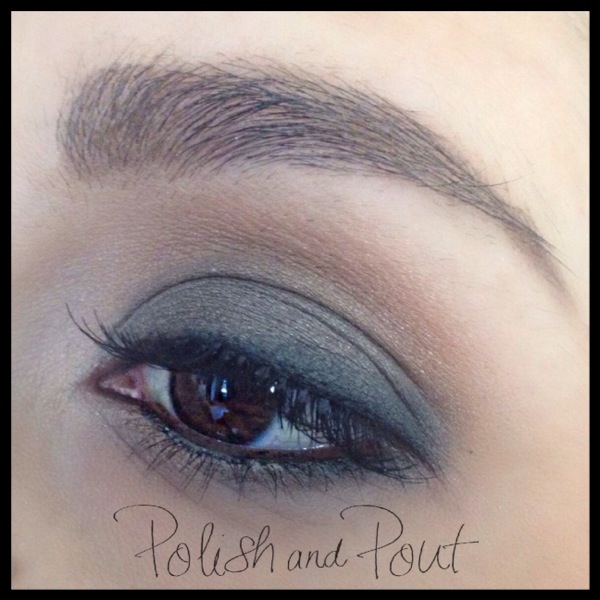
Mascara (and lashes if desired) and there you go!
A touch of intensity that appropriate for just about anywhere!

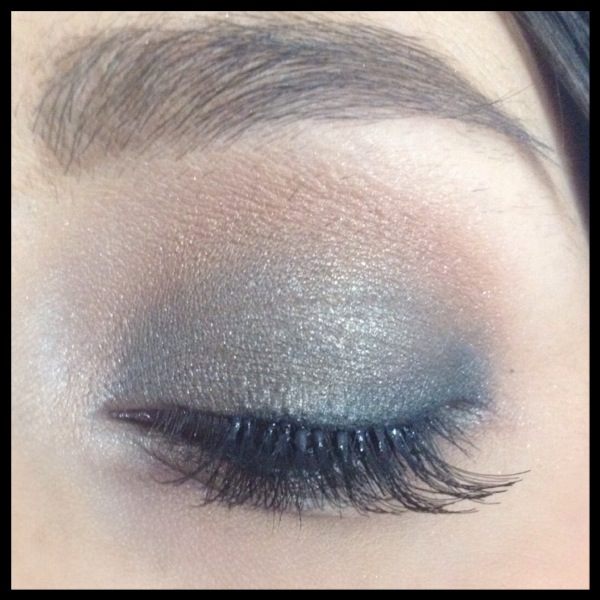
And a full shot of my lovely model to show you that overall, the shadow really does translate soft and is definately not too harsh for daytime! Plus, I have to show off my gorgeous sister (who is having a baby next month! Woohoo!).
Cheers to Smoke, Shadow, and Daytime Drama,

January 13, 2014
Meet my friend Christi of Christi Reynolds Makeup Artistry! With over 17 years of experience in the beauty industry, she is the definition of a pro! Her skill and expertise have helped me both personally and professionally…in fact, Christi is the makeup artist I hired to do my makeup for my wedding 6 years ago! (See! EVERYONE needs to hire a professional makeup artist for their big day!)
I love Christi’s style of artistry…with a focus on complexion and a fresh aesthetic, her artistry really lets the person shine! I’m so thrilled she is sharing some of her must-have products with all of us! Here we go…

1. Elf eyelid primer: “This sheer formula doesn’t interfere with the color or texture of your shadows…use it and nothing will budge!
2. Benefit’s High Beam and Benetint: “I love to mix them together! Looks good on every skin tone and gives a natural healthy flush. Instant red carpet glow!”
3. MAC Mineralize Skin Finish: “I love this powders beautiful coverage, it’s not too much, and provides subtle luminosity! Great for setting foundation.”
4. Clarins Beauty Flash Balm: “Love it! I reach for this when I know that my skin needs that wide awake, fresh, just had a facial look! Instantly snaps my skin back from looking dehydrated.”
5. Lingering MAC brow pencil: “This is super precise so you can mimic the natural shape of the brow hairs.”
Christi sums up her beauty philosophy well,”I like to make-up, not make over. I like to correct, define, and enhance…enhance…not create! There’s a difference.”
So Cheers to Correcting, Defining, and Enhancing,

Beauty, Beauty Spotlight, Health, industry professional, Makeup, Product review, Products, Shopping, Skincare
July 1, 2013
Ever have this happen to your eyeshadow or powder or blush or…the list goes on and on…Turns out it wasn’t as safe as you thought in your bag or you accidentally knock it on the floor and…
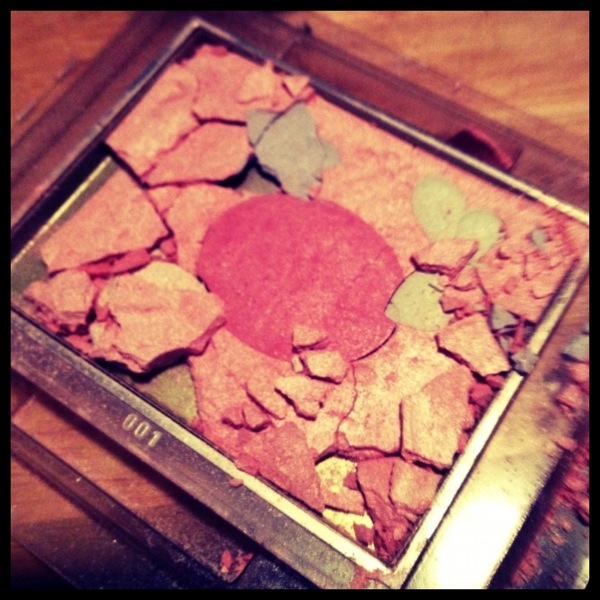
Ugh. This drives me nuts! I used to just use what I could and toss. Then it occurred to me that I could just crush it up and put in an empty jar as a loose powder product (um duh, why did I ever toss anything?)…but then an even more amazing solution presented itself…
Makeup surgery! Hand me a spatula and bottle of alcohol stat!
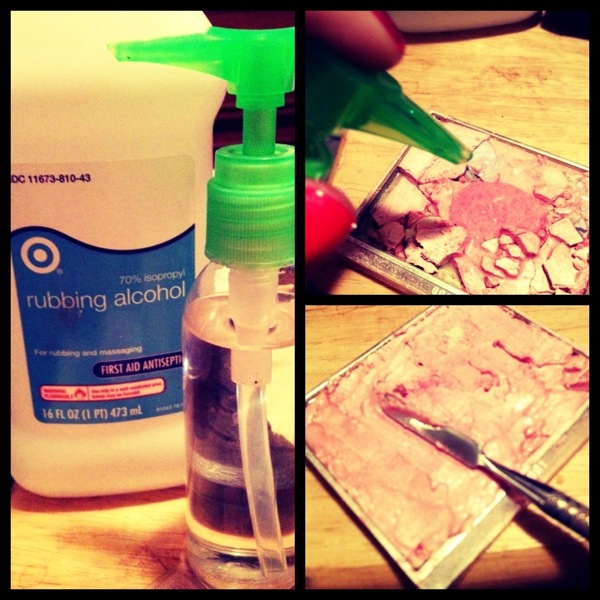 Gather up all of the broken pieces into the container you want it in. Spray the alcohol onto the product generously. Use the spatula (or knife etc) to spread the alcohol into the product, smoothing the product and eliminating seams in the process. It’s very important That you do not touch the product with your fingers, as the oil from your skin may transfer to the product and begin to break it down and disturb the “surgical” process! Let dry for the necessary amount of time (depends on size of the product).

I let this guy dry overnight before touching since it was big! The alcohol evaporates out and…Voilá!
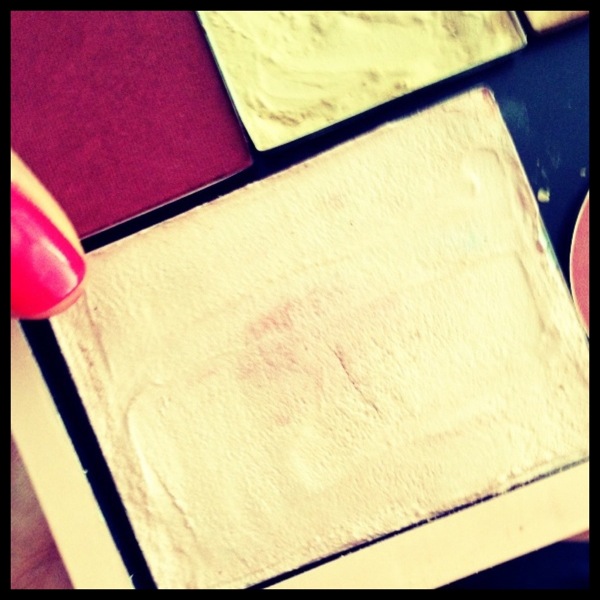
Makeup is once again usable and the color is not affected! Give it a shot next time you have a makeup accident!
Cheers to Powders, Spatulas, and Mending what’s been Broken,

March 24, 2012
Not washing your makeup brushes regularly: this is a super common mistake that even I am guilty of! This is so bad for a number of reasons…oils and bacteria from your face attach to the brushes you use and can affect the quality of your skin!

Many times when I break out I look at the area of my breakout and ask myself what brushes do I use on that area? When was the last time I deeply cleaned my brushes? More times than I care to admit poor brush care is to blame! Also, the better you treat your brushes, the longer they’ll last. And the cleaner your brushes are, the less likely the oils and bacteria from your face will break down the products you use. 
Washing your brushes every other week at least with something antibacterial will have a huge payoff! Make sure you lay them flat to dry so the water does not creep up the handle and split or damage the brush!

Want to know what to wash your brushes with? Watch the tutorial below for a DIY brush cleanser recipe! Want to expand your brush collection? Me and fellow artist Lindsey will give you the low down on where to splurge and where to save when it comes to brushes…
Cheers to Brushes, Brush Cleanser, and Breaking those Bad Beauty habits,

January 8, 2012
It is something so many are guilty of: Wearing the wrong shade of foundation and/or improper blending. Something I hear all the time is that “it’s not quite right” or “my foundation is OK buuut…” or “my face looks so white in a photo!” Do yourself a favor and once and for all find a foundation that matches you perfectly in a formula your crazy about!
A great complexion makes everything easier and if you get that right, it will make your overall makeup look great, boost confidence, improve how you look in pics, and can even knock years off of your face!
http://www.grandeurphotography.com/
So get to a makeup counter, get professionally matched, and don’t be afraid to spend a few dollars more than normal…it’ll be SO worth it! If you have to match yourself and cannot go to a department store, then make sure you match the shade to your chest NOT your face or neck (those places are usually much lighter than the rest of you and you the point is for your face to match your body!), and purchase from a store with a good return policy. If they cannot provide you with someone to match you, then it’s only fair that you can swap it for one that works!
http://www.grandeurphotography.com/
Some favs of mine, higher end first, more affordable listed second:
Full coverage matte finish…Dior’s Forever foundation OR Neutrogena’s Skin Clearing Oil-Free Makeup
Moderate to buildable coverage,more natural finish…Makeup Forever’s HD foundation OR TruMatch by L’Oreal
Natural coverage, dewy finish: Skin by Bobbi Brown OR Maybelline’s FitMe foundation
So make it happen this month! Fall in love with your foundation…your face will thank you!
Cheers to skin, to foundation, and to breaking bad habits,

January 3, 2012
Having a longwearing…even waterproof look is often times desirable…sometimes necessary, and always a bonus!
It boils down to two things: the products you use, and the techniques you employ.

As far as products go…this may seem like a no brainer, buuuuut: choose products labeled “long-wearing” or “waterproof” this will give you a leg-up on achieving a long-wearing look and products marked as such REALLY do have ingredients in them that help them wear longer (such as oil absorbing ingredients, etc).
Some fav’s of mine for eyes: use MAC’s paint pot in painterly as a base for your shadow…it REALLY stays put and as you can see from these pics, it REALLY helps your shadow stay put!! Also their Fluidline in Blacktrack really goes the distance for lining your eyes!
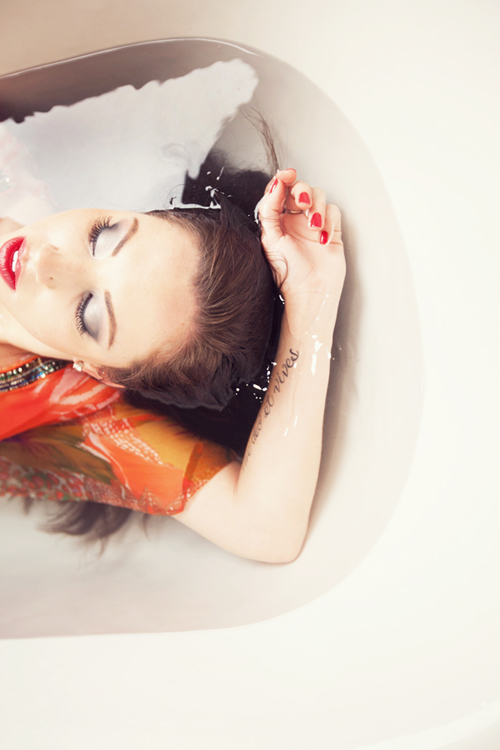
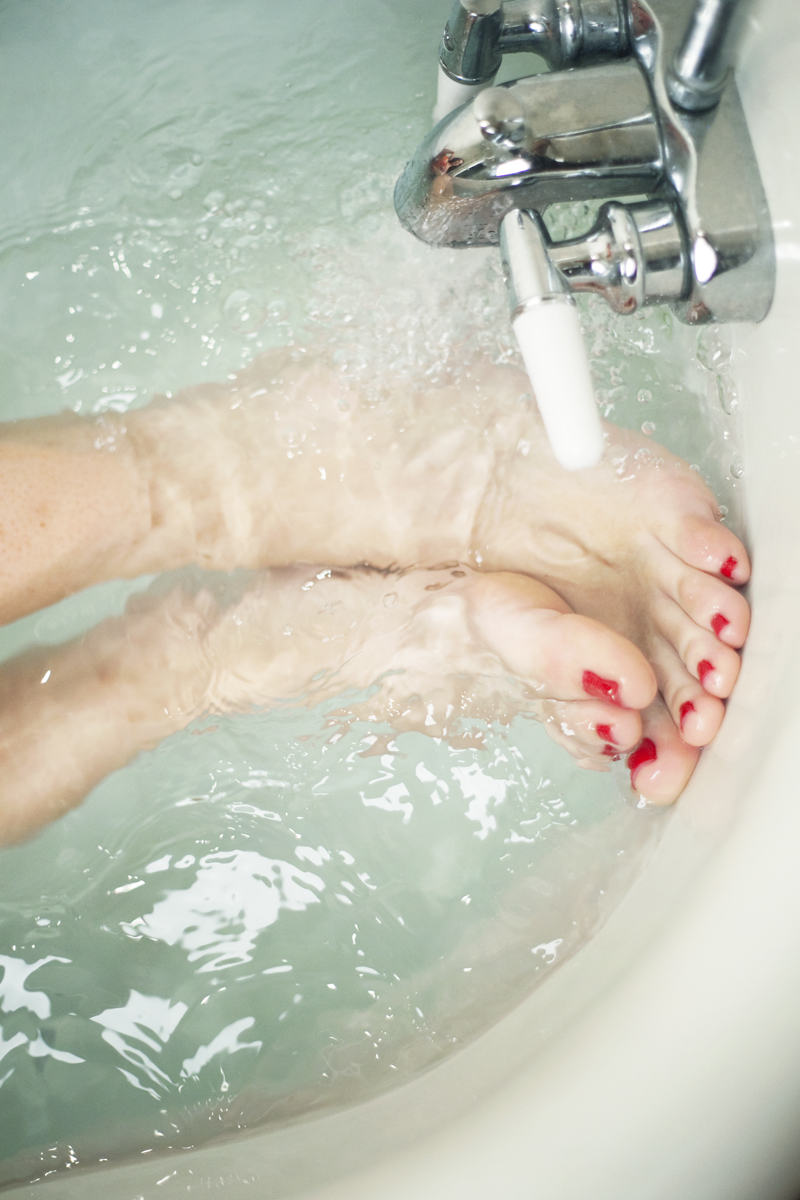
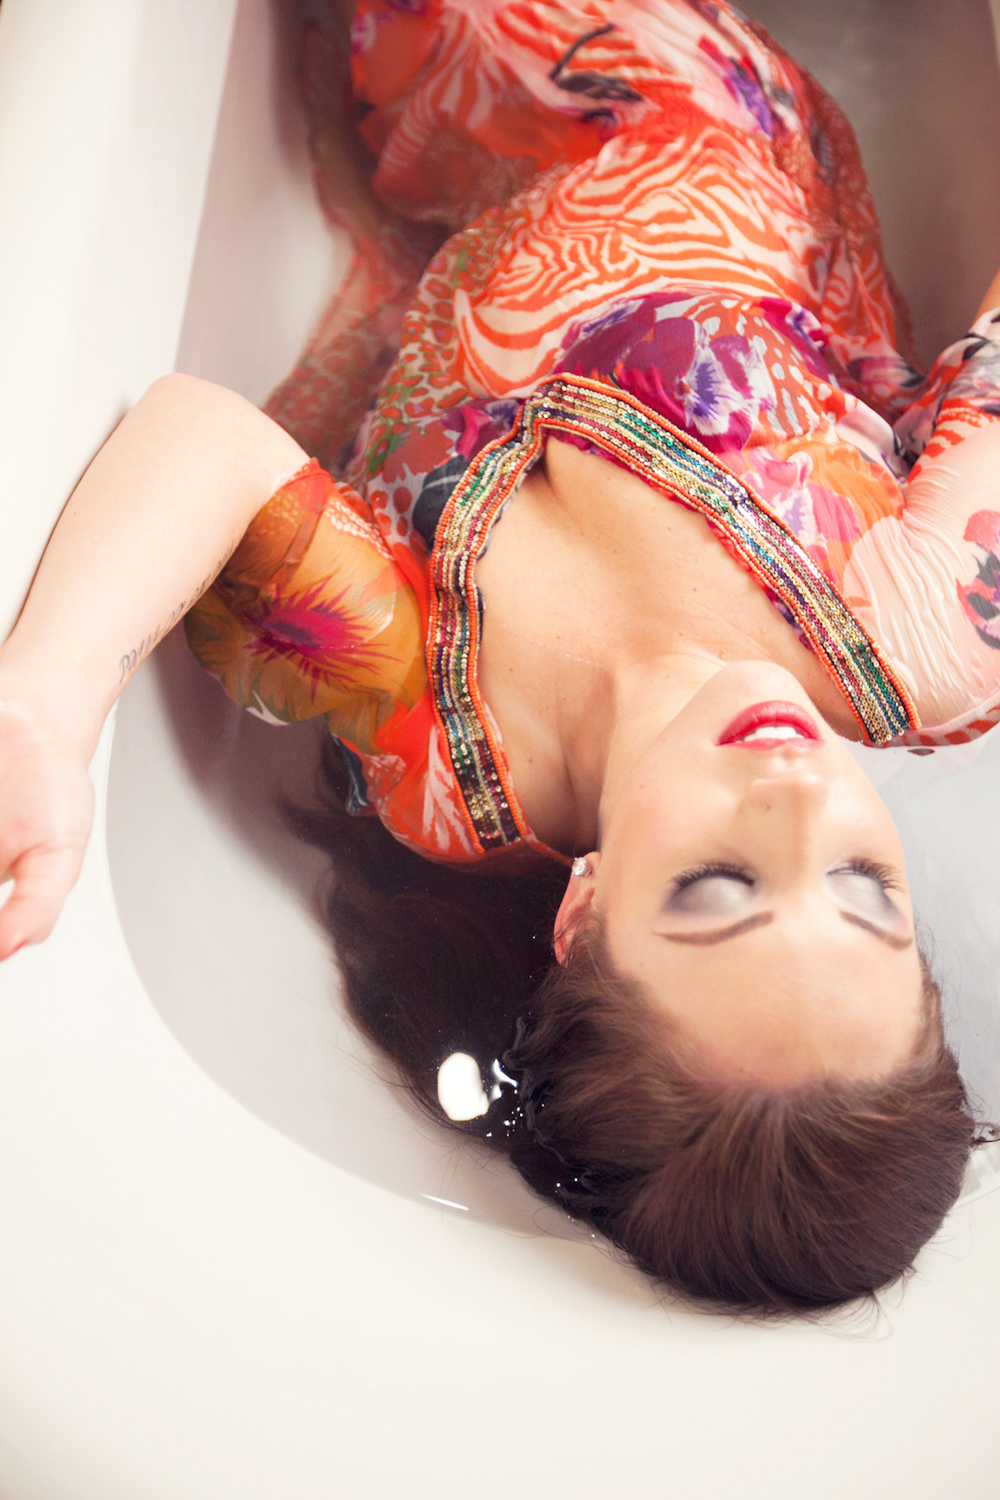
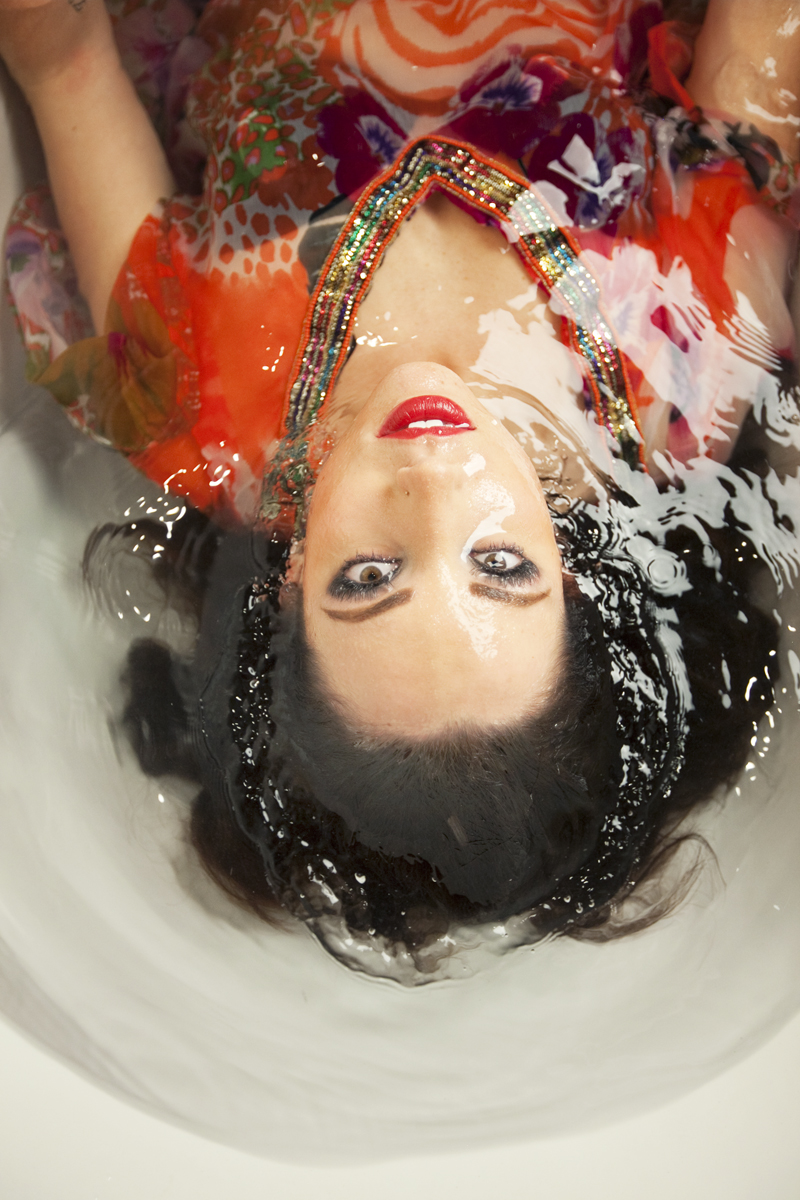
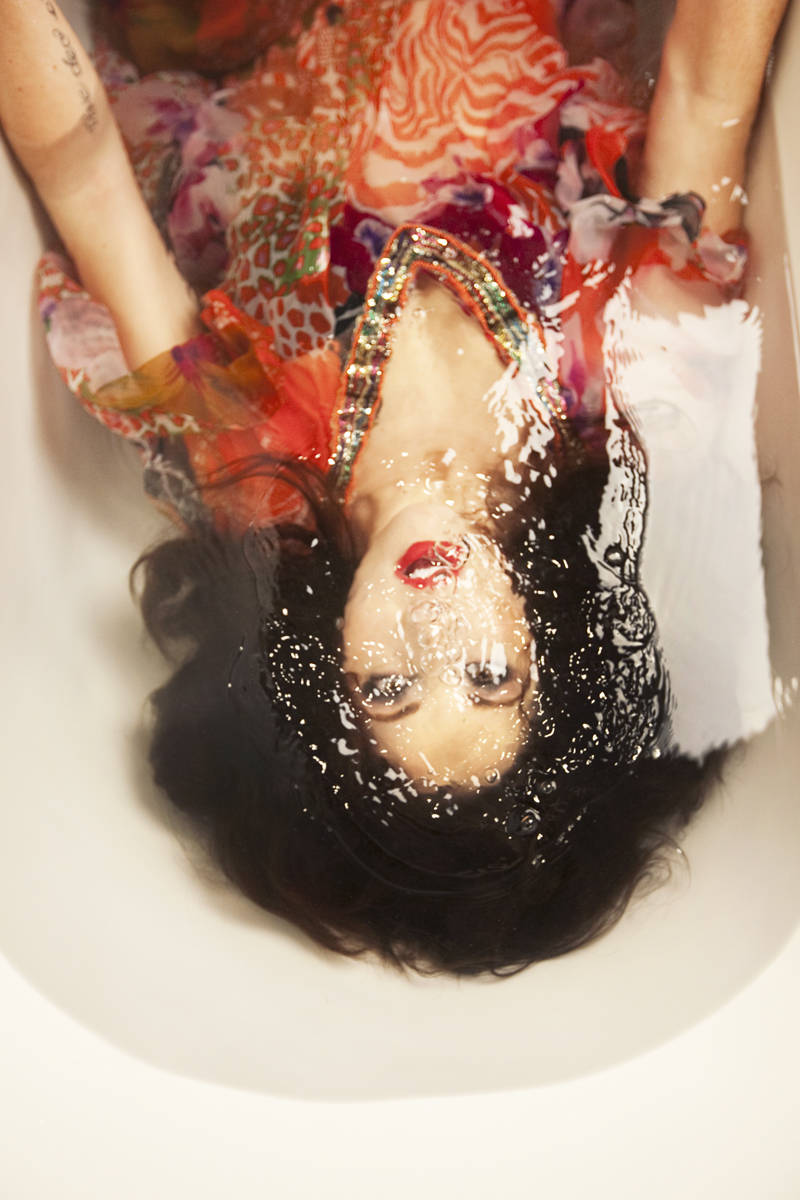
One of my favorite long-wearing foundations (I mention it ALL the time!) is Dior’s Forever foundation…it really will last through a long day…dancing, moving, hugging, and (as demonstrated by our model) even a dunk in some water won’t make it run down your face! As far as lips go, the trick is to opt for more matte formulas, they tend to be drier but longer wearing. Also, completely color in your whole lip with a corresponding shade of liner to act as a base for the lipstick! Apply your matte shade on top, blot, then repeat!
When it comes to technique, layering is key. Layer upon layer of perfectly blended makeup, that is what is going to give you a flawless long-wearing look. It is important to layer translucent powder on top of foundation, to layer cream blush underneath powdered blush, and to layer liner underneath lipstick. Every layer adheres to the one under it, creating a long-lasting color-packed punch! One thing I really love doing is even layering a cream blush, then a powdered blush, THEN even a bright pop of a different blush right on the apples of your cheeks! I know it sounds like a lot, but remember we are talking about multiple LAYERS, not necessarily a ton of thick makeup! Blending is key!
Use fingers to warm up concealer and foundation, use fluffy brushes to blend away seams and set with powder, and of course use waterproof mascara! I love L’Oreal’s Voluminous mascara in black!
Watch below to see the specific techniques I employ for a long-wearing picture-perfect complexion!
So Cheers to Picture Perfect Faces, to Long-Wearing Lipsticks, and to Not Being Afraid to jump in the pool (or hot-tub!) every once in a while!…

December 17, 2011
Whew, this weekend was a long one! I am sitting at my computer right now in my pj’s thankful for the weekend to be over…Sounds backwards doesn’t it? My weekends are almost always my work days…Sunday night is like my Friday and tomorrow I will be sleeping in! Woohoo!
And although the weekend was busy and felt long I wouldn’t trade it for the world…this weekend was especially exciting because I did makeup for 2 photoshoots.
The first was for my friend Ashley…you know her from her amazing hair styling work for many of my shoots and clients! She needed some updated headshots and also some fun shots of her “in action” doing her hair styling thing! She is a gorgeous lady inside and out! I can’t wait to see the pics!

Our photog was Dan Rappa. This was my first time working with him and I was super impressed! Definitely check out his work…he is amazing!
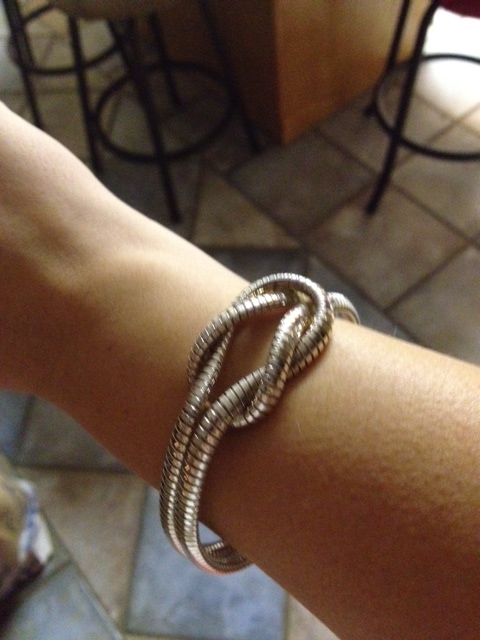
Of course I had to wear my lucky bracelet that day…I ALWAYS wear this baby whenever I have a makeup gig, wedding, or meeting with a client! Once I forgot to wear it and totally hit major traffic on the way to a wedding…Coincidence?? 😉
Our next shoot was all about motion. Swishy skirts, bouncy pearls, swirling hair…you name it we did it! The lovely Laura was so patient as we tugged at her hair and dropped it, swished it, blew air on her, and made her jump again and again until we got just the right shots…
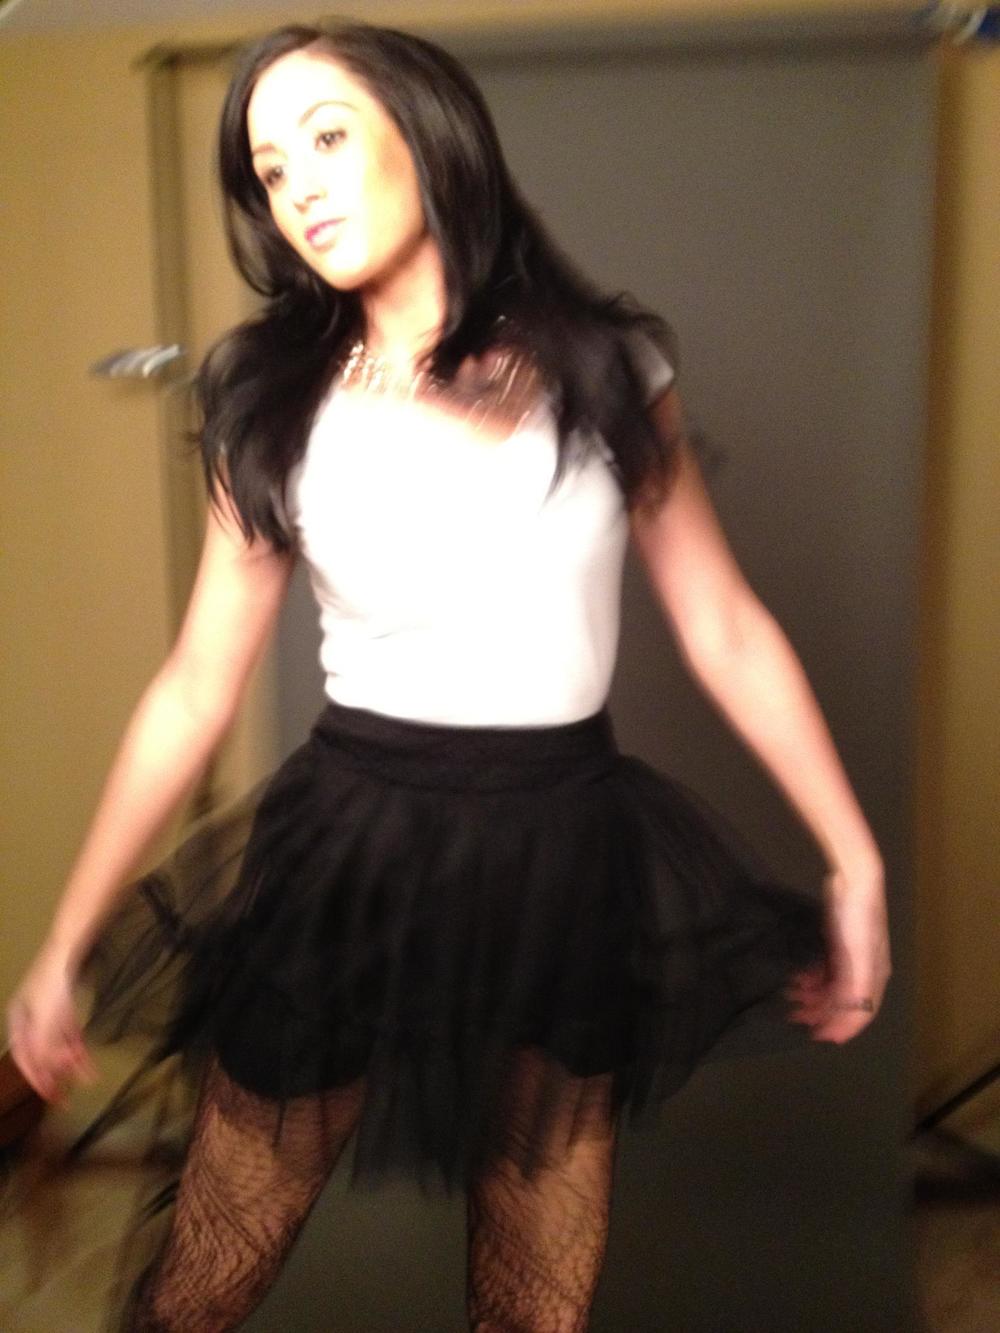
The pic above is of course just from my little ol’ iphone…I cannot wait to see them! I did get a sneak peek tho and I am so eager to see more! Hope you enjoy this shot from Dan as much as I do…

To make sure Laura was glowing and fresh all over I mixed a sheer coverage foundation with a lightweight body moisturizer and smoothed it into her arms and chest. She is lovely yes?
So Cheers to Long Weekends, to Photoshoots, and to Loving what you do,

December 12, 2011
Two very frequent questions I get regarding makeup and photography…One is usually from a person who does not wear much makeup (or none at all), and the other from someone who is no stranger to makeup but feels like things don’t look quite right when they get their picture taken.
So the first question is: “Do I need to wear [any, more, extra, heavy, etc] makeup that day?” That day of course referring to anything special where pictures are being taken (usually a wedding, family pics, you know what I mean!). Well I could probably write a book on this one question, and I will give you my two cents, but I want you to hear what some industry professionals have to say too!
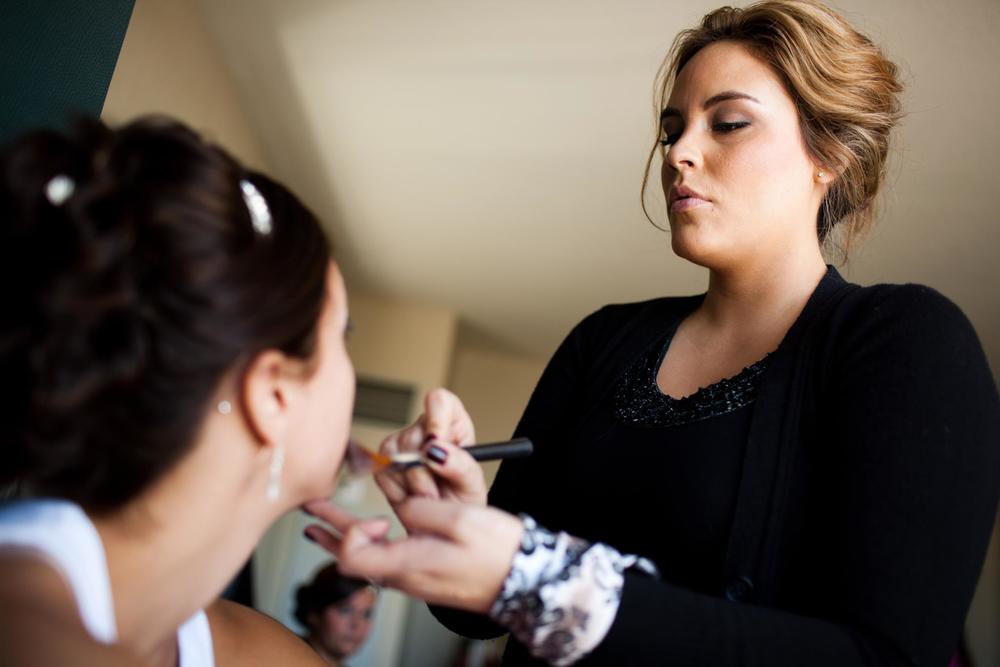 Photo credit: Charleton Churchill Photography
“An image is not just about the moment the camera shutter clicks, but what went into that moment. As an artist, everything inside the image matters: Location, colors, the right outfits, composition, lighting, props, direction, and posing or interaction. However, what good is all that without a properly painted and dressed up person? In the movies, people wear makeup (yes guys too) to enhance their look. Why should we expect less in a photograph?” Charleton Churchill, Charleton Churchill Photography
So in other words: YES! Makeup is a necessary part of a fantastic picture! Plus a well done makeup job will boost confidence which will show in the pictures too! And while a heavy makeup face is rarely what anyone actually wants, it is entirely necessary to enhance your features so you look like YOURSELF in a photo! And of course I always recommend hiring someone to do your makeup for those special times too so you don’t have to worry about it 😉 Even the “no-makeup” look takes makeup and a little extra skill doesn’t hurt!
So moving on…The other question I get asked quite a bit, in fact I was reminded of this issue yet again when a friend texted me the other day (Hi Brae!), is “I wear (a good amount) of makeup but in pics I feel like I always look like I’m not wearing anything. Why and what can I do to change it?”
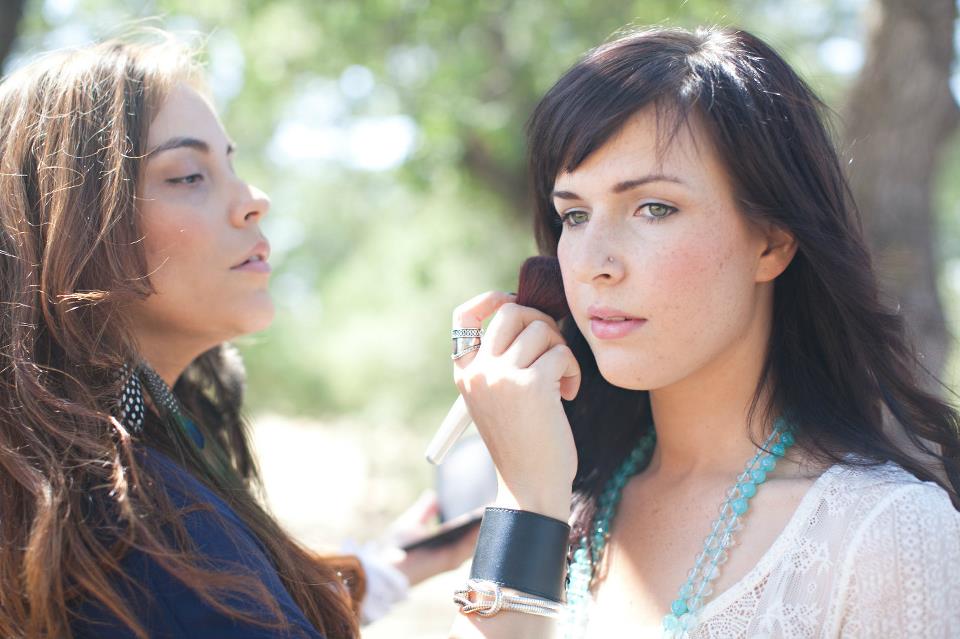 Photo credit: Lydia Photography
“Everyone wants to look their best in pictures! But most people don’t realize that the pure, beautiful light that is great for pictures also can wash you out–a la that just rolled out of bed ghost face! Done well, makeup can add back in the radiance we all want to compliment that glowing smile!” Lydia Takeoka, Lydia Photography
It’s true, lighting washes people out…it can make a rosy complexion look pallid, a diminish features that seem defined face to face. Makeup is necessary, more than usual makeup is necessary.
Here’s the catch: everyone’s definition of “natural” or “dramatic” is different, and how you view yourself (or judge yourself!) in a photo is not going to be how everyone else (or your photog, or your makeup artist) views you. Here’s a few tips that can help you get a handle on this:
- Makeup gets cut, cut major, in a photo…depending on the lighting you’re working with, it could even cut what you did in half. So even those who wear nothing or next to nothing will need a little makeup so you don’t look like death warmed over 😉 And for those of you who wear a full face on a regular basis you may want a more dramatic look or even just kicking it up a couple notches. I recall a recent photoshoot in which I kept having to add so much blush to the model (she was photographing pale and we wanted a flushed look) I thought there was no way it would look right but because of the amazing light we had it cut out so much of the color…she looked naturally rosy in all of the pictures, no one would have known how much blush she had on that day 😉
- Intensifying your look for pictures does not necessarily mean piling on more of what you normally do…it’s all about being strategic in product and product placement. A brighter pop of blush on top of your normal cheek look will help you look awake. A touch more of bronzer than you usually use on your forhead, temples and cheeks will give extra glow to your complexion. Slightly more depth in your eyeshadow, or using false lashes will help your eyes sparkle. And do not forget your lips! It’s so easy to lose your mouth in a photo so I recommend using something a shade or two deeper than you normally do to achieve the appearance of your “normal” mouth. Nudes are fun, they are my favorite, but make sure if that’s what you normally do that you use one with more color (like peachy or pinky) because in a picture a true nude could very well make you look like you are ill!
- Determine what your starting point is, what your normal is…this isn’t one size fits all! Everyone has a different look and that’s ok! The nutshell is: whatever you do normally should be intensified. And if you feel like you just can’t figure out why you don’t look right in a pic take some time to to really figure it out: is it that you feel pale? That your eyes don’t stand out enough? Find those exact things that you want to change and that’s how you’ll know where to strategically use more or different makeup!
So let’s recap: makeup is good!! It will make your pictures better and boost confidence, not to mention it’ll also make your photographers job easier too! One size does not fit all since everyone’s normal varies. Find your normal, determine the level of intensity you want, and use more than the usual so you don’t feel bare. Be strategic about product placement in the areas that seem to fall flat when you photograph. And when in doubt, hire an artist to do the dirty work for you! Did I mention I know a good one? 😉
So Cheers to Photographers, and to a little extra Polish and Pout in your Pics,

November 18, 2011
Part of what makes a wedding special is putting in little personal touches or unexpected details…I especially love it when a bride decides to throw in an accessory that’s more on the fun side or even a little trendy!
A few things I see fitting in with bridal trend during the cold seasons…
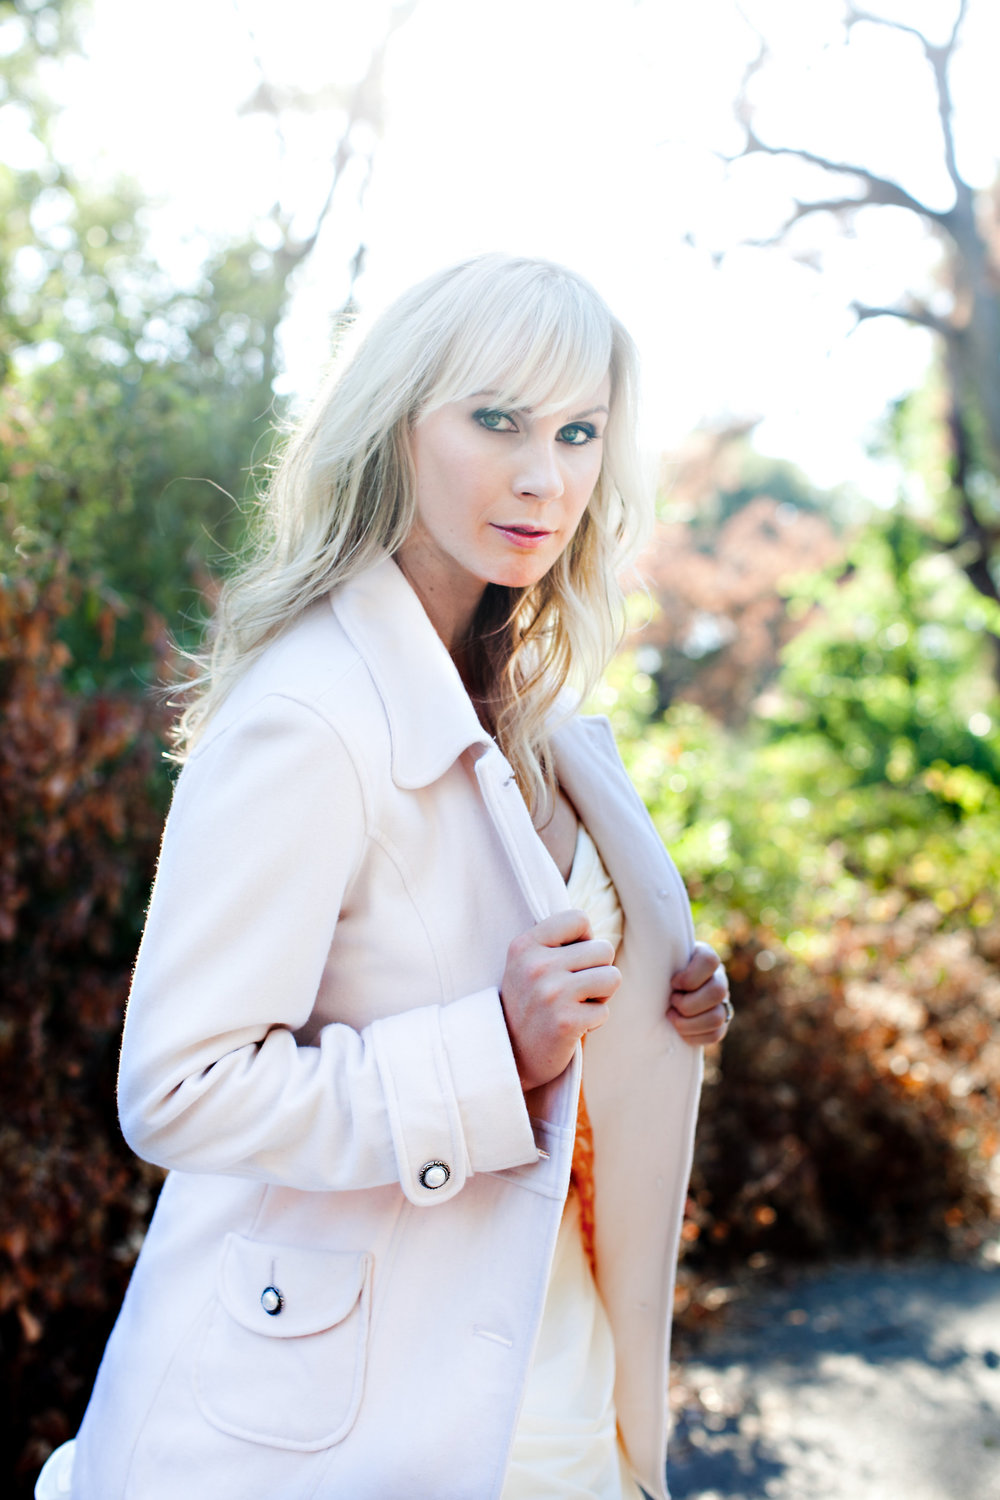
What better accessory for a chilly weather wedding than a pretty coat?! Definitely a good idea for some cute pics outside before you walk down the aisle! DIY Tip: this coat is from the juniors section in Nordstrom…every year they sell peacoats in all colors for around $50 (sometimes cheaper if on sale!). They come with basic buttons that looked very casual so I went to the craft store and found these gorgeous antique inspired pearl buttons. A quick button swap and voila! A fancy-shmancy coat!
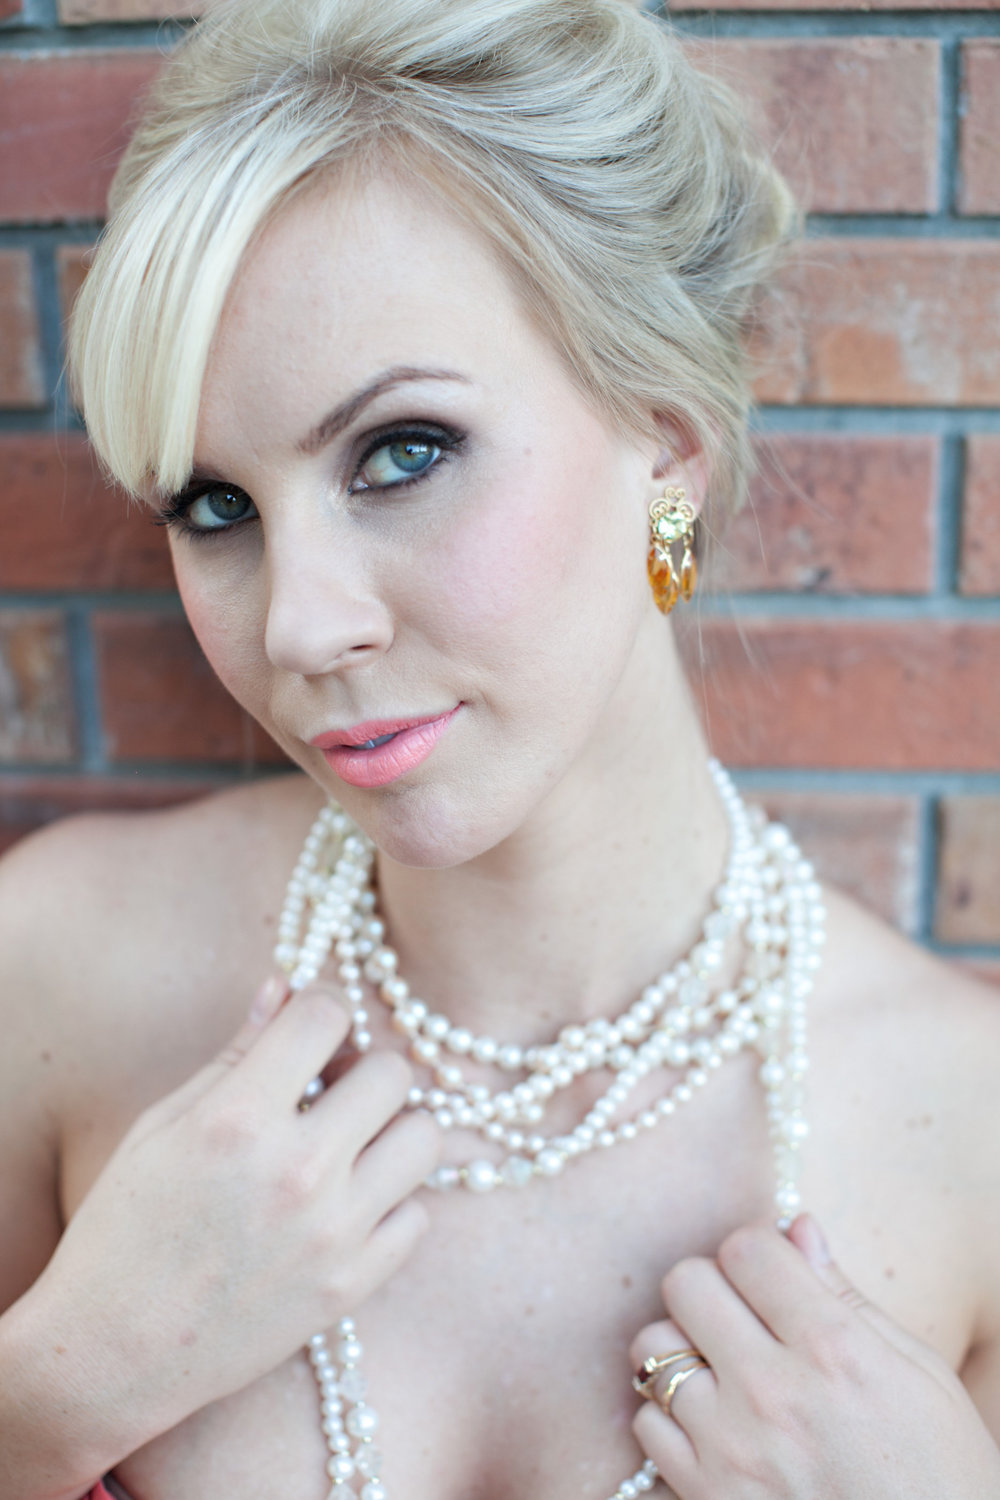
Are you a lipstick or vintage loving gal? Opt for vintage earrings, layers of pearls, or a punchy lip (or as in the case of our model all 3! Ha!)! A bright peach is a great way to rock the vintage look while still being current (bright lips are huge this fall in makeup trend!) and is a nice change from the usual red. Upswept hair with a little texture completes this look (styling compliments of Ashley B!)
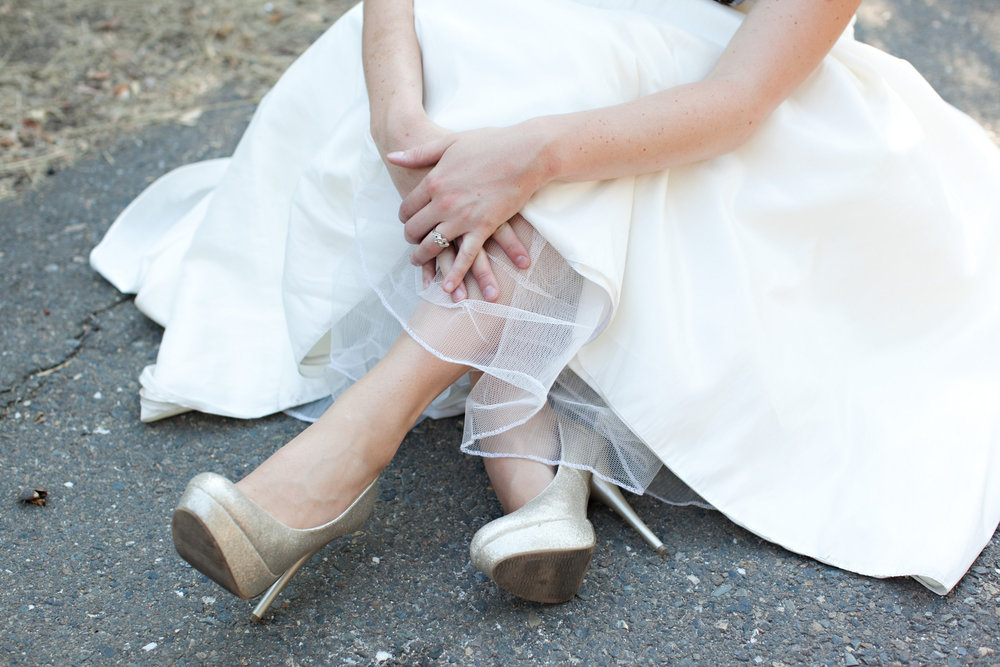
Sparkly heels! Who wouldn’t feel like a million bucks in these glittery gold colored babies?! I’ve seen versions of these all over the place and they can be pretty pricey. Our lovely model Ashleigh snagged these at Target! I would have never guessed…they were stunning!
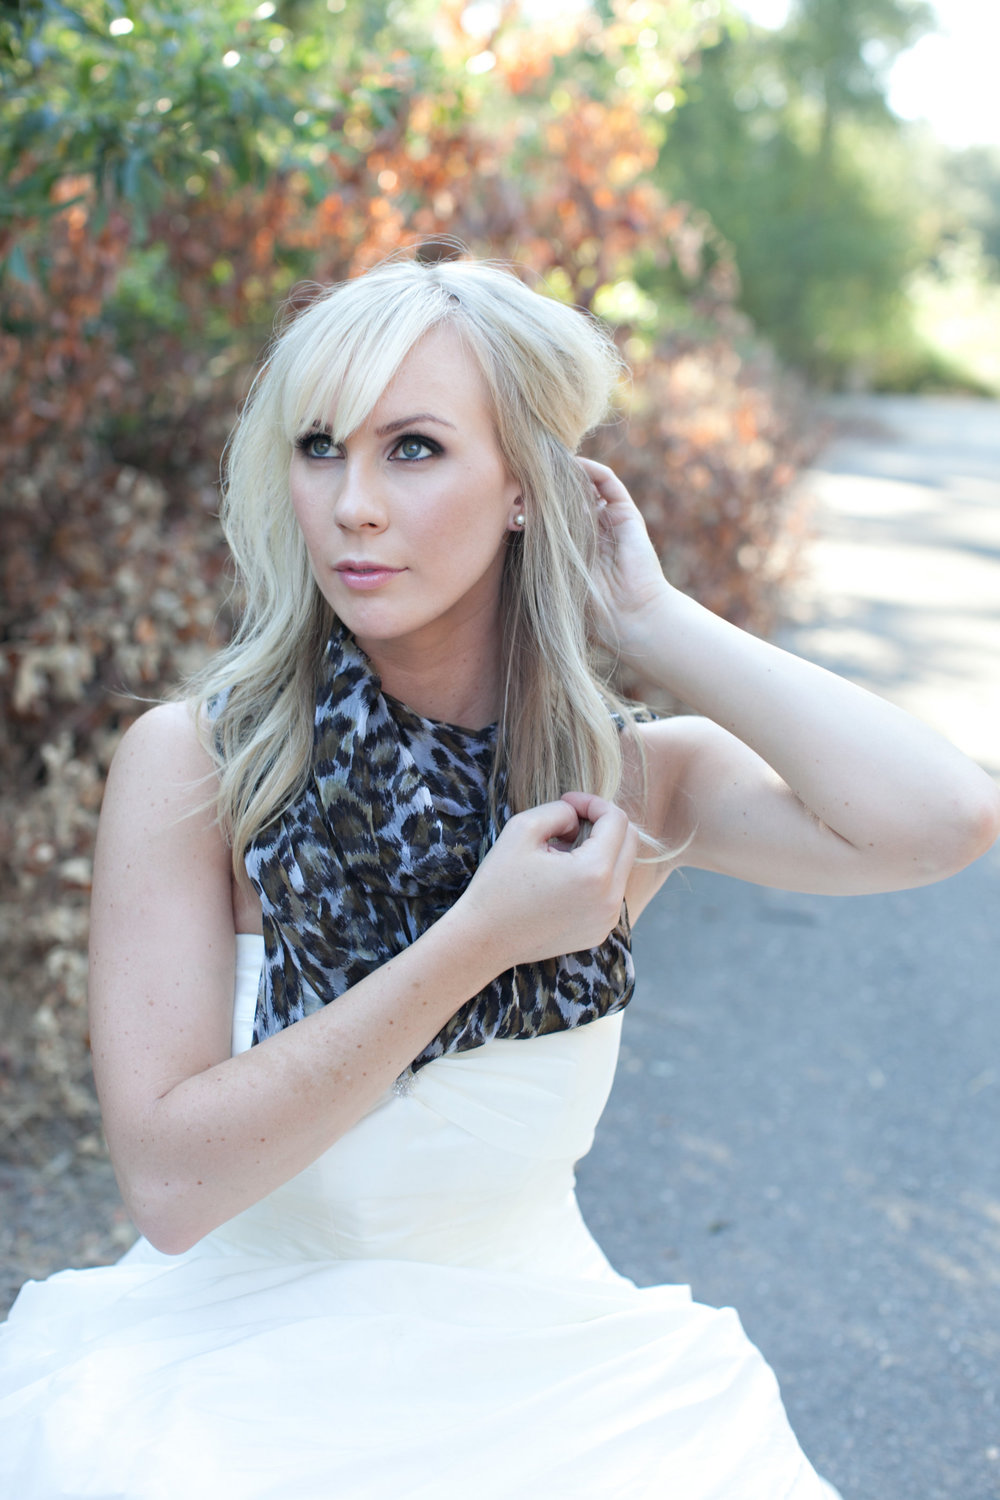
Another cold weather accessory: a scarf! Snag one in a shade like your wedding accent colors. Avoid bulky knits and opt for more of a pashmina or a chiffon or silk scarf. Looks cozy while still being classy! Love trends and fun bold statements? Go for an animal print! Again this can be for pics before or after the ceremony or better yet: before you enter your reception lose your veil and wrap a gorgeous scarf around your neck to change up your look!
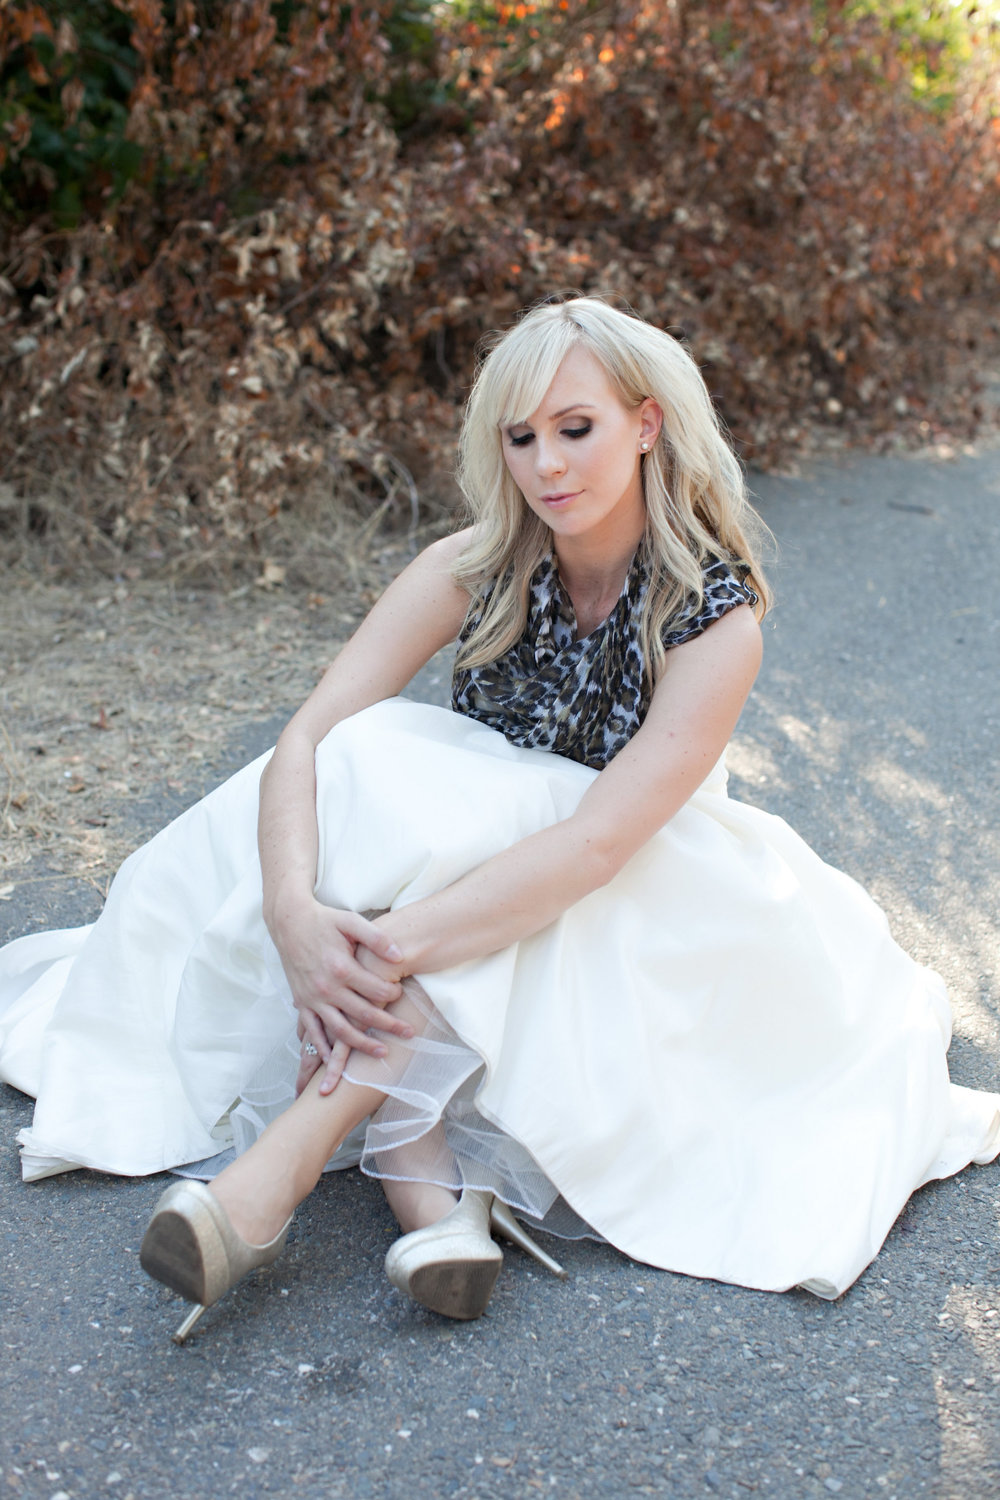
A classic smokey contoured eye is always in style! To learn how to do this makeup look click HERE. Ashleigh looks absolutely lovely don’t you think? Thanks for the amazing pics Lydia Photography!
While classic is always nice, there’s nothing wrong with your wedding or your bridal style reflecting who you are at the time you get married! Don’t pass up on something you like because you’re afraid it’ll look “dated” later in pics…guess what, it still will no matter what! So don’t be a fashion victim but enjoy the time you live in and capture it!
So Cheers to Style, Class, and maybe even a little Leopard Print on your big day!

Acessories, Beauty, Bridal, DIY, Fashion, Makeup, Photoshoot, Trend
November 5, 2011

