

So between my frequent thrifting and the fact that I have a hard time getting rid of anything…my pile of makeup bags, clutches (or anything for that matter!) that need a little face lift are in abundance! If you have an old clutch or makeup bag that needs an update, a few cheap items…some things you probably already have at home…should do the trick! Here’s how I did it!
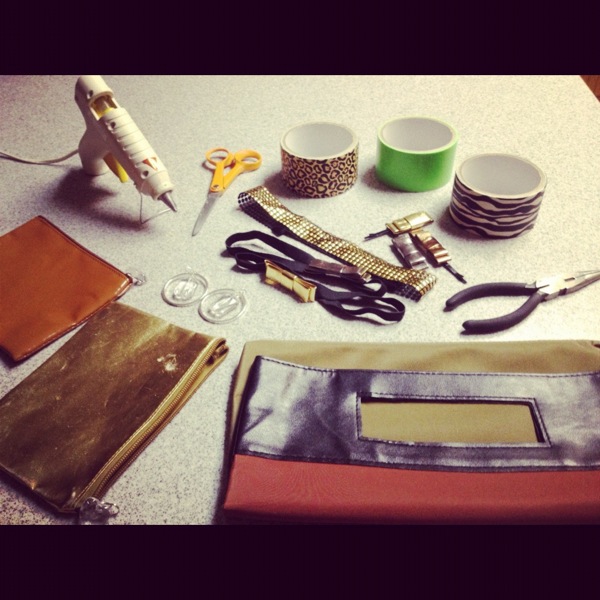
Here’s what you need:
1. Your bag to recover…I find that something with sharp anges (like square or rectangle) work best, anything with a rounded edge will be a bit more difficult
2. Printed duct tape…you can find this at any craft store! Pick a print or colour you like. I snagged mine at the dollar tree!
3. Hot glue gun, needle nose pliers, scissors
4. Any old earrings, brooches, or headbands to add pizazz!

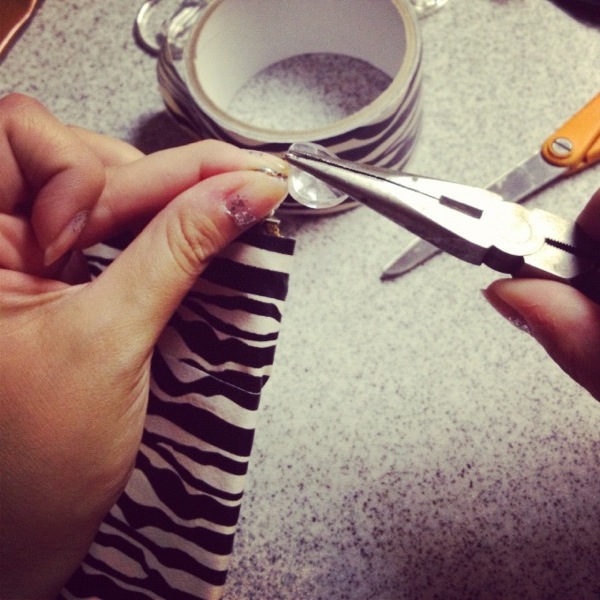
Align the tape on the top outer edge and wrap around the entire bag until you end up back where you started. Then cut with scissors. I like to do the top and bottom first, so I can see how many pieces of tape will be needed for the middle. That way I don’t end up having to trim at the bottom, I just layer them. Start with each new piece of tape on the same side each time so that bag has a seam down only one side.
My makeup bag had an ugly heart shaped plastic thing that I wanted to remove and replace. If yours doesn’t, no big deal…you can also use the pliers to add a charm or ring et cetera.
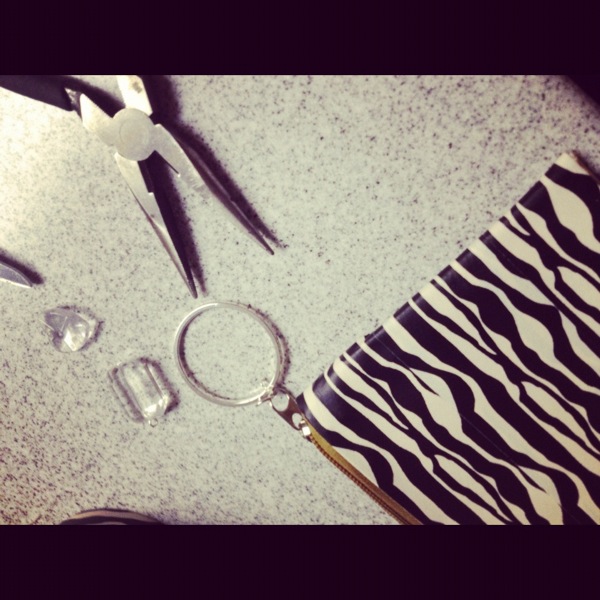
I used an old earring to replace the charm. An old earring or necklace piece would work amazingly!

Glue anything you’d like to your bag! I had a studded headband and some bows that I used. This neon green tape really looks like duct tape…so the clutch has an urban vibe that I loved! I noticed that the other prints had a smoother texture and looked a little more refined. So pay attention to your tapes when you pick one out. I honestly like both textures and finishes!
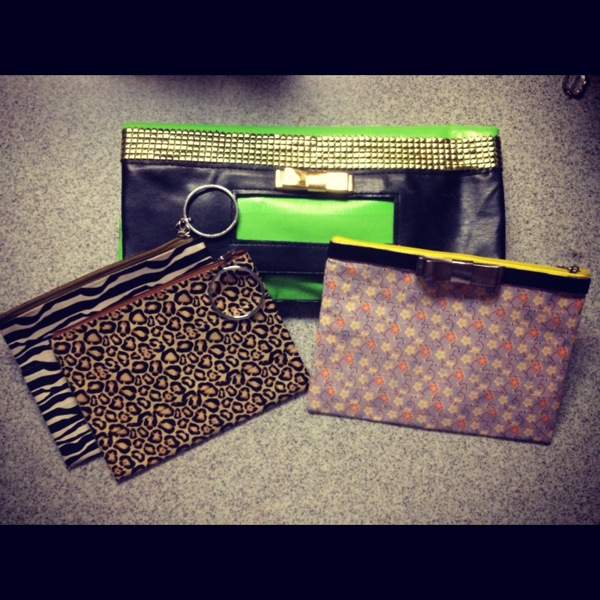
Here’s how mine turned out! I did two small makeup bags and one clutch…I then remembered that my friend Malisa gifted me some super cute craft tape with a floral print so I did another makeup bag and added the bow headband to it! I love how they turned out!
Give this a shot and let me know how it turns out!
Cheers to DIY, the Dollar Tree, and Duct Tape,

August 29, 2012
Still needing more pick me ups for your summer look? Here’s what’s on my list for the warmer weather…
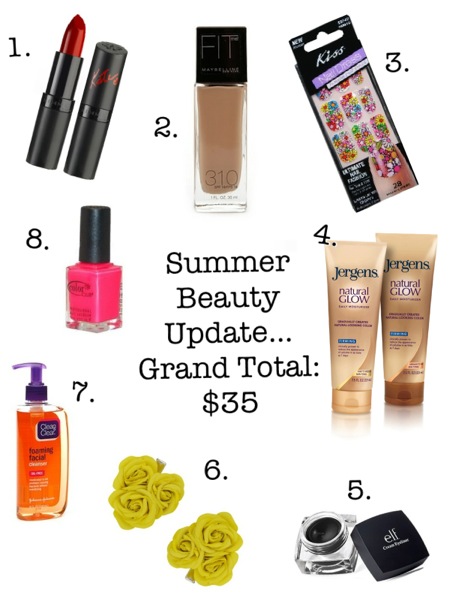
1. Kate Moss for Rimmel London: these lippys feel amazing, wear like a dream, and are under $5. My favorite is shade 12
2. Maybelline FitMe foundation: a long time favorite of mine. With a lightweight, luminous finish, you can consider this tinted moisturizer’s big sister. Perfect for those days when you don’t want to feel too “made up.” Around $6
3. Kiss Nail Decals: lasts up to ten days, tons of fun patterns and less than $6 a box! Good for nails and toes…or be daring and do the “accent nail” trend. I love this floral pattern!
4. Jergens Natural Glow: Skip the damaging sun and use this daily for a believable tan! LOVE this stuff! Definitely in my top 5 self tanning products! Under $8
5. ELF cream liner: $3 and lasts ALL day! Summer-proof liner to be sure.
6. Forever21 Hair Clips: Aren’t these yellow roses cute? $2.50
7. Clean and Clear Antibacterial Face Wash: one of my favorite face washes, this $4 miracle will take care of any extra yuck (ie: sweat & bacteria) that comes along with the heat.
8. Color Club in Jackie Oh!: less than $3, and free from all of the poisons in typical polishes! Love this electric shade!
So many beauty treats, so little time! Pretty nice though for only $35 right?!
Cheers to Sunshine, Summer-Proof Makeup, and Beauty Pick-me-Ups,

May 15, 2012
Part of what makes a wedding special is putting in little personal touches or unexpected details…I especially love it when a bride decides to throw in an accessory that’s more on the fun side or even a little trendy!
A few things I see fitting in with bridal trend during the cold seasons…
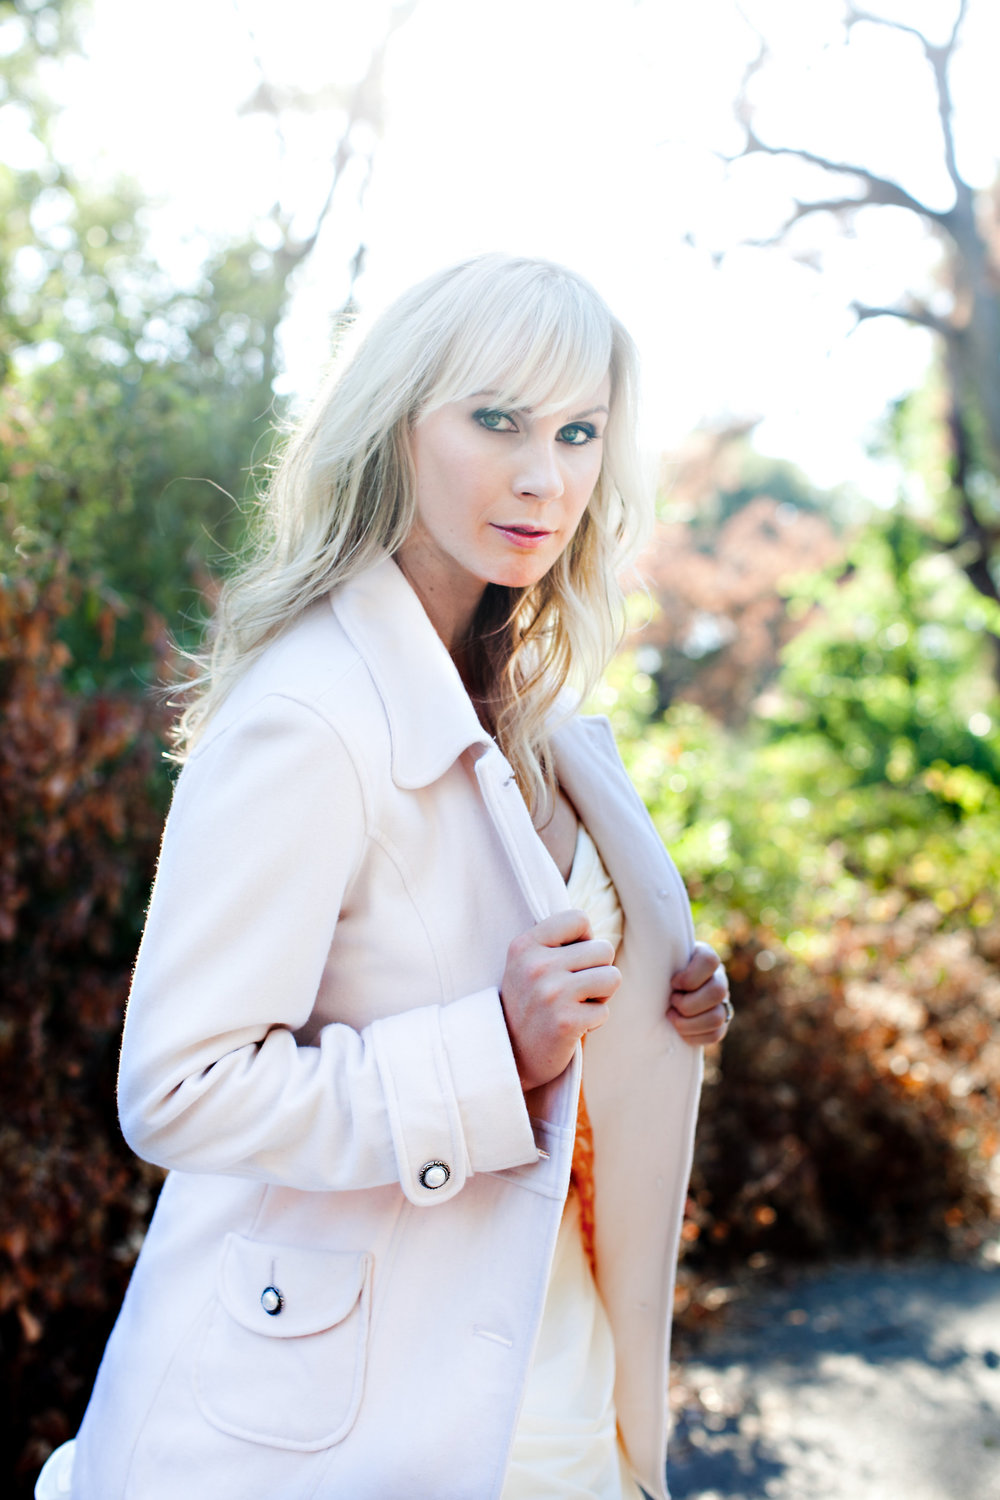
What better accessory for a chilly weather wedding than a pretty coat?! Definitely a good idea for some cute pics outside before you walk down the aisle! DIY Tip: this coat is from the juniors section in Nordstrom…every year they sell peacoats in all colors for around $50 (sometimes cheaper if on sale!). They come with basic buttons that looked very casual so I went to the craft store and found these gorgeous antique inspired pearl buttons. A quick button swap and voila! A fancy-shmancy coat!
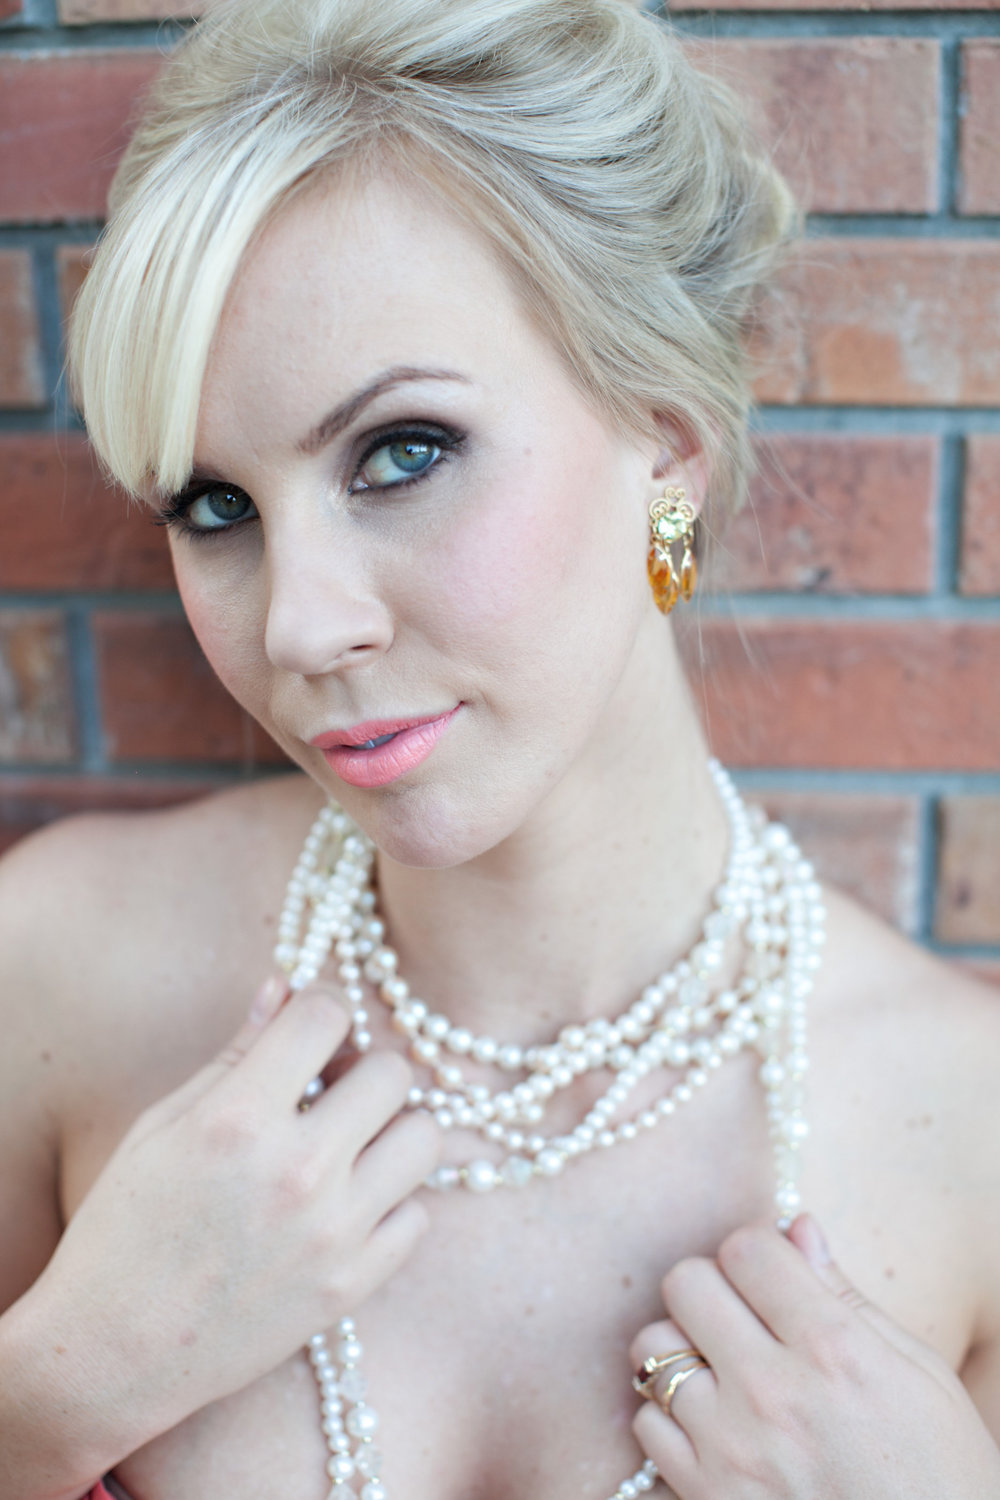
Are you a lipstick or vintage loving gal? Opt for vintage earrings, layers of pearls, or a punchy lip (or as in the case of our model all 3! Ha!)! A bright peach is a great way to rock the vintage look while still being current (bright lips are huge this fall in makeup trend!) and is a nice change from the usual red. Upswept hair with a little texture completes this look (styling compliments of Ashley B!)
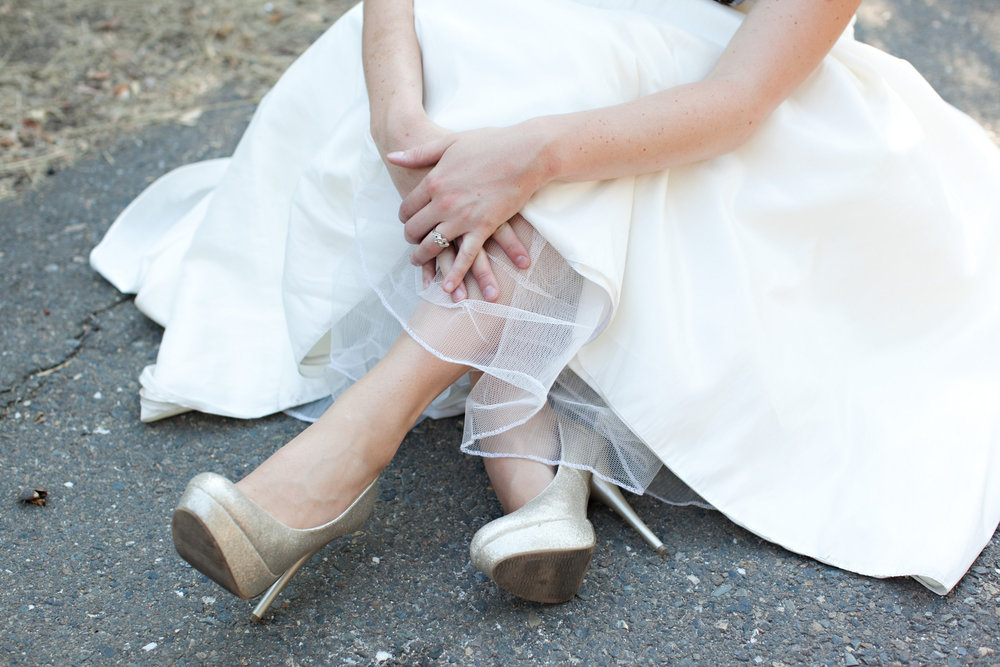
Sparkly heels! Who wouldn’t feel like a million bucks in these glittery gold colored babies?! I’ve seen versions of these all over the place and they can be pretty pricey. Our lovely model Ashleigh snagged these at Target! I would have never guessed…they were stunning!
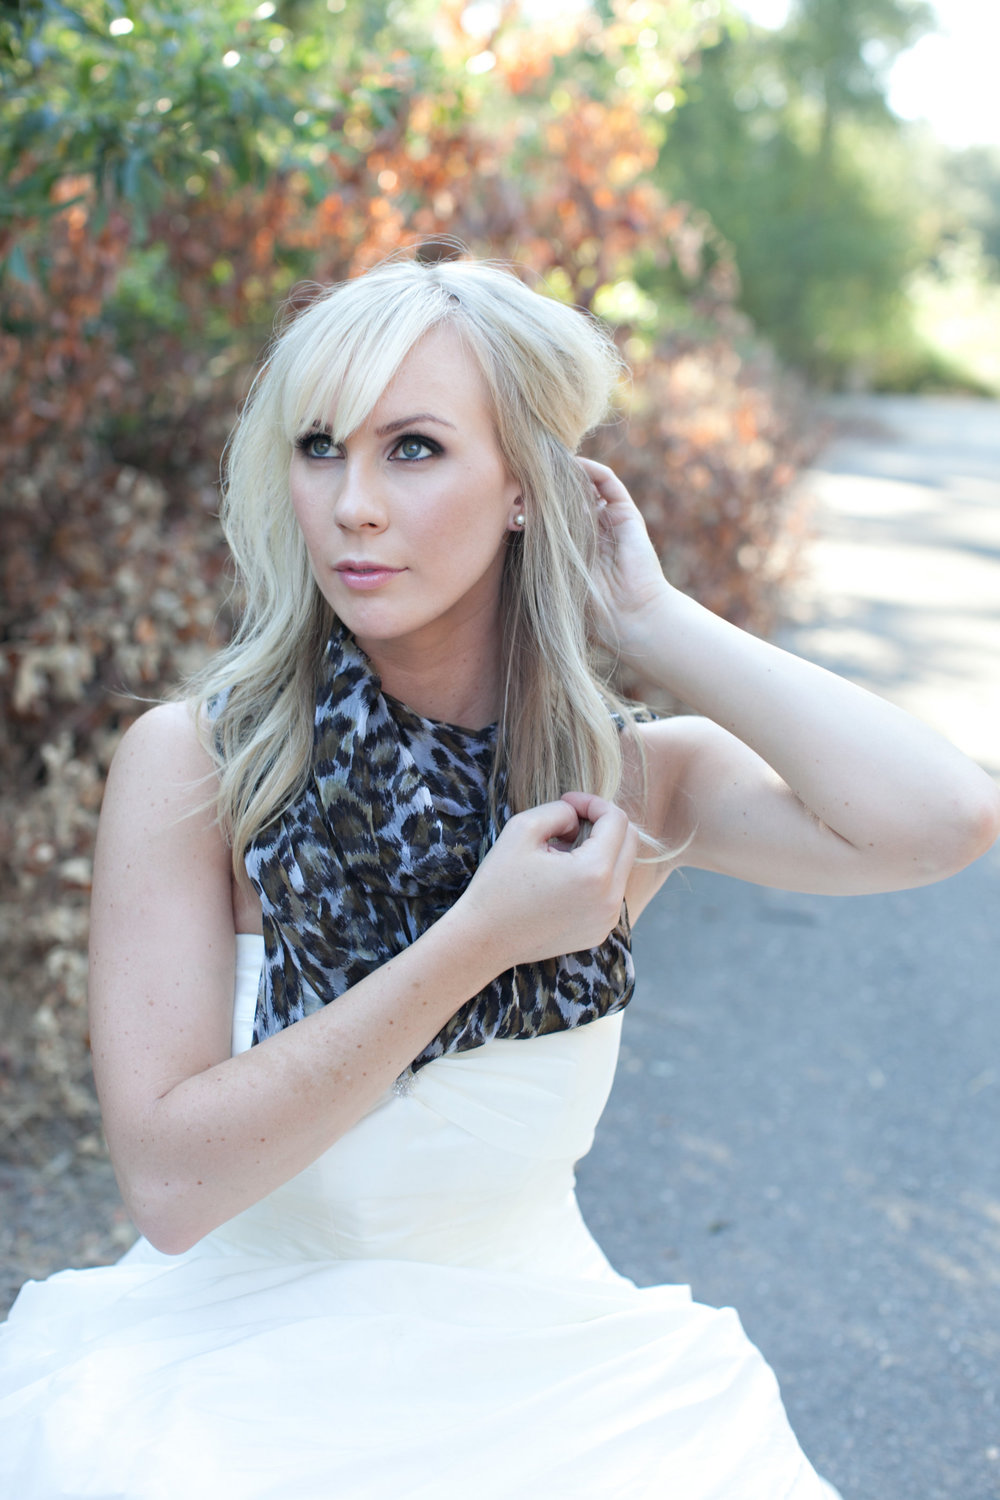
Another cold weather accessory: a scarf! Snag one in a shade like your wedding accent colors. Avoid bulky knits and opt for more of a pashmina or a chiffon or silk scarf. Looks cozy while still being classy! Love trends and fun bold statements? Go for an animal print! Again this can be for pics before or after the ceremony or better yet: before you enter your reception lose your veil and wrap a gorgeous scarf around your neck to change up your look!
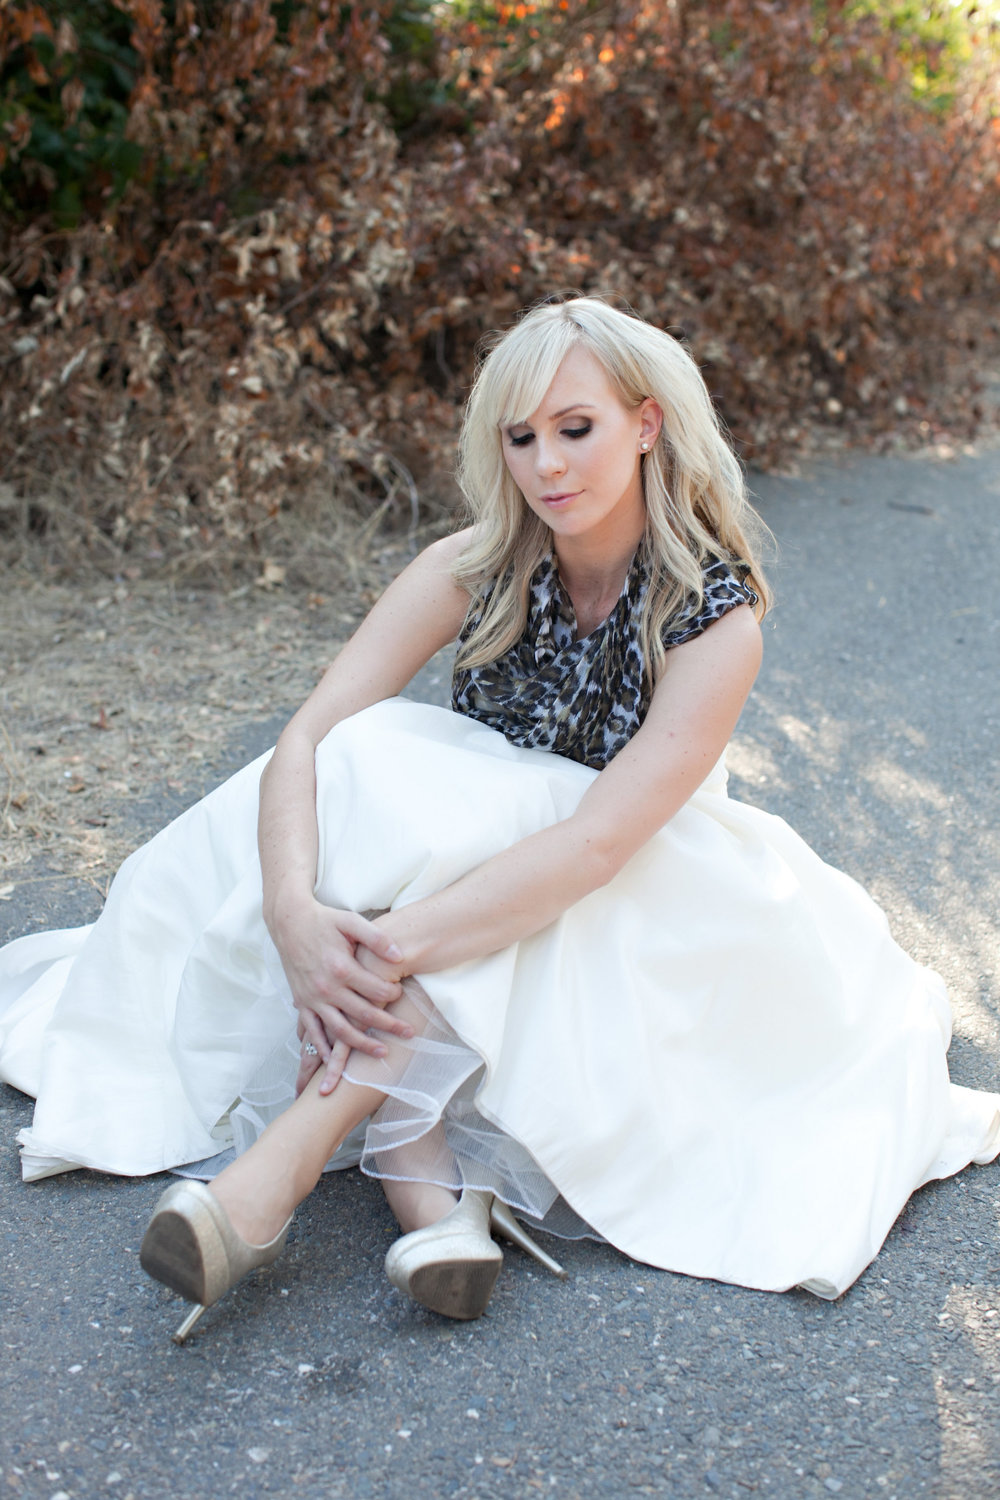
A classic smokey contoured eye is always in style! To learn how to do this makeup look click HERE. Ashleigh looks absolutely lovely don’t you think? Thanks for the amazing pics Lydia Photography!
While classic is always nice, there’s nothing wrong with your wedding or your bridal style reflecting who you are at the time you get married! Don’t pass up on something you like because you’re afraid it’ll look “dated” later in pics…guess what, it still will no matter what! So don’t be a fashion victim but enjoy the time you live in and capture it!
So Cheers to Style, Class, and maybe even a little Leopard Print on your big day!

Acessories, Beauty, Bridal, DIY, Fashion, Makeup, Photoshoot, Trend
November 5, 2011
Nothing says drama like a smokey eye!
A while back I had the pleasure of doing a shoot with the talented photog JennaRae…for these shots we wanted a very dramatic smokey eye…to help emphasize the dark socket I intentionally muted the model’s brows…

Mary (the model) could seriously be wearing dirt on her face and still look gorgeous tho so my job was pretty easy! 😉

For the eyes I started with blue as the base and brown in the crease and then layered matte black on top of it. Try Dior’s 5 pan eyeshadows in Gris Gris and Navy Design. And look at those lush lashes! Fakies of course…love me some Ardells! I used mostly bronzer and a soft sweep of peach on the cheek…that way the eye was the focus. Pale pink lip completed the look.
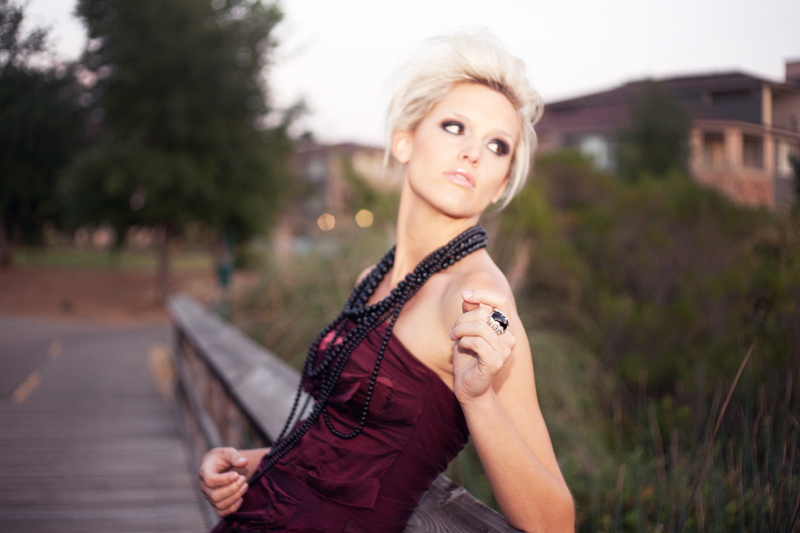
Ashley styled the hair on this shoot…I LOVE all of the texture in this updo! Don’t you?!
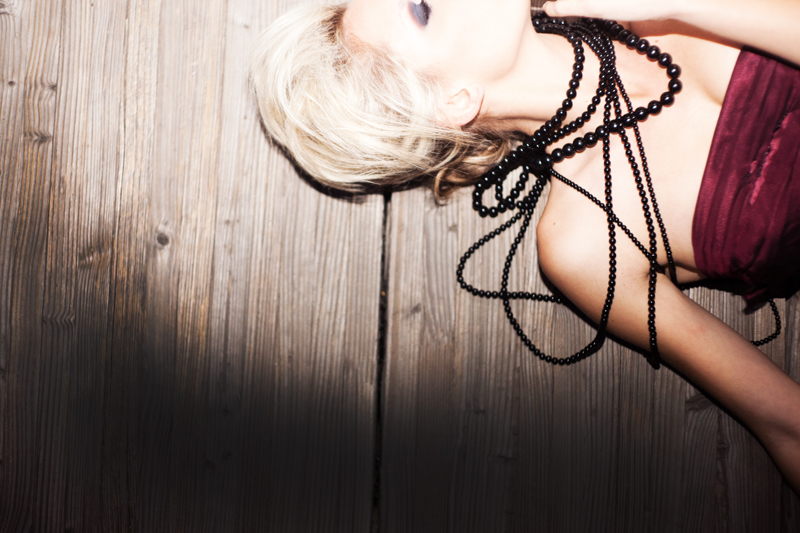
Layers and Layers of black beads…this necklace is all one piece attached in the back by chain. It actually belongs to me and is from H&M. One of my fav accessories!
Here is a tutorial on a very similar look…simply substitute in more black if you want the level of drama that Mary has in these pics!
There was a time when I would wear dramatic makeup a la Kardashian almost everyday! I had it down to a science and could whip out a uber-dramatic smokey eye in minutes! Nowadays…smokey eye is reserved for special occasions! So what about you…is a smokey eye a regular look for you? Only on the weekends? Never?
Cheers to layers of beads, and to Drama in your makeup but NOT in your life!

Acessories, Beauty, Fashion, Hair, Makeup, Photoshoot, Trend, Tutorial
November 3, 2011
I did a shoot a while back that turned out SO beautifully and I’ve been dying to share the pics with you all but had to sit on them for a bit until they were published in the wedding blog Every Last Detail! The fabulous Lydia Takeoka took the pics!
All 3 of the models were so gorgeous I thought it’s be nice to tell you how you can get each of their looks! The first one that we will look at today is Ashley…

Ashley is often my partner in crime on shoots but usually as the hair stylist…this time though I had the pleasure of doing her hair and makeup! She is absolutely lovely, no?! I love the unique accesories: chains and pearls, and that gorgeous ring! And the vintage wedding dress was from a second-hand store!
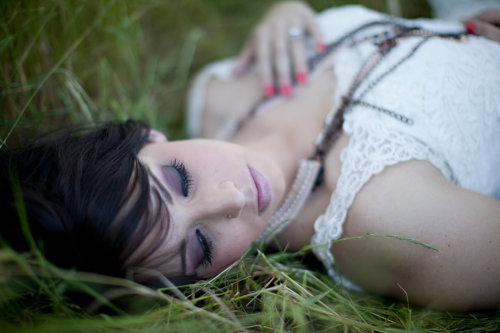
To achieve this sultry eye I swept a rich cool undertoned brown all over her lid, blended her pinky-peach blusher shade into her crease, highlighted the inner socket and under the brow bone with a shimmery vanilla, and smoked out the edges with matte black shadow. A strong liner and loads of L’Oreal’s Voluminous mascara finished off her look! Try Dior’s 5 pan in Mystic Smokys 004

On Ashley’s nails is OPI’s Monsooner or Later…this was a bridal themed shoot so I especially loved this unexpected flash of color on her nails! Would you wear a non-traditional color on your nails on your wedding day? I would! (And I did! Haha…mine were black!)

Ashley showed up with her hair already with a bit of curl in it which made my job easier…to get this touchable updo start by running a curling iron through your locks or if you have natural texture use a scrunch spray. Next gently tease the crown, gather the hair like you are going to put it in a some-up-some-down look and pin. Pull the ends up and tuck into a french twist or chignon. Pull out small sections of hair as needed to add volume and texture. Then hairspray liberally!
Give this look a try and let me know how it turns out!
Cheers to sultry eyes and vintage dresses,

Acessories, Beauty, Bridal, Fashion, Hair, Makeup, Nails, Photoshoot, Tutorial
October 14, 2011
A few weeks ago I did a shoot with @lydiacali and @ashleycosmo on Fall bridal trends! It was an amazing day…
Here is a peek behind the scenes of that day…

This board is hanging up in my makeup room…its some of the things that are inspiring me this season!

Face charts of the looks…we ended up only having time for 2 tho!
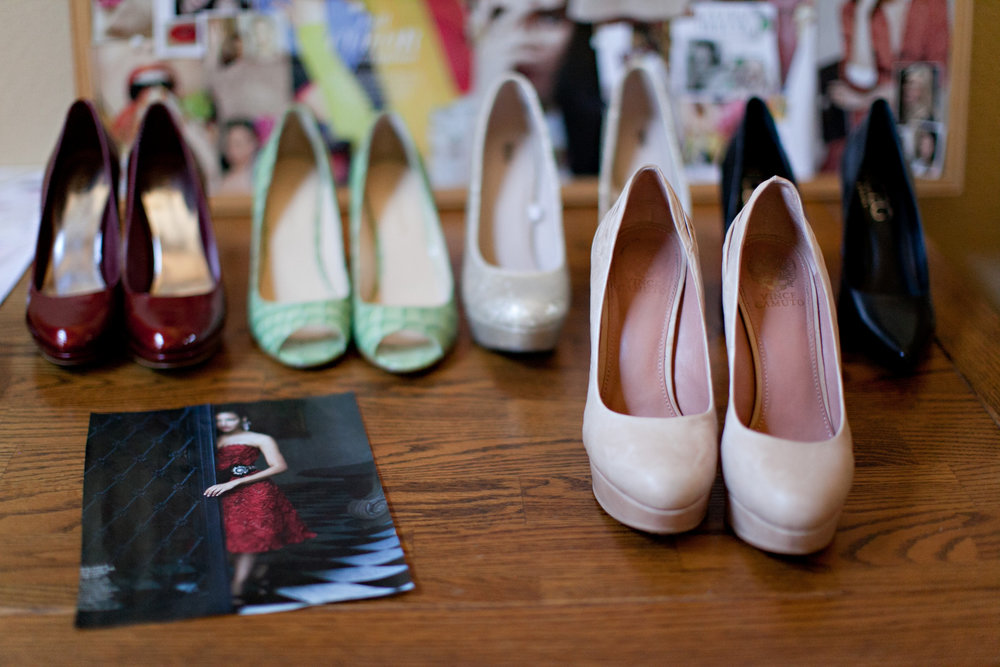
Shoes! Need I say more?

Pearls, pearls, and more pearls…

The talented Jeff taped the first look: a classic bridal look…it will be up on YouTube soon!
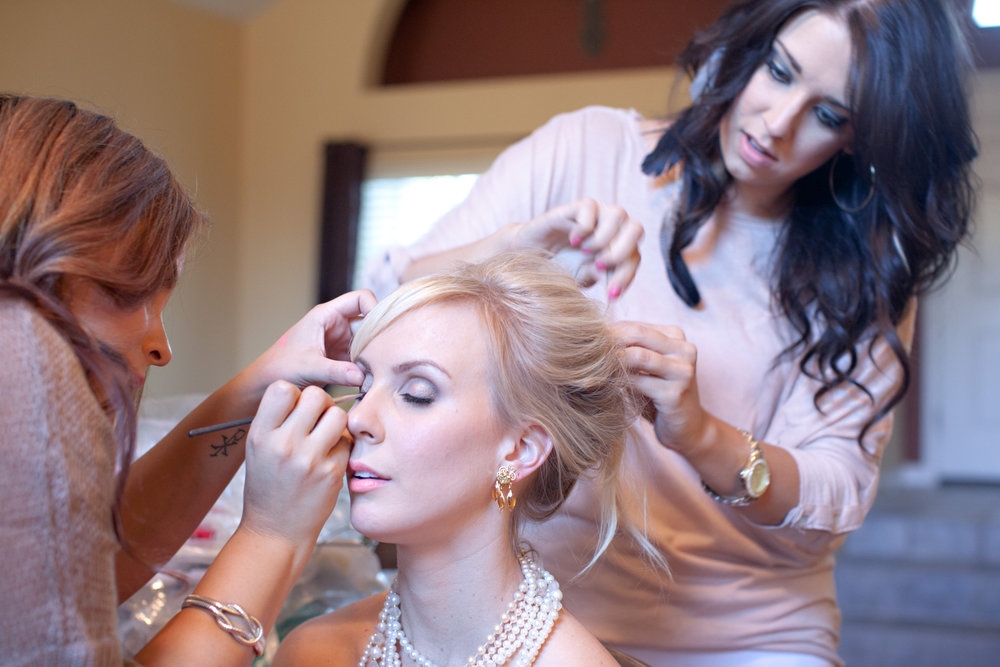
@ashleycosmo and me getting our lovely model Ashleigh into the second look!
Stay tuned for the finished pictures soon! And check out the talented photog @lydiacali at lydiaphotography.com
Cheers to heels, pearls, and gorgeous brides,

September 29, 2011

