

Only a few more days to go until Halloween! Still don’t have an idea? Here’s one that you’re sure to have the stuff for!

For the outfit grab jeans or overalls, a white tee, a flannel, and a straw sun hat!

For the makeup, start with your face as done as you like it. For Gracie, we opted for foundation and powder and some big fluffy doll-like lashes! Then go in with hot pink blush and make a distinct circle shape with it on each cheek! We used Tarte blush in Rad.

Make a tear drop shape with the blush on your nose too and top off the look with a bright pink lip! Try NYX Butter Gloss in Peaches and Cream or Cupcake!
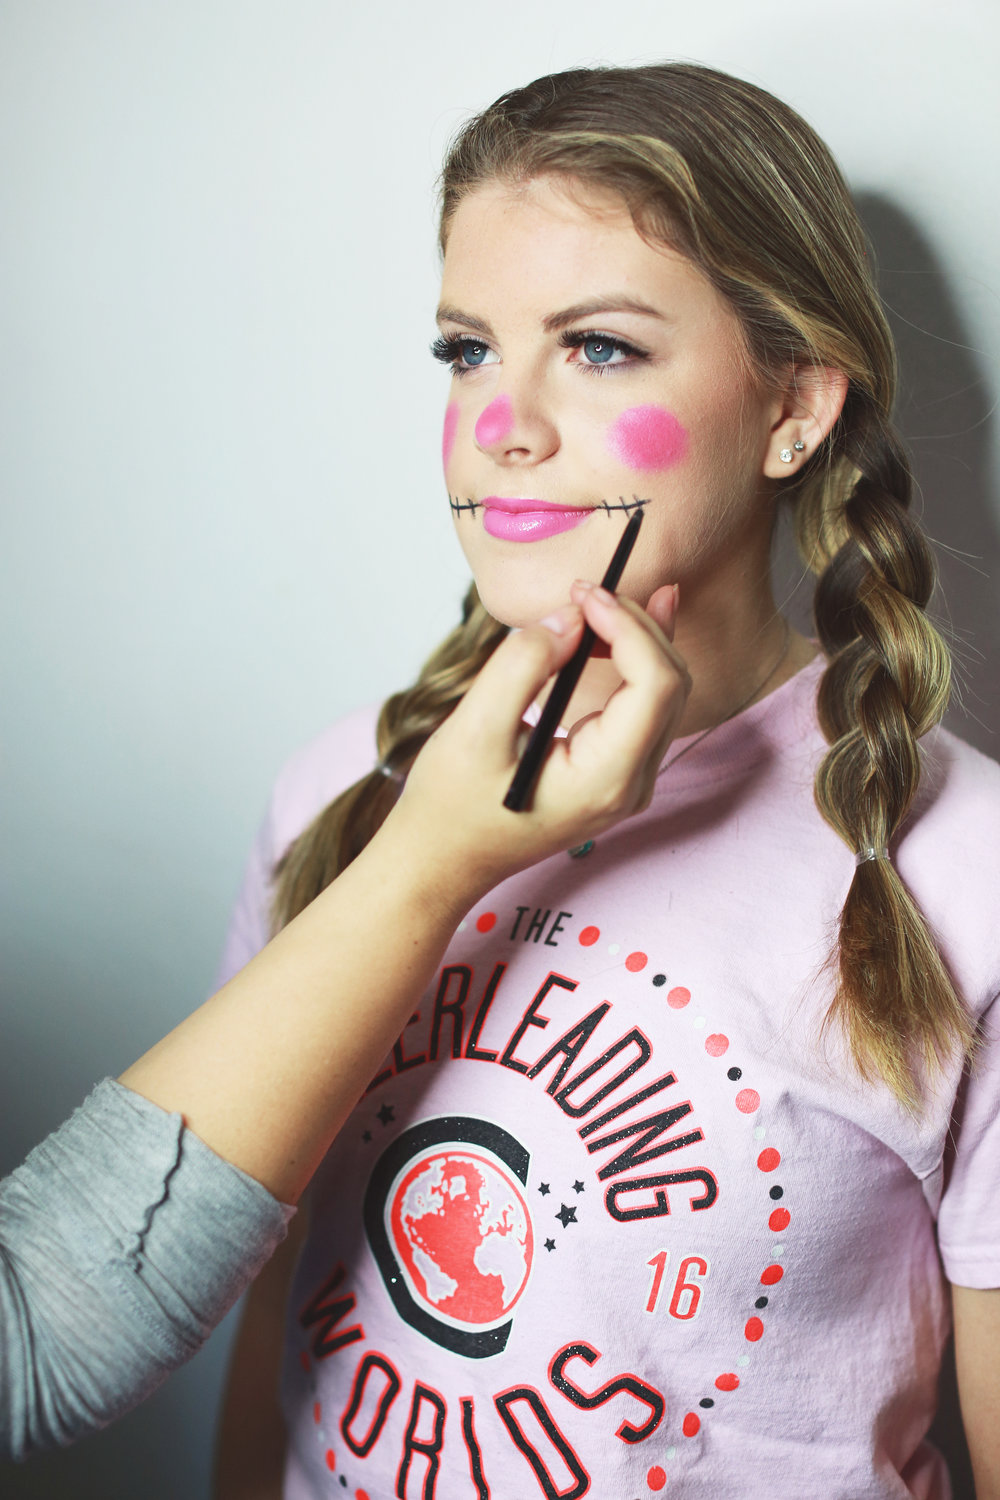
Now take a black eyeliner pencil—we opted for Urban Decay Perversion—and draw smile lines with stitches and outline the pink on your nose the same way too!

Double braids add to the country farm vibe!
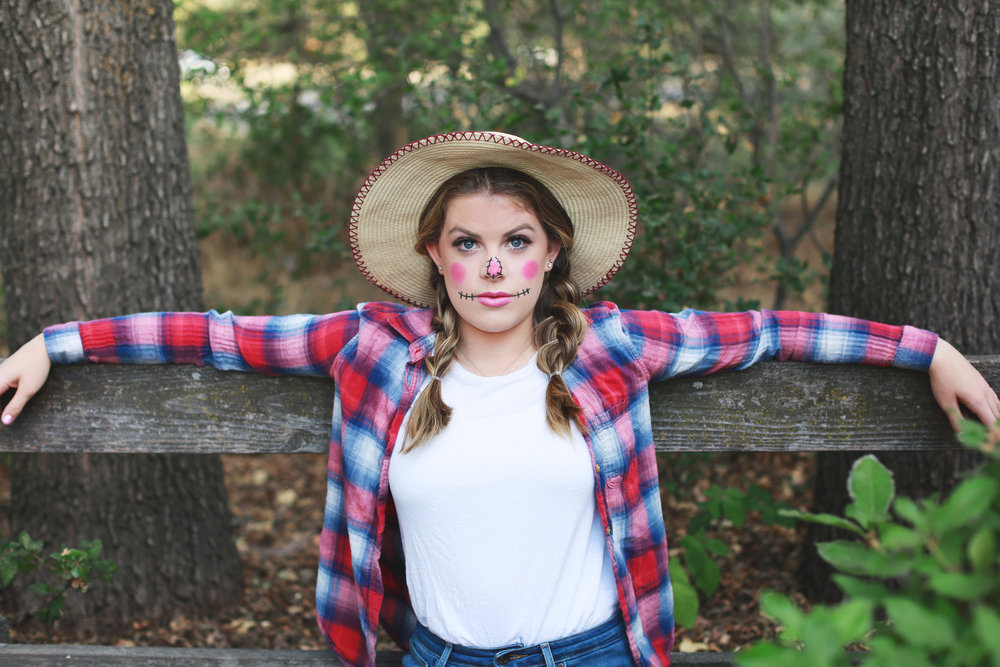
There you have it! And chances are you already have all these things lying around!

Special thank you to Indulge Beauty Studio for taking pics of the gorgeous Gracie in this tutorial!

Give this a try and be sure to tag @polishandpout on IG when you do so we can see your version of this costume!! Happy {almost} Halloween!!!
October 22, 2018

Last year we did a few fun super simple Halloween DIY costumes and it was SO MUCH fun we just had to do more this year too!
First up, an old timey bank robber!
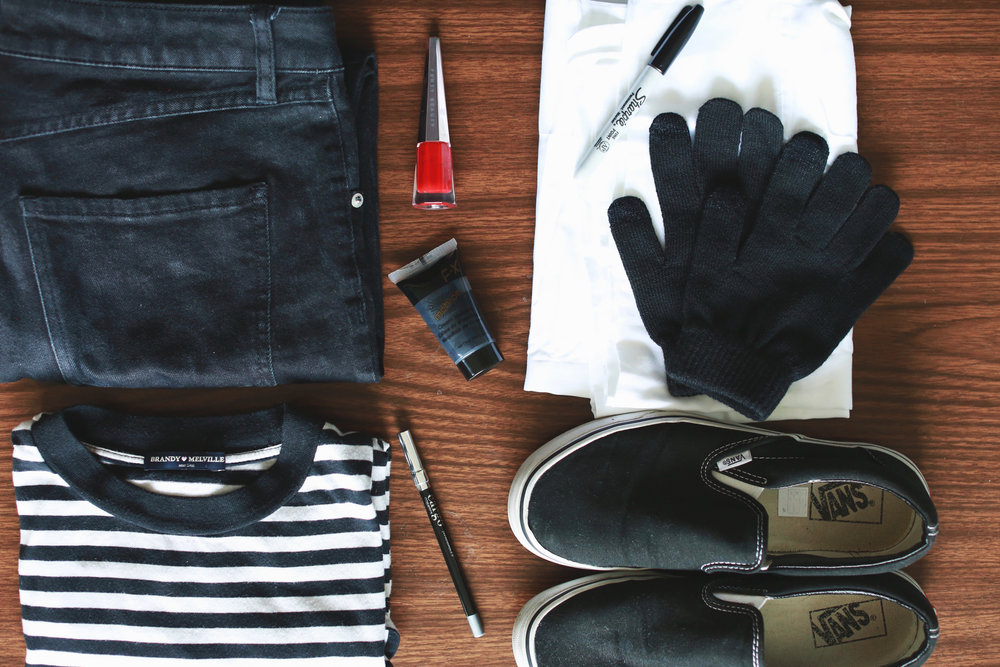
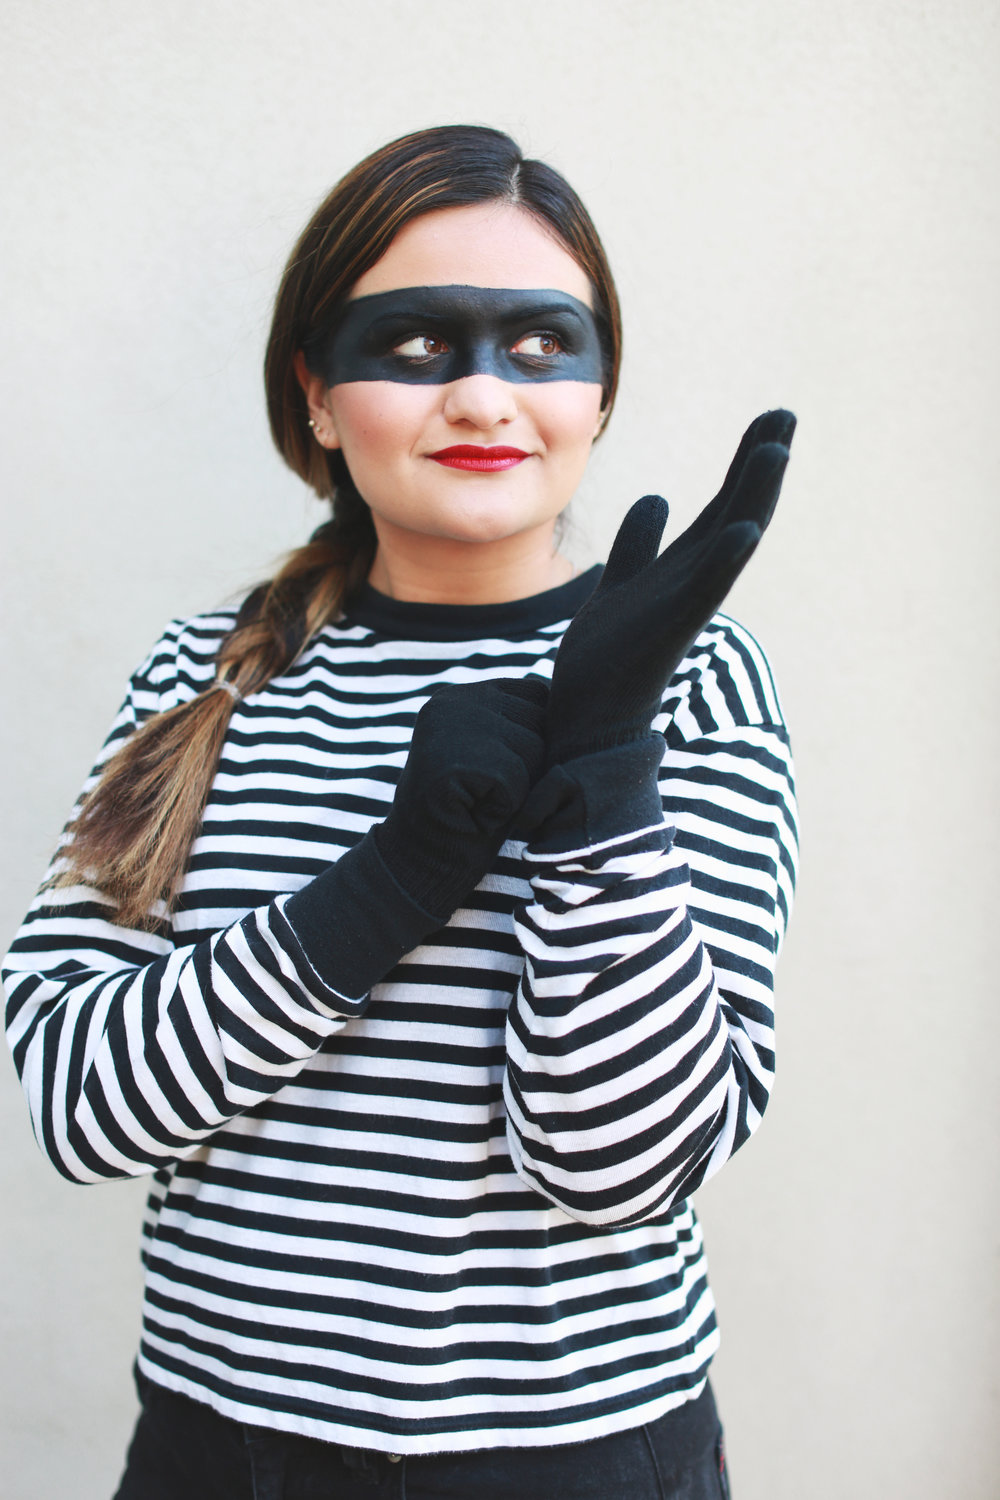
Here’s what you’ll need: For your outfit opt for black pants and shoes, a black and white striped top (go for all black if you don’t own stripes), black gloves.

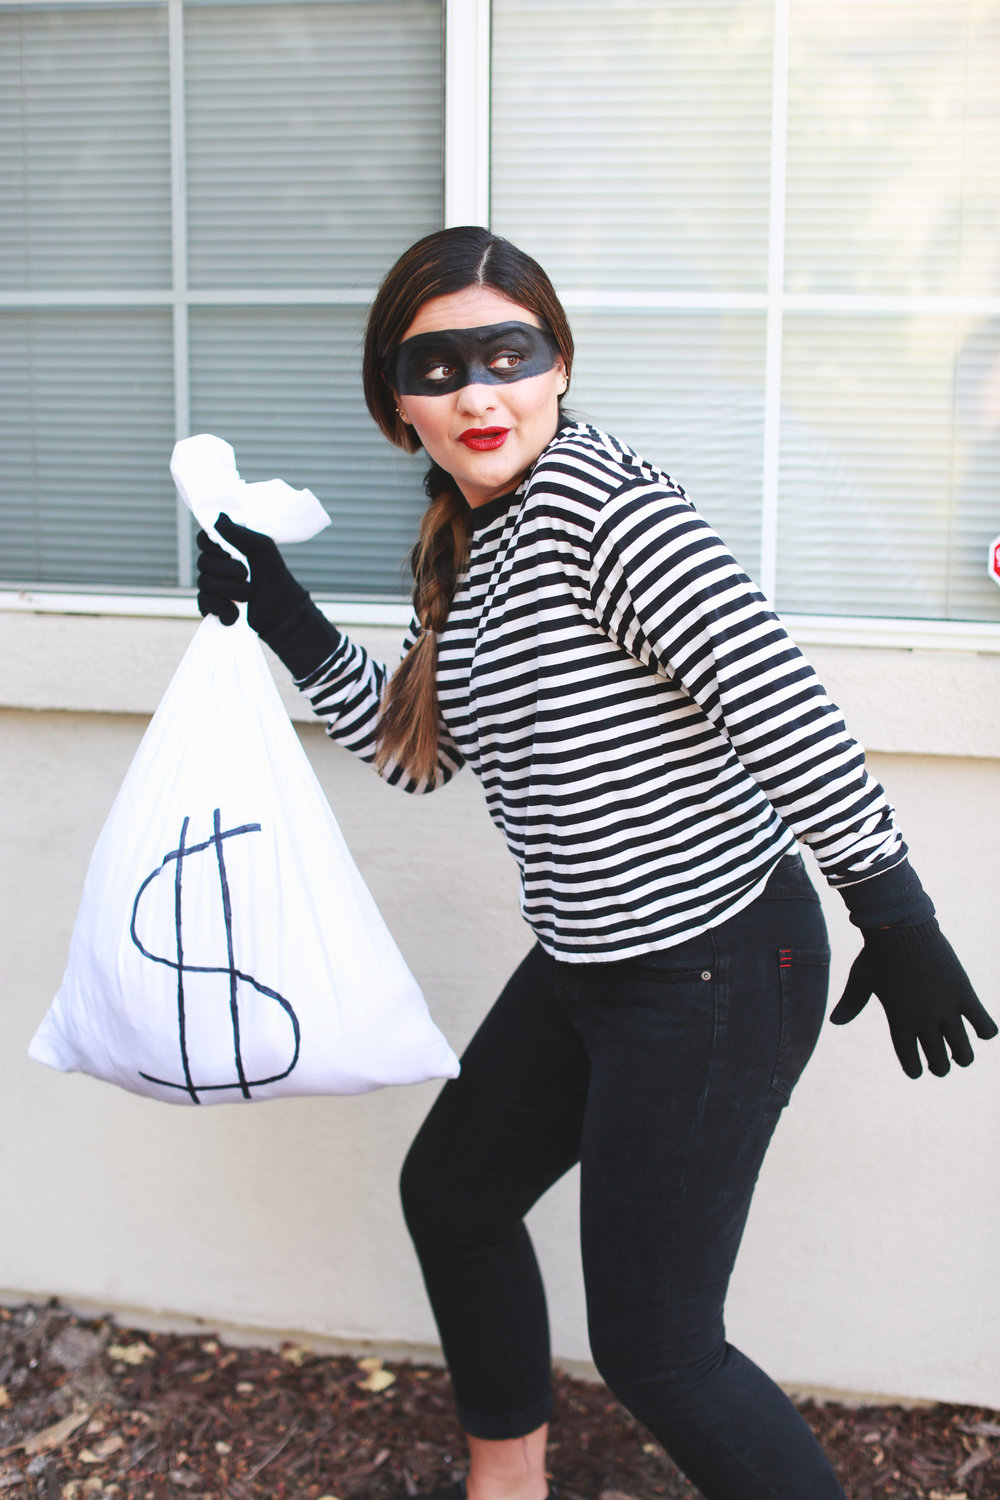
You’ll also need a bag for all your stolen loot! An old white or cream pillow case will do the trick! Use a black sharpie to draw a big dollar sign $ on it…because otherwise how will you remember what’s inside?! 😉
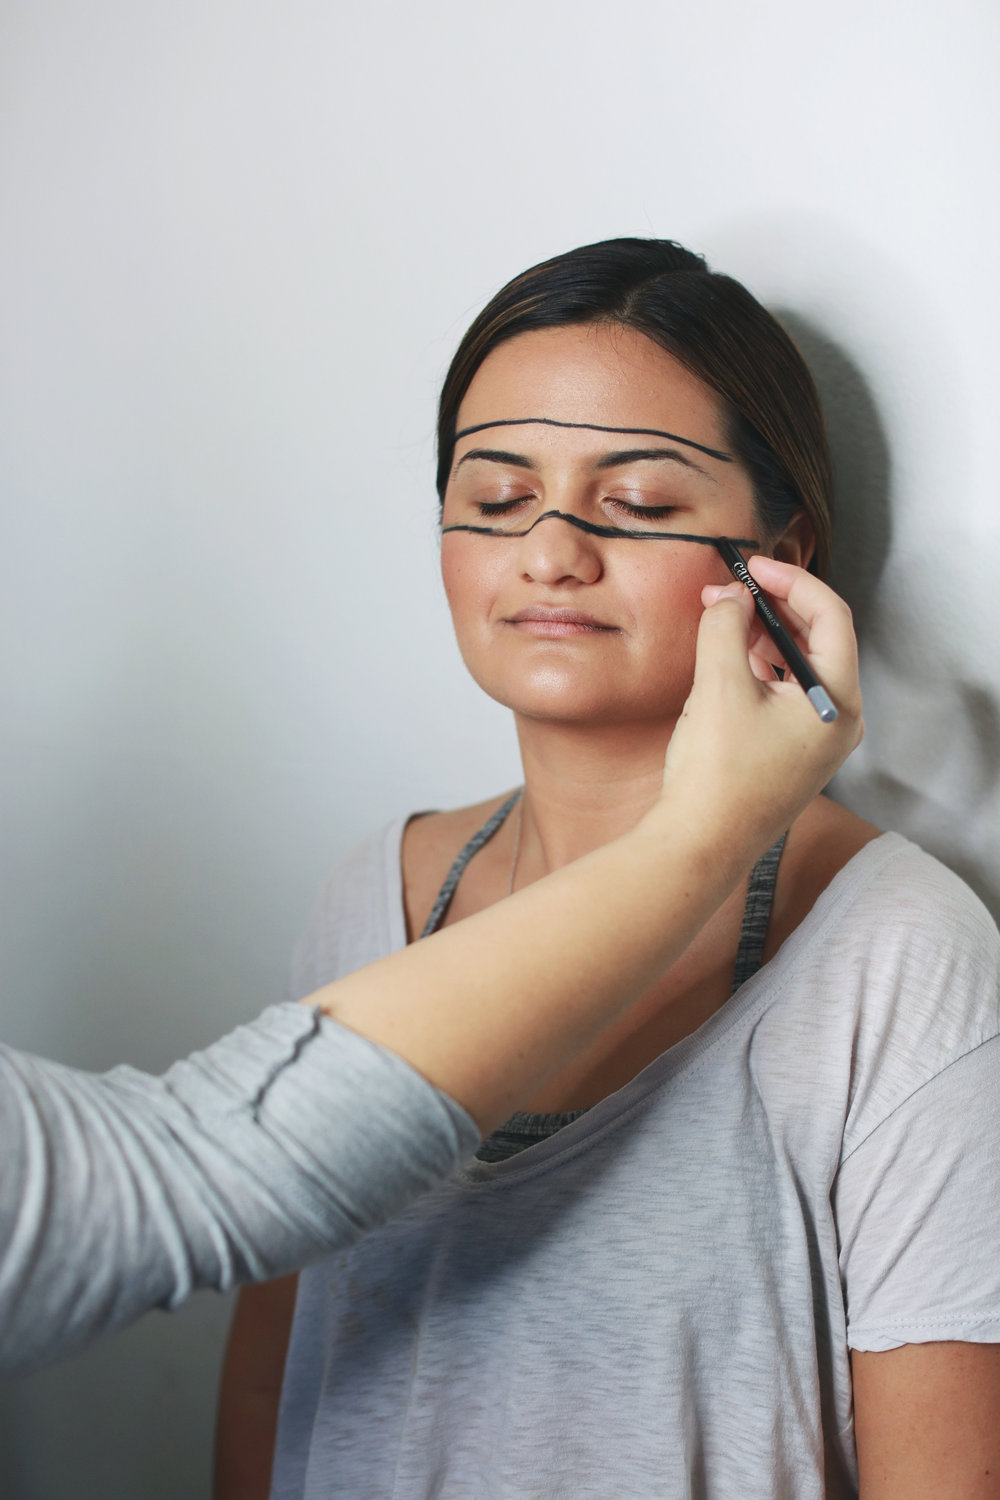
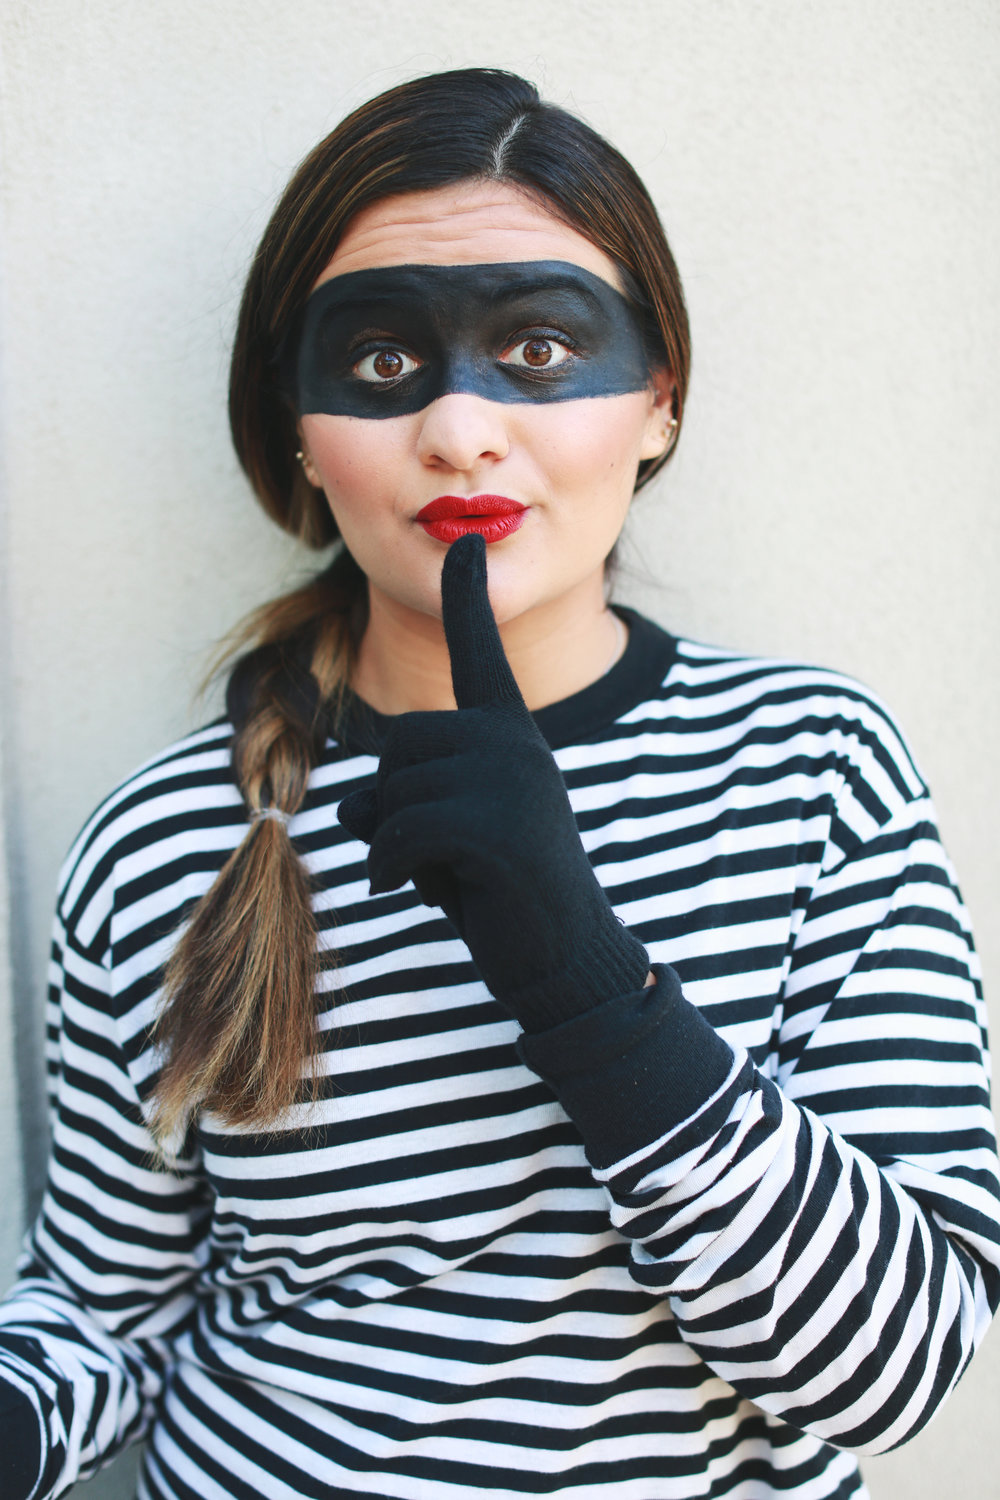
Ok now for your makeup. Start out from whatever point you’re most comfortable. Maybe that means a bare face or maybe that means your current routine, it’s whatever you want! On Izzy, we used foundation, powder, blush, bronzer, and highlight. So her basic complexion was on point before we drew the mask! Ok now grab a black eyeliner and sketch your eye mask outline.

Now fill in the mask! We used Mehron black cream makeup, you can snag it on Amazon for a few dollars! Not able to get ahold of black makeup? Fill in mask with your eyeliner or layer on black eyeshadow to fill in the mask.
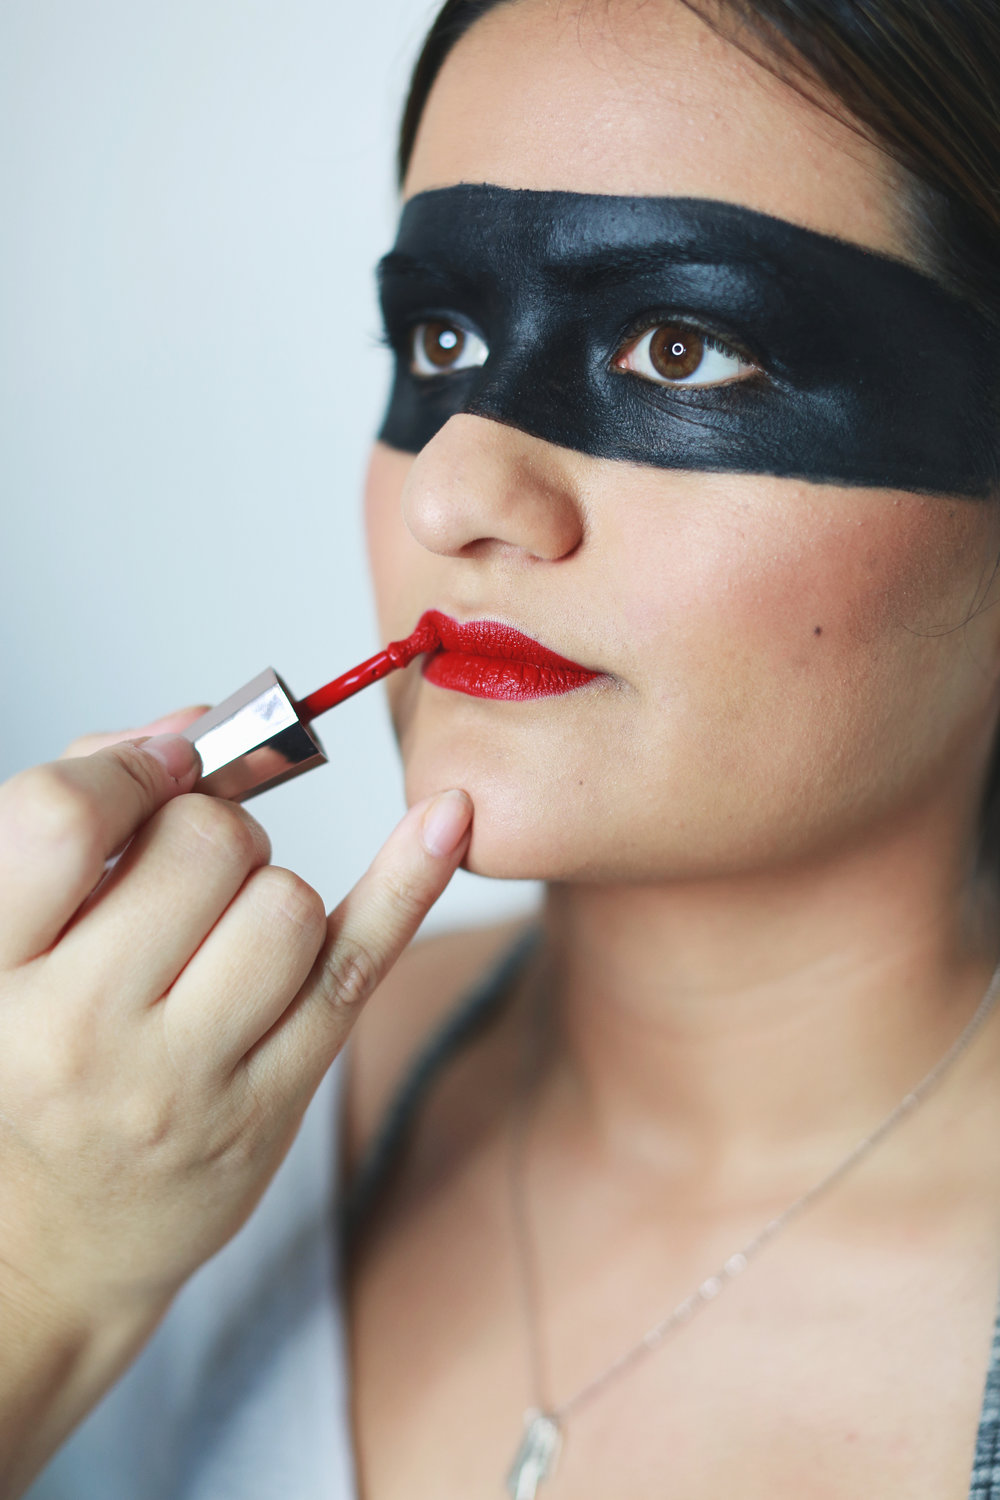
Now the fun pop of color! You really can wear anything lip you want but I just love the contrast of this bold red with the black and white outfit! Bank robbers like to be glam too! This is Fenty’s Stunna Lip Paint in red and it’s so creamy, smooth, vibrant, and ultra long wearing!
Now you’re ready to pull off your master plan!!!
Special thank you to Indulge Beauty Studio for these awesome photos of the lovely Izzy!
Give this a go and be sure to tag @polishandpout in your look on IG so we can see it!! Happy {almost} Halloween!!
October 15, 2018

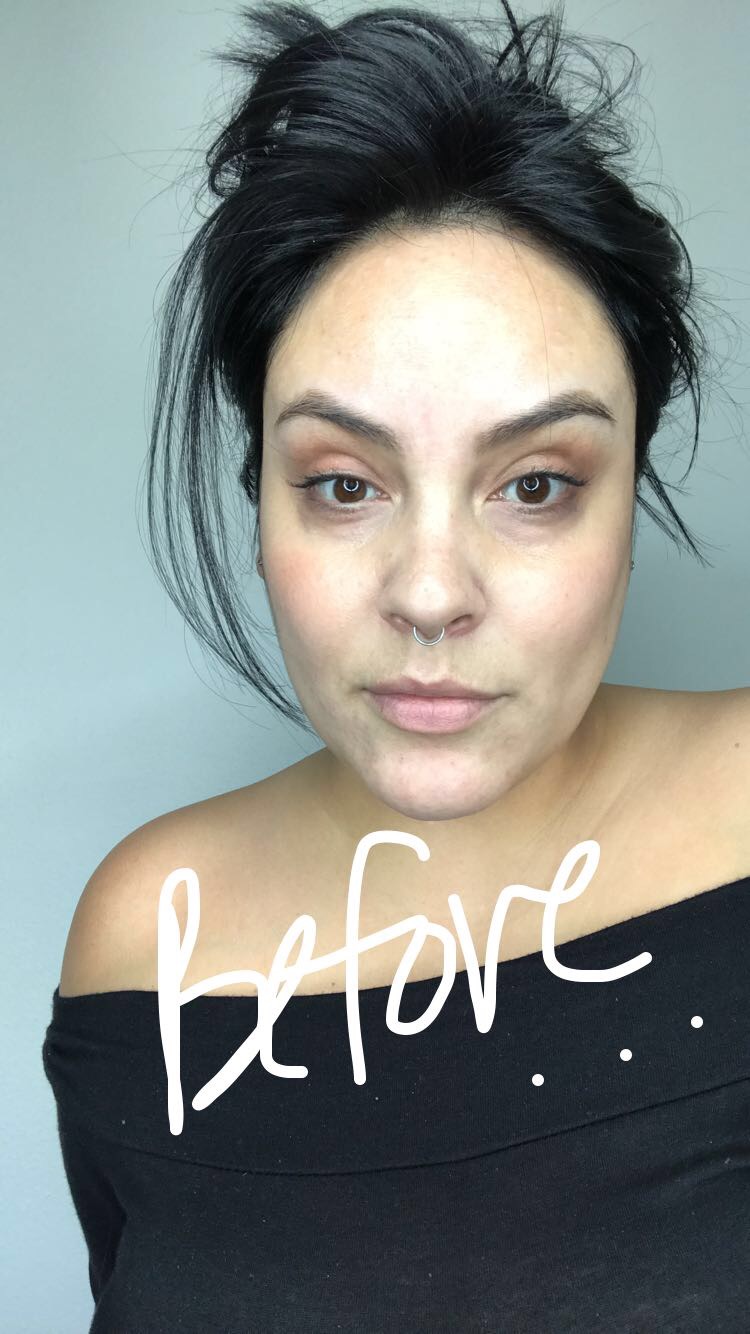
One of the things I love the most about makeup is its ability to impart confidence. The other day I wasn’t feeling the greatest and rather than doing nothing I decided that nothing could make me feel better than turning myself into Wonder Woman!
I remember watching old reruns of the tv show with Lynda Carter as a child and thinking she was so strong and so beautiful…seeing the movie this year with Gal Gadot was so inspiring too!

The latest version of Wonder Woman ditches the classic red lipstick for more of a fresh face. I used Dior Airflash for a flawless finish and NYX Precision Brow Pencil for a strong full Brow.
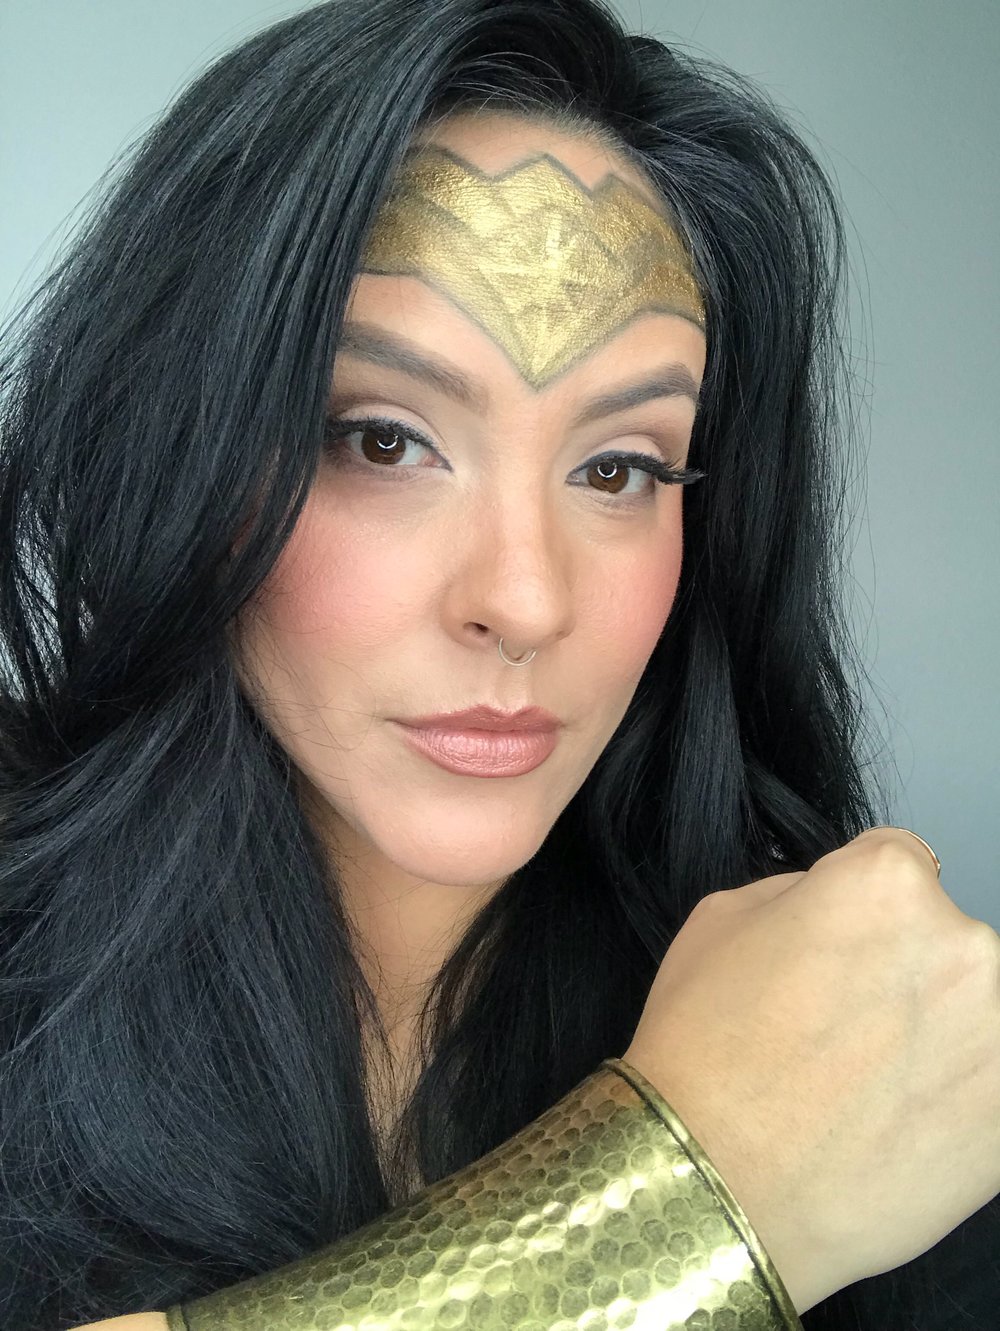
I also used my favorite metallic powder and mixing liquid by Mehron to paint on her signature headband! I had this amazing statement cuff already but you could easily use the same gold pigment to paint them on!
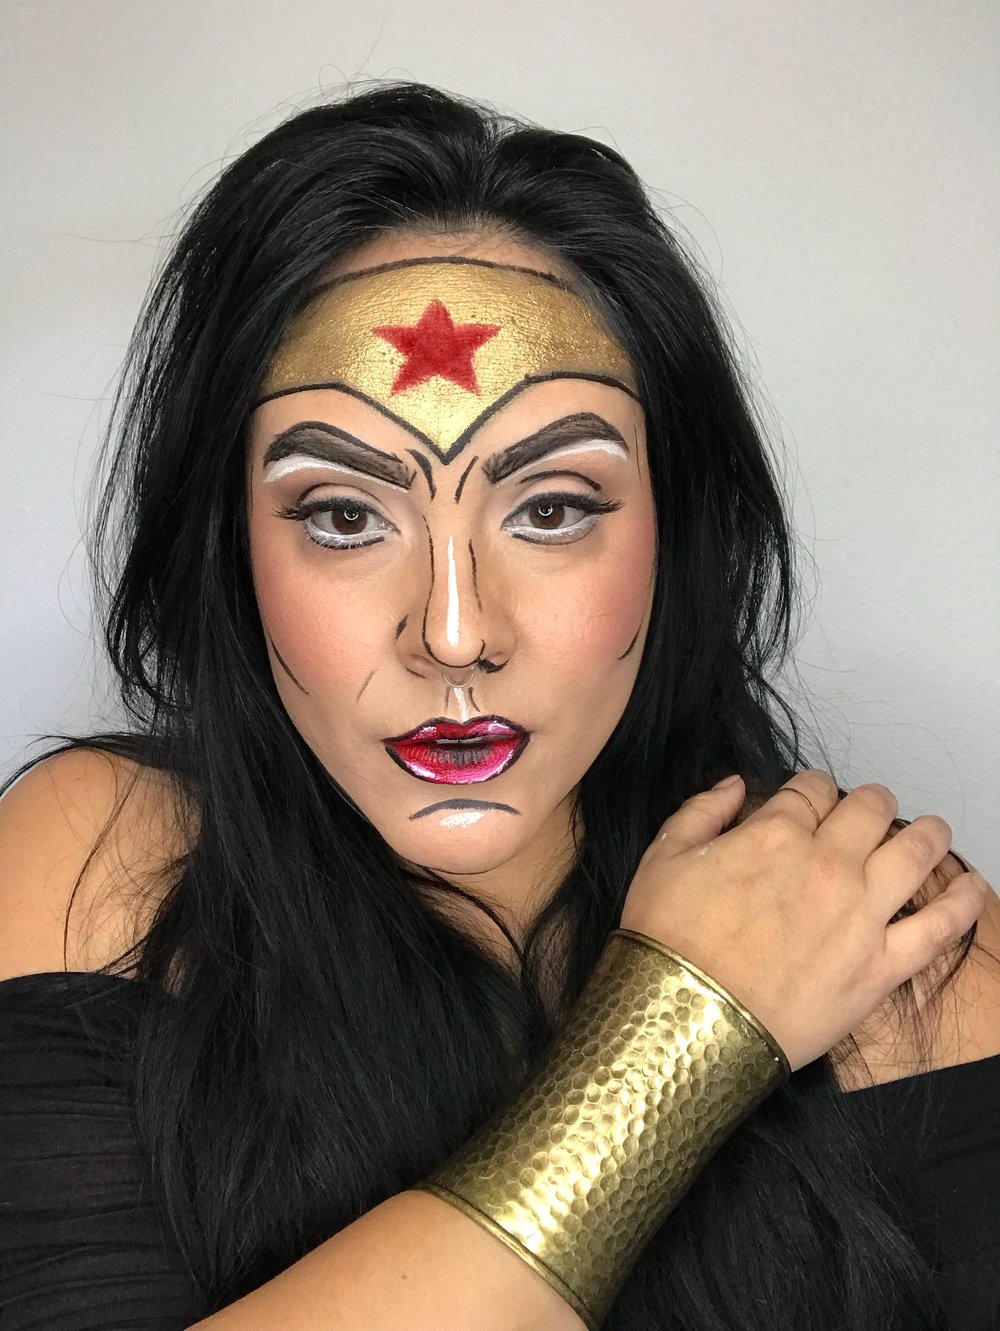
Of course I had to try a comic book version too! I love all the pop art makeup looks floating around right now…simple black and white lines to accentuate facial structure, add red lipstick and there you go!
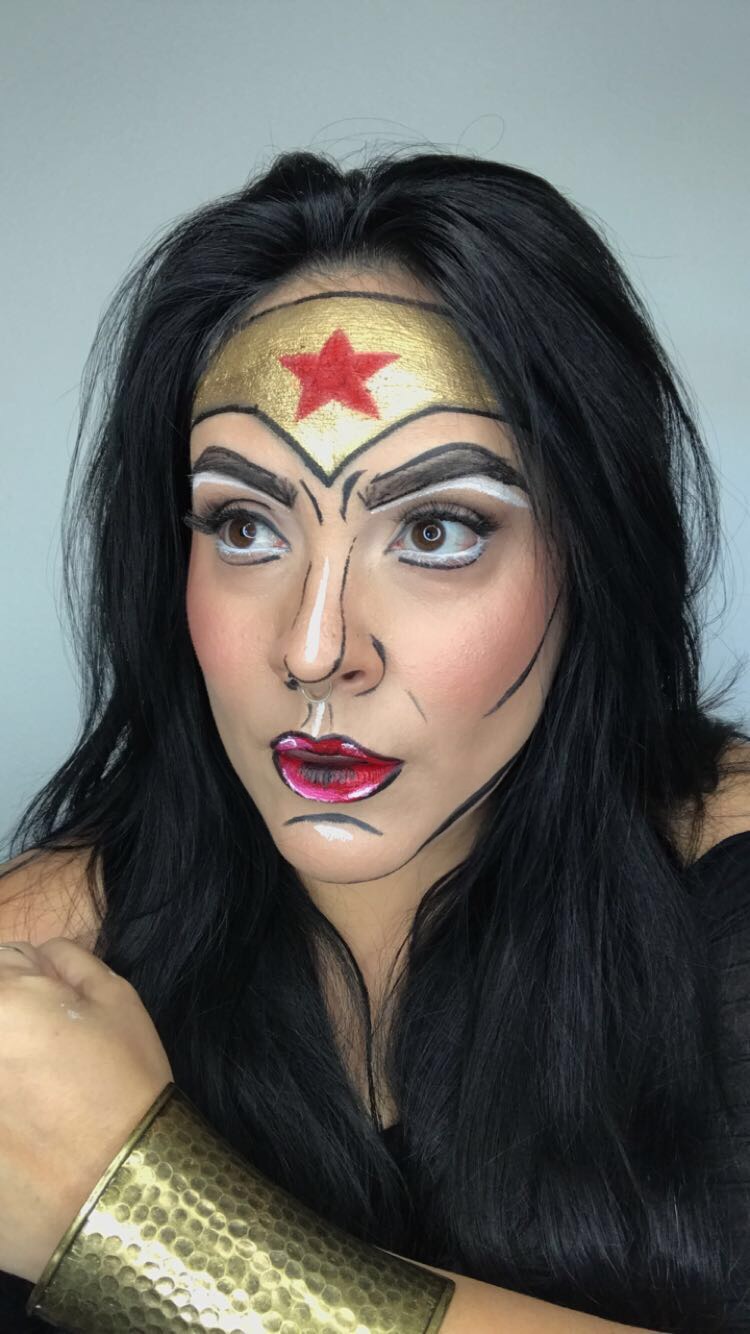
I changed the headband to the more classic shape.
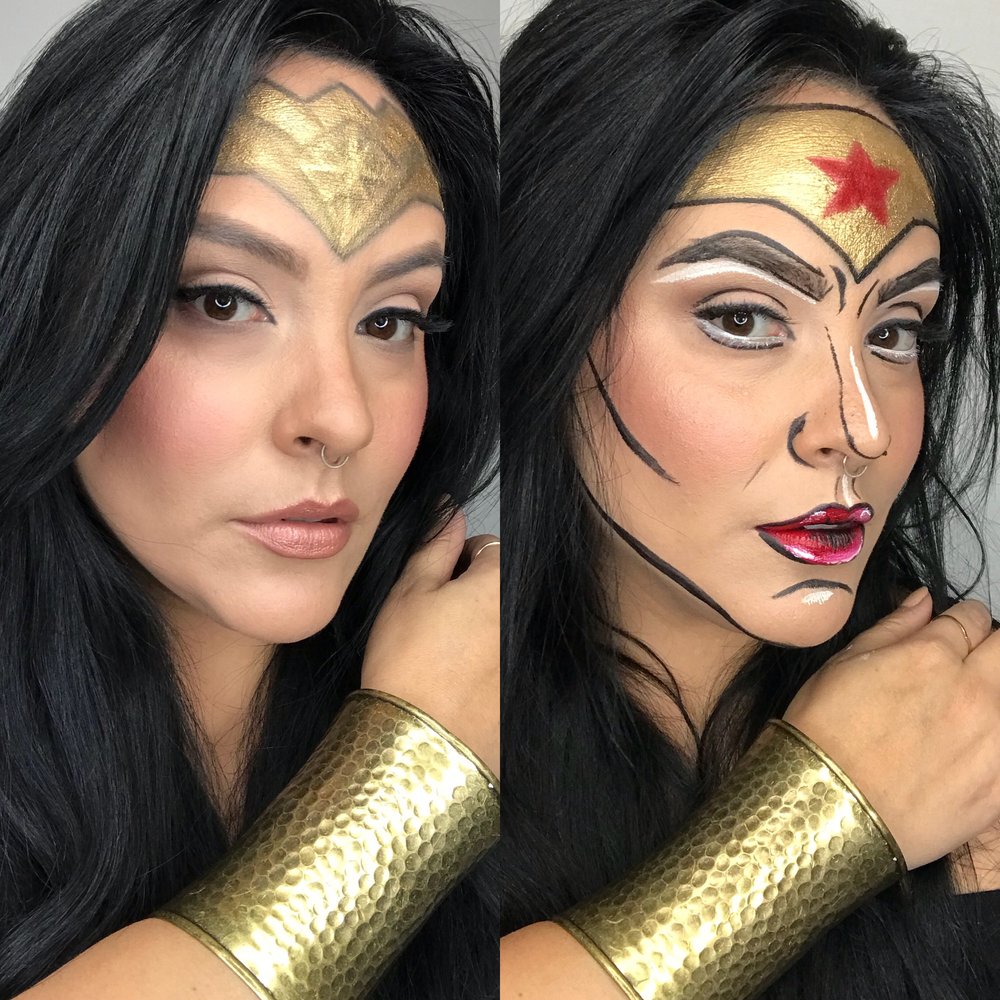
I can’t decide which is my fave! How amazing is it that makeup can show on the outside how we want to feel on the inside? I have to admit, it’s impossible to feel bad when your face is painted like Diana herself!
October 18, 2017

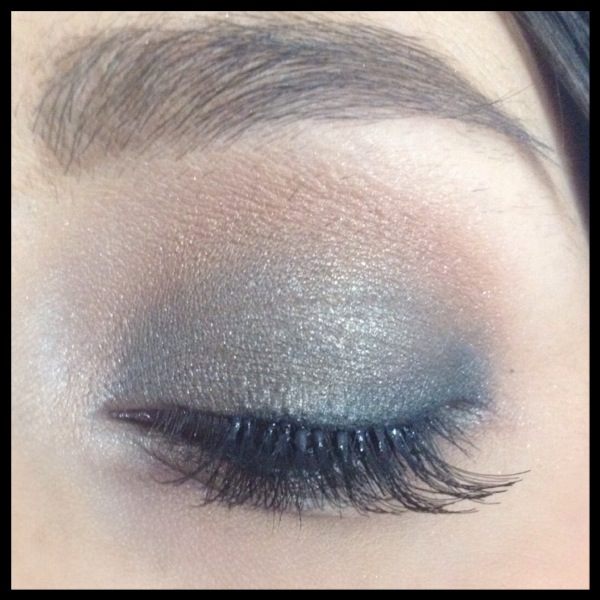
Who says that the only daytime drama can be the soaps you watch on tv? A smokey eye doesn’t have to be reserved for the evening! The trick to pulling it off during the day and not looking like you’re headed to the club is to be strategic about the placement and using soft neutral shades! Here’s how…

1. Apply your normal primer, and then start by lining your eyes. It doesn’t need to be perfect. I’m using the Rimmel Scandaleyes pencil in black.
2. Use a smudger brush and smudge the liner back and forth to create our smoke.
3. Using the same brush begin to work the smudged liner upwards. Keep it away from the crease…we are smoking out the lid.
4. Pat a shimmery taupe all over your lid. I’m using Homecoming by Makeup Geek.
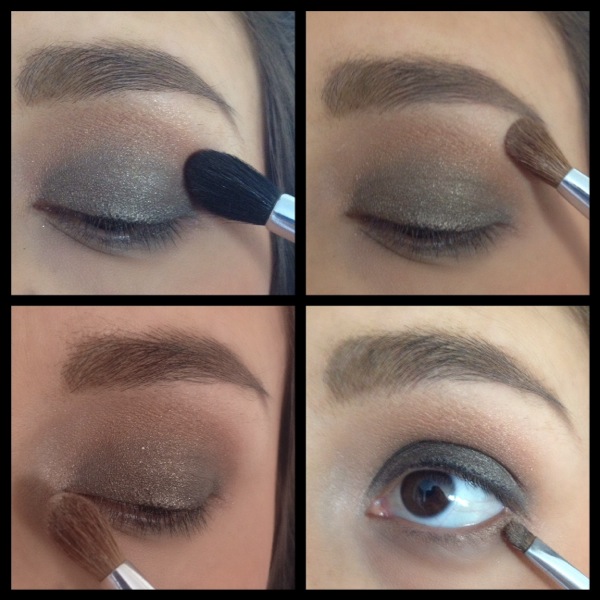
5. Using a windshield wiper motion, blend a soft brown into the crease. I’m using Creme Brulee by Makeup Geek.
6. Sweep a matte vanilla shade under the brow bone, I’m using Foxy from the Urban Decay Naked Basics palette.
7. Place a pop of shimmery vanilla in your inner socket to give the look a little light. I am using Venus from Naked Basics.
8. Using the same smudge brush as before, dip it into the taupe you used on your lid and blend a thin line under your lashes.
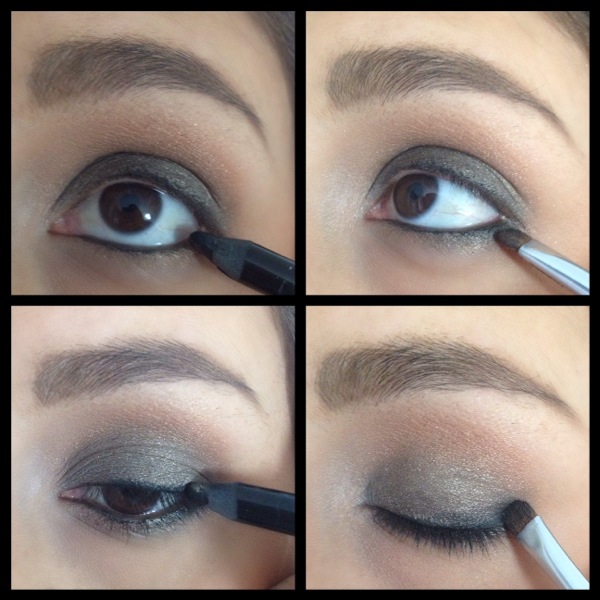
9. Apply your black liner from step one to the inner rim of your lower lashline (waterline).
10. Use your smudger to smear the liner into the outer third of your lower lashline.
11. Line the top of your eyes again to bring the look together.
12. Smudge the liner up slightly on the outer third of your top lashline.
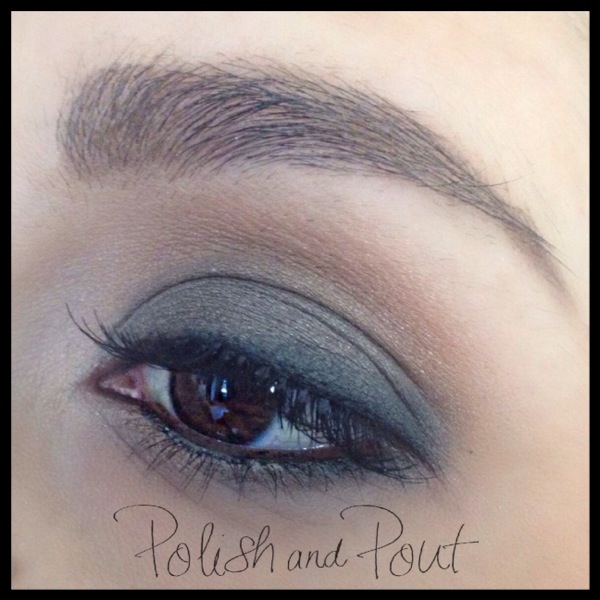
Mascara (and lashes if desired) and there you go!
A touch of intensity that appropriate for just about anywhere!
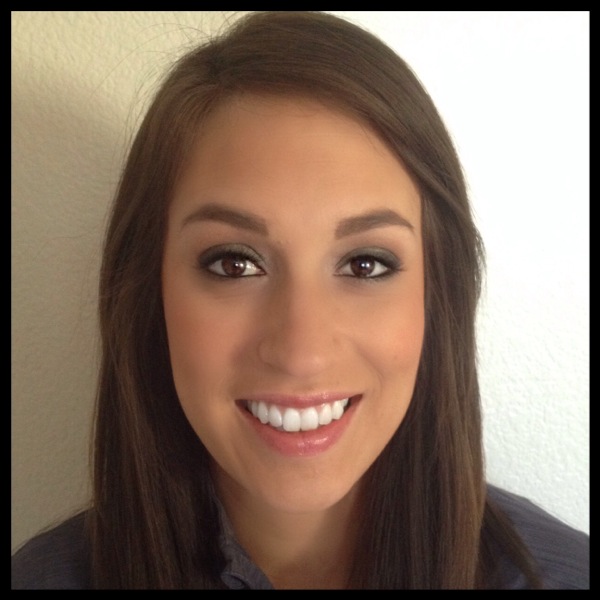
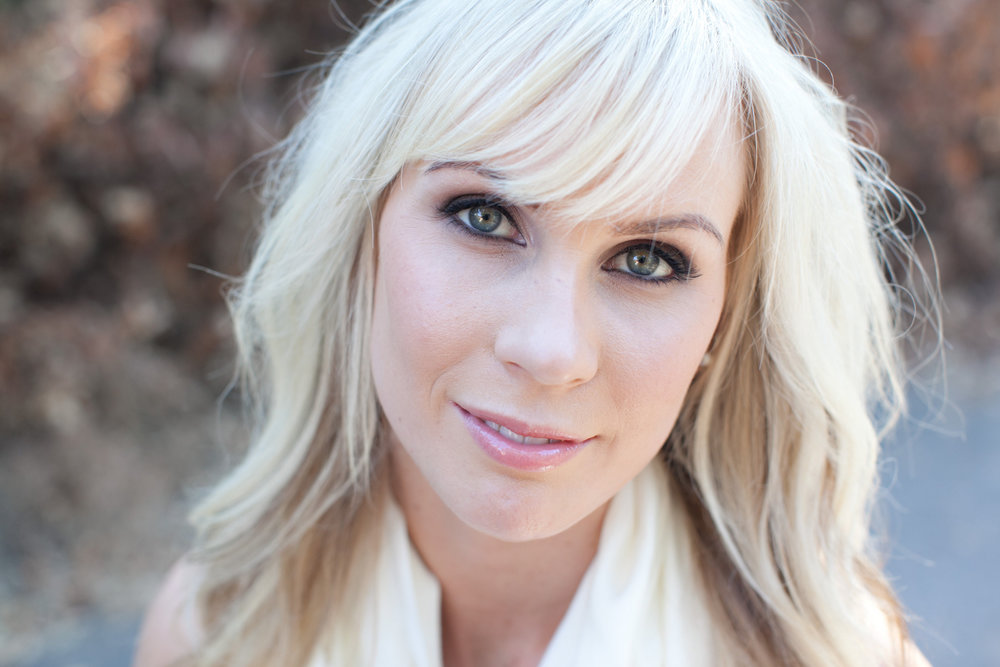
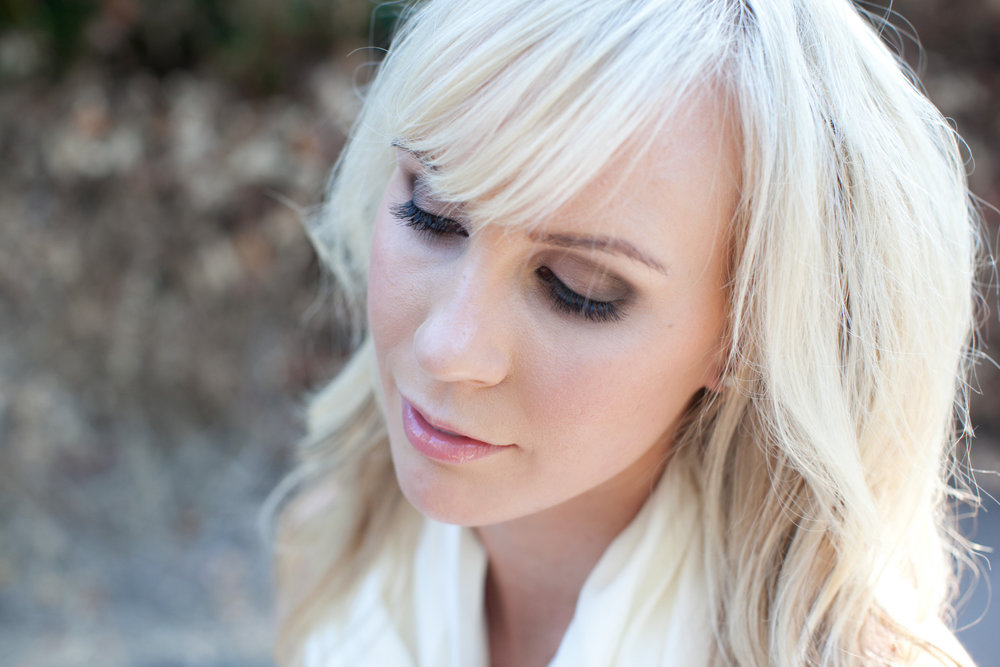
And a full shot of my lovely model to show you that overall, the shadow really does translate soft and is definately not too harsh for daytime! Plus, I have to show off my gorgeous sister (who is having a baby next month! Woohoo!).
Cheers to Smoke, Shadow, and Daytime Drama,

January 13, 2014
Hair is so much fun and I love doing my hair in new ways…the same down with curls look gets old! And honestly I only wash my hair once or twice a week (that’s better for your hair!) so learning new ways to wear my hair up is necessary!
When I saw Nicole Richie on the red carpet at the Golden Globes with this amazing hairdo I felt super inspired!

Then, when I saw the character Rebekah on Vampire Diaries with a very similar do I knew I just had to create my own version of this look! Is it a ponytail? Is its faux-hawk? Who knows! I guess I’ll call it a punk ponytail…

So here’s what you’ll need:
A hair-tie, a comb or brush, a few bobby pins, and some hair spray
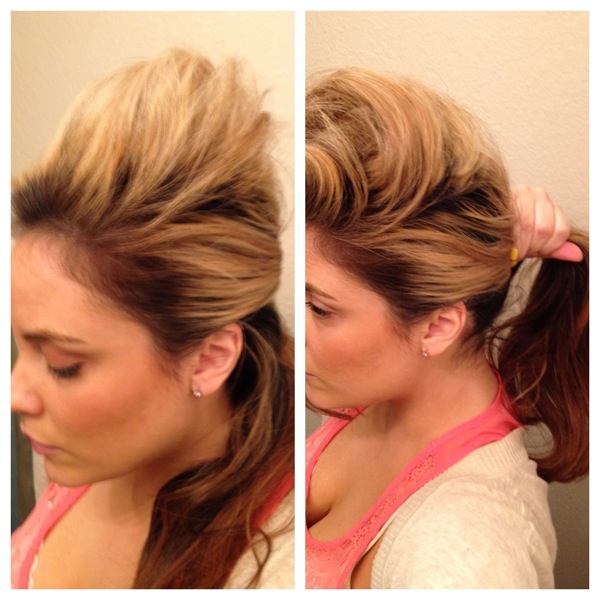
Comb out your hair and either straighten or curl it. Mine is left over wave and texture from the previous day. Create a deep, defined part on one side. Section the top portion of your hair to create your faux-hawk.
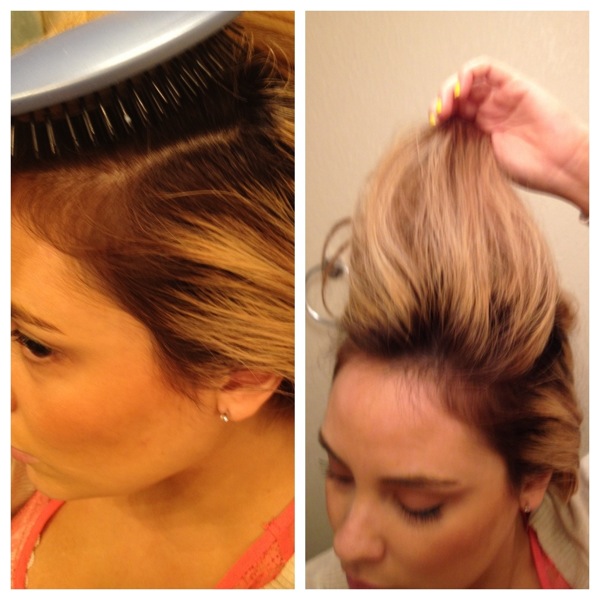
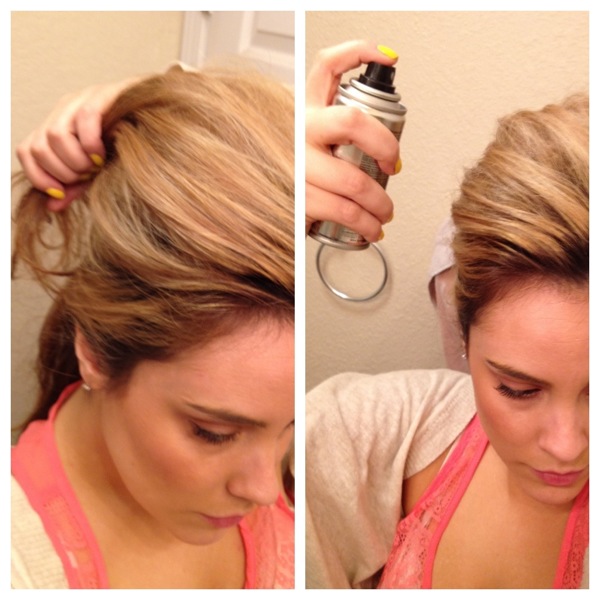
Tease the top portion of the hair that you sectioned off and smooth over the front of the hair. Take your comb and slick back both sides of your hair. Secure with bobby pins (like your doing some up/some down) and spray.
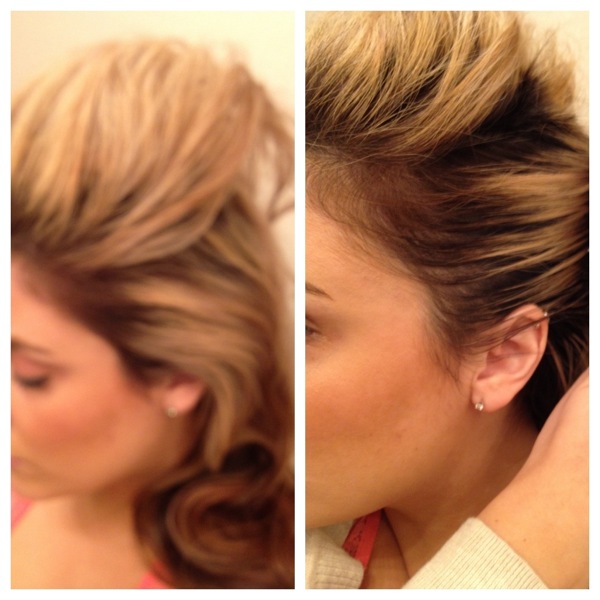
Your hair will now look something like the left picture below. The top teased hair is left out on top separate from the slicked back sides that you’ve secured. Gather all of the hair, except for the top section, into a ponytail and secure with a hair-tie.
Arrange the top section of hair so that it lays over the back ponytail and slightly swooped toward the side opposite of the deep part. Tease more if necessary. Spray the heck out of it!
And there you have it!
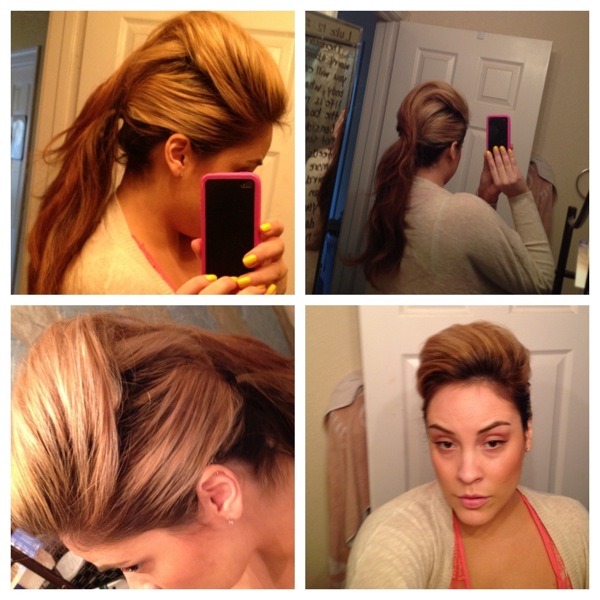
Side note: If your hair is all one length, then the top portion of hair that you teased will lay over your ponytail with that “cascade” effect that Nicole Richie’s hair had. In that case, be sure to hairspray the underside of the teased hair generously. My hair is layered and the top layer quite short, so it barely grazed the top of my ponytail.
So Cheers to Hairstyles that looks good on the Red Carpet, on Vampires, and on Regular People too!

March 7, 2012
I absolutely LOVE false lashes…especially individuals! They really make eyes pop, but not in an over the top way…individuals can be believable, more so than a strip in my opinion. It’s more like ” hmm…her lashes are so great!” or “I wonder if she used Latisse.” Don’t get me wrong, strip lashes can be nice and fun, but individuals just have a certain something that I just love!
I often hear: “Aren’t individuals harder? They take so much time!” Perhaps it is a practice-makes-perfect situation but I actually find them easier. They take no thought. I don’t have to sweat lining them up perfectly likes strip and I don’t have to measure or trim. Plus, no fear of a corner lifting! And popping a few on the ends of my eyes when I’m pressed for time is a cinch and adds a lot! You convinced yet?

What you’ll need: individual lashes…I like Ardell’s, and I find that most (even those with “good” natural lashes) will use the “short” length (they come in short, medium, and long) if you want a plush lash that is believable. Lash glue…I like DUO (it is NOT latex free, for those of you with allergies FYI) and I get the one that dries black (vs. the one that dries clear). Tweezers are optional. I find that they get in my way and prefer to just use my fingers…but some people swear by tweezers. Your choice, do what works for you.
Quick tips:
I do one lash cluster at a time on each side, alternating back and forth so things are even steven.
Dip the lash in a little glue (you don’t need much!!) and let it dry for a sec so it’s tacky/sticky NOT wet. It will adhere better and stay put where you place it.
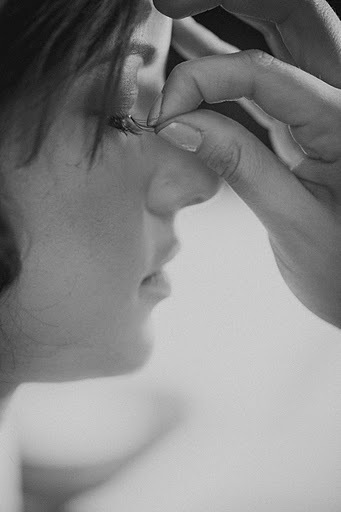
And finally, place the falsies into the root of your lash…not on your actual lash, not above your lash on your skin, but into the actual lash line.
Watch the video below for more tips and to see me apply them! Good luck and let me know how they turn out for you!
Cheers to Lashes, to Glue, and to Fluttery Eyes that Pop!

January 19, 2012
I did a shoot a while back that turned out SO beautifully and I’ve been dying to share the pics with you all but had to sit on them for a bit until they were published in the wedding blog Every Last Detail! The fabulous Lydia Takeoka took the pics!
All 3 of the models were so gorgeous I thought it’s be nice to tell you how you can get each of their looks! The first one that we will look at today is Ashley…

Ashley is often my partner in crime on shoots but usually as the hair stylist…this time though I had the pleasure of doing her hair and makeup! She is absolutely lovely, no?! I love the unique accesories: chains and pearls, and that gorgeous ring! And the vintage wedding dress was from a second-hand store!
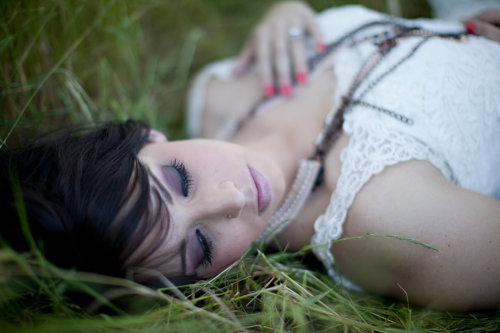
To achieve this sultry eye I swept a rich cool undertoned brown all over her lid, blended her pinky-peach blusher shade into her crease, highlighted the inner socket and under the brow bone with a shimmery vanilla, and smoked out the edges with matte black shadow. A strong liner and loads of L’Oreal’s Voluminous mascara finished off her look! Try Dior’s 5 pan in Mystic Smokys 004

On Ashley’s nails is OPI’s Monsooner or Later…this was a bridal themed shoot so I especially loved this unexpected flash of color on her nails! Would you wear a non-traditional color on your nails on your wedding day? I would! (And I did! Haha…mine were black!)

Ashley showed up with her hair already with a bit of curl in it which made my job easier…to get this touchable updo start by running a curling iron through your locks or if you have natural texture use a scrunch spray. Next gently tease the crown, gather the hair like you are going to put it in a some-up-some-down look and pin. Pull the ends up and tuck into a french twist or chignon. Pull out small sections of hair as needed to add volume and texture. Then hairspray liberally!
Give this look a try and let me know how it turns out!
Cheers to sultry eyes and vintage dresses,

Acessories, Beauty, Bridal, Fashion, Hair, Makeup, Nails, Photoshoot, Tutorial
October 14, 2011
Remember that photoshoot that I showed you behind the scenes pics of the other day? Well here are a couple pics of one of the finished looks as well as the how-to video so you can achieve the look too! Are you excited? I am! Haha!
The shoot was on Fall bridal trend…but for now, I just want to show you our amazingly-gorgeous model Ashleigh in her “classic bidal look”…she looked great! Many thanks to @ashleycosmo for styling her hair!
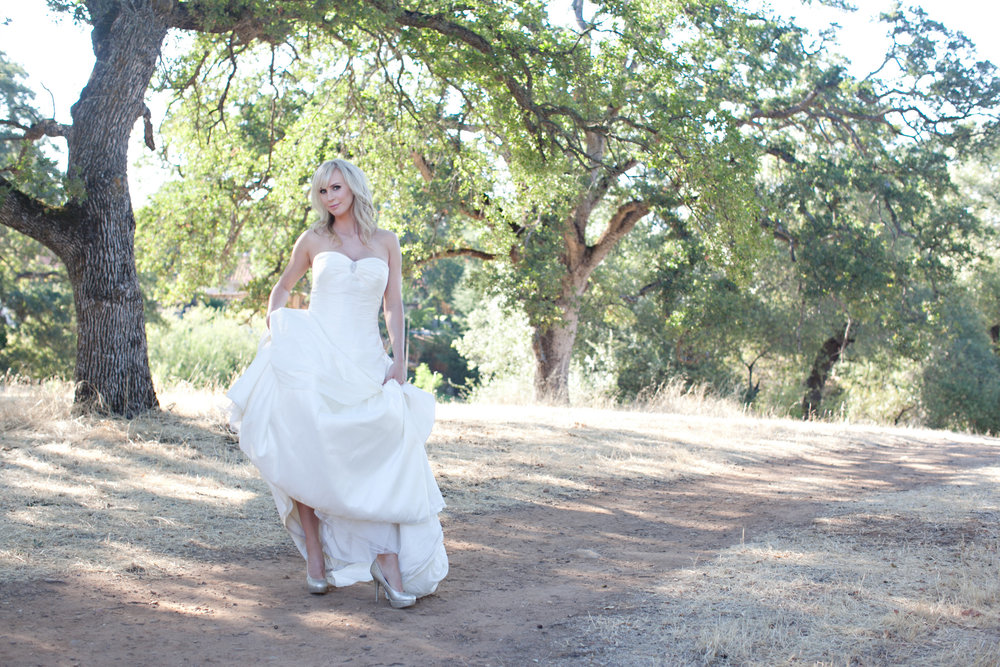
You can have this look too…even if it isn’t your weddings day…this look is great for any special occasion…or even just a Monday! It’s flattering on anyone! So pull up a chair, grab your brushes and shadows, and brush up on your smokey eye skills!
So Cheers to bridal beauty and weddings, but most of all to looking your best regardless of the occasion,
October 3, 2011

