

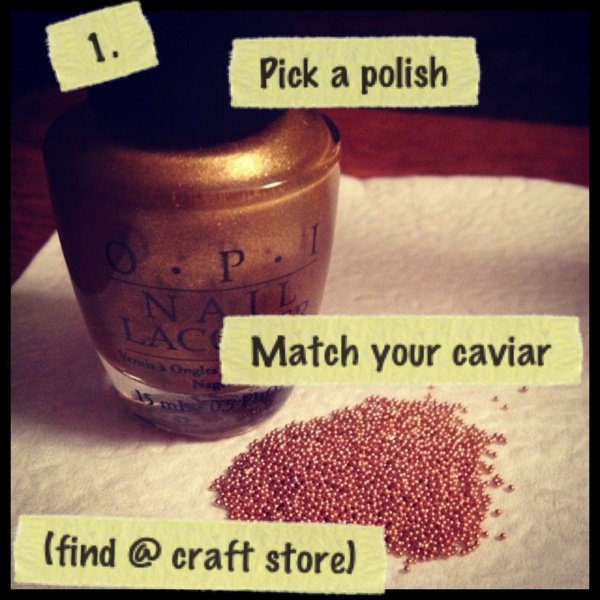
It’s all about nail art right now and the caviar mani is top of the trend list! You can find “caviar” at the craft store (I’ve even seen it at the dollar store too). It looks so fancy but is super easy!


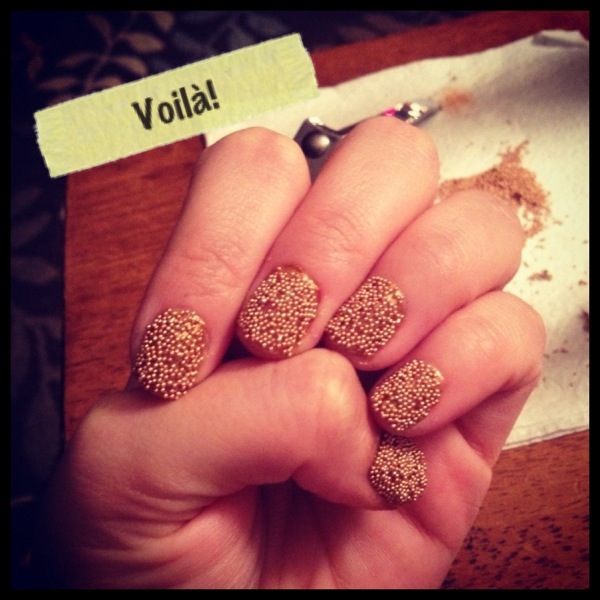
I think this is a perfect holiday mani don’t you?
Cheers to Nails, Christmas, and Caviar,

December 3, 2012
Sockbuns have been everywhere this year…from bridal to the redcarpet. And while some of the top-knot trends can be achieved many different ways, there is no substitute for the good ol’ sock bun! It’s called that because you actually use a sock! True story. Here’s how…
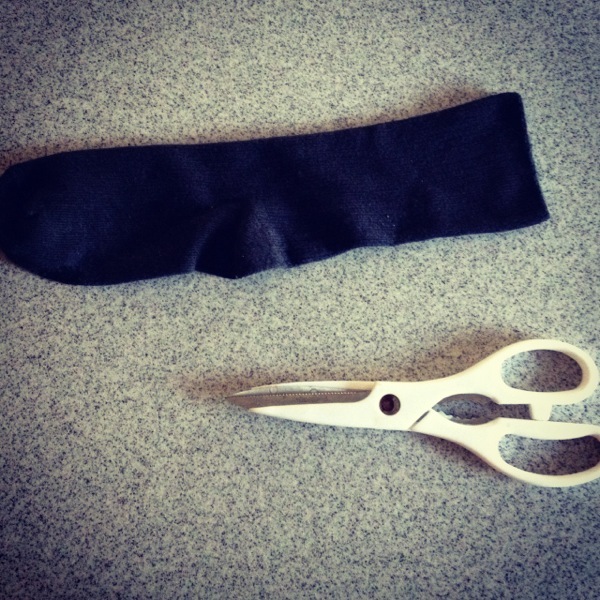
Grab some scissors and pick your sock. Any will do, however a few things to note: the thicker and/or longer the sock, the bulkier it’ll be, thus the bigger or more voluminous your bin will be! Want mega volume huge hair, then opt for a thick long sock! Average is always a good place to start if you’re not sure. Also, while the hair will cover the sock, it’s always a good idea to choose a sock closer to your hair color just in case something shifts during the day people won’t see your purple striped sock! Haha!
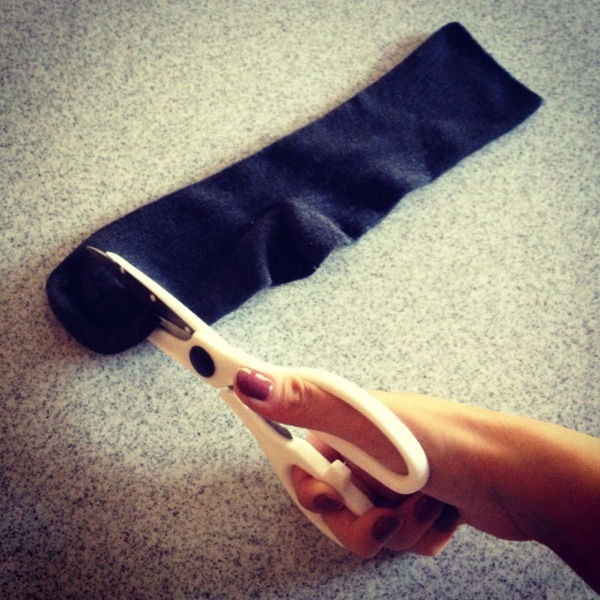
Cut the tip off. Doesn’t matter if it’s half an inch or several. What matters is that the closed “toe” is no longer there.

Now you have essentially a leg warmer!

Begin to roll the sock into a doughnut like shape.
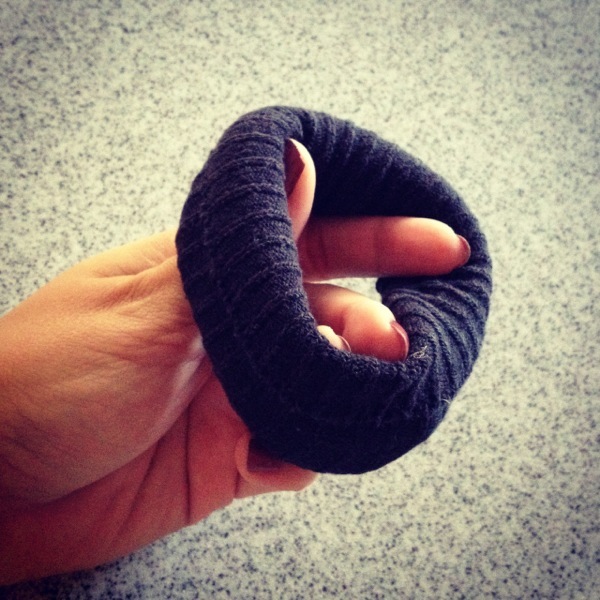 Keep rolling until you reach the other end and…Voilá! Sock bun ready for action!

To put your hair up in one literally takes a minute or two! Fastest hairdo ever! Below is the video demo on how to put one in your hair!
Cheers to Socks, Buns, and Fast Hairstyles,

October 5, 2012
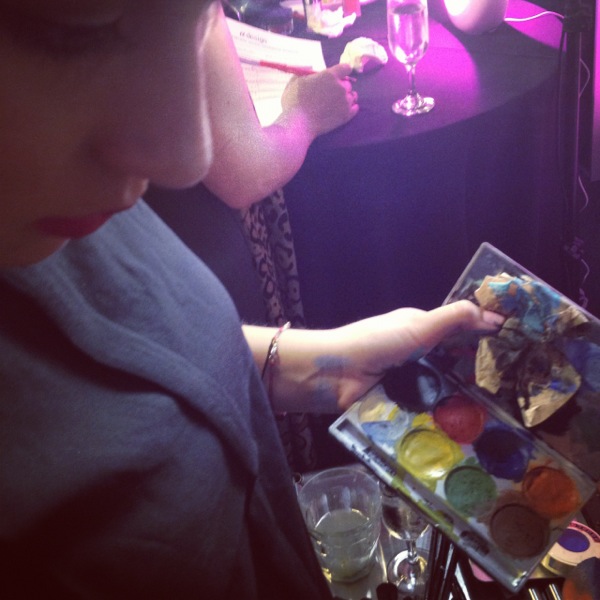
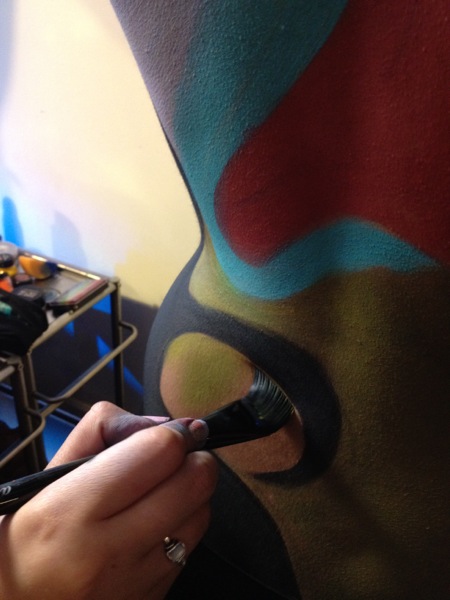
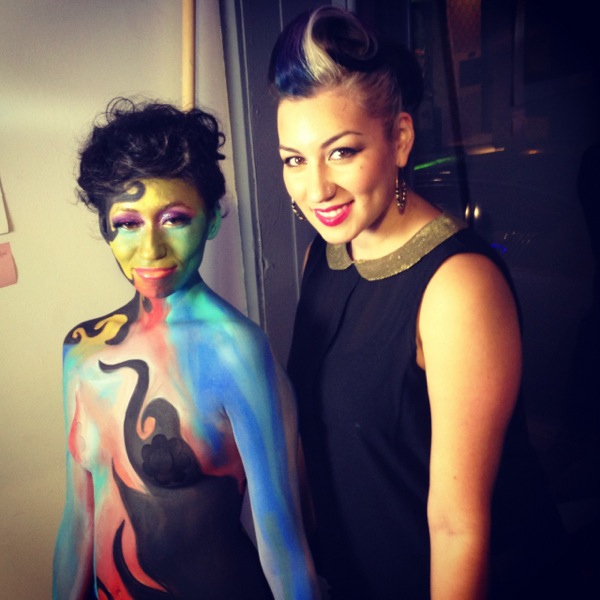
Meet my new friend Kali. Kali at the ripe old age of 21 is an accomplished makeup and hair artist. I met her last month at the Adesign Brush Party, she was demo’ing body art techniques using those awesome brushes. I was completely wowed by her abilities and asked her to share her story and some products she loves. Her strengths and interests (math, anyone?!) intrigue me…take notes people, this girl is going places…
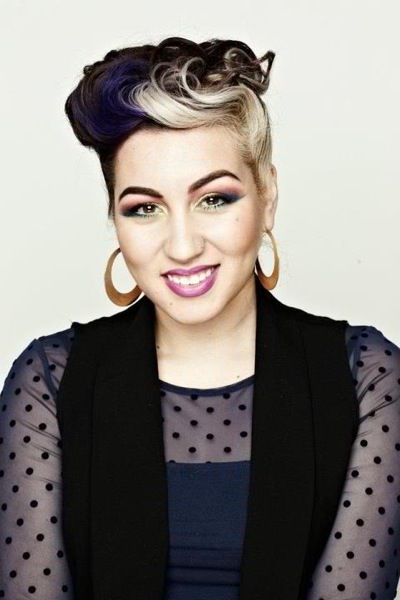
“So lets see, where do I begin…Well for starters my name is Kali Lorenzo. Born and raised in San Jose, CA. I was always a creative kid and somehow I ended up putting it to use through makeup. I loved painting and math. So those 2 skills served me well when it came to hair and makeup. I’m a licensed cosmetologist. Believe it or not theres alot of math in hair! I’ve been professionally doing makeup for about 5 yrs, hair 2yrs.”
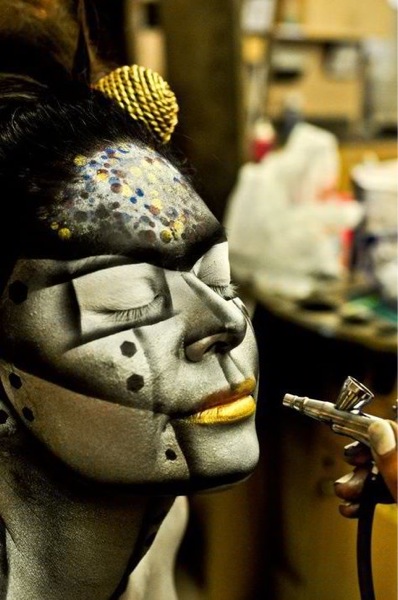
“As far as body painting goes, I’ve only been doing that for a year. My first time doing such thing was for a Hair show competition, which I won first place for ;). The theme was “time warp” doing anything from the b.c. to present involving hair/makeup. I did futuristic of course. I converted my model into a robot from head to toe. Never did I have previous training for this, but it was how my mind worked. I had this vision in my head so I would quickly draw it before it left my brain. Sketch it out & then bring it to life on a human body as my canvas. Sometimes I dont even know how my brain works…but it does…in a crazy way. I love doing what I do, and I feel more than blessed to be one of the few that gets to do what they love as a career.”
“My interest in makeup began shortly after my 15th birthday, my friend had a photography project and asked me to be in it. I knew how to do makeup, but not like those girls at MAC. That day I did a look that changed my life forever, it was simple but gave me the idea that “Hey, maybe this can take me somewhere”. So I started reading books, watching youtube videos, and eventually having clients. I posted all my stuff on myspace (back then lol) then facebook, and then eventually started attending shows and networking…”
“May I add I was only about 18or 19? I was determined, and I still am.”
“I know what I want and I do not stop until I get it. I feel like I’m still at a young age where I have plenty of years to achieve my goals, but of course I give myself a deadline. I need to push myself harder every year to achieve that 25yr deadline. So I have 4 yrs to go :).”
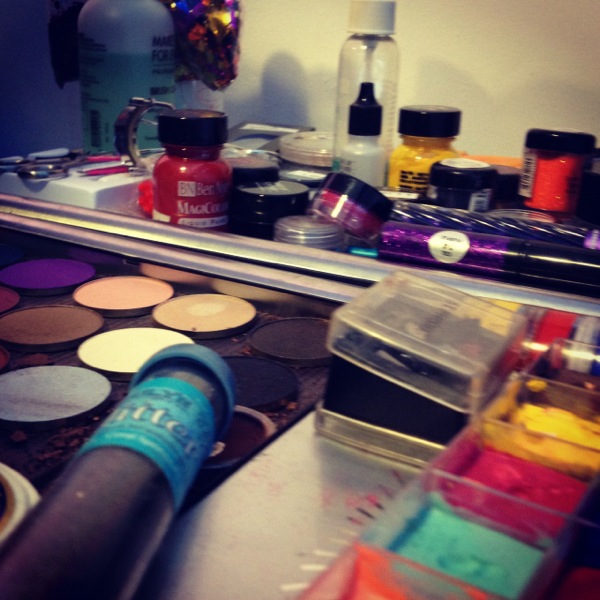
3 must haves (or else I’d die!!):
1) Ben Nye Setting Spray, I dont care what anyone says best setting spray ever!
2) Urban Decay Supercurl Lash, I kid you not best curling mascara I’ve used by far.
3) MUFE’s Flash Palette, need I say more??! Everything in 1!
Wow! I don’t know about you, but Kali’s amazing talent and determination (at such a young age too!) is incredibly inspiring! Follow her work on Facebook…and find out there how to book her services!
Cheers to Math, Art, and Determination,

Beauty, Beauty Spotlight, Body, Costume, Hair, industry professional, Makeup, Musings, Personal, Photoshoot, Pro event, Product review, Products, Shopping, Trend, Tutorial
September 17, 2012
So between my frequent thrifting and the fact that I have a hard time getting rid of anything…my pile of makeup bags, clutches (or anything for that matter!) that need a little face lift are in abundance! If you have an old clutch or makeup bag that needs an update, a few cheap items…some things you probably already have at home…should do the trick! Here’s how I did it!
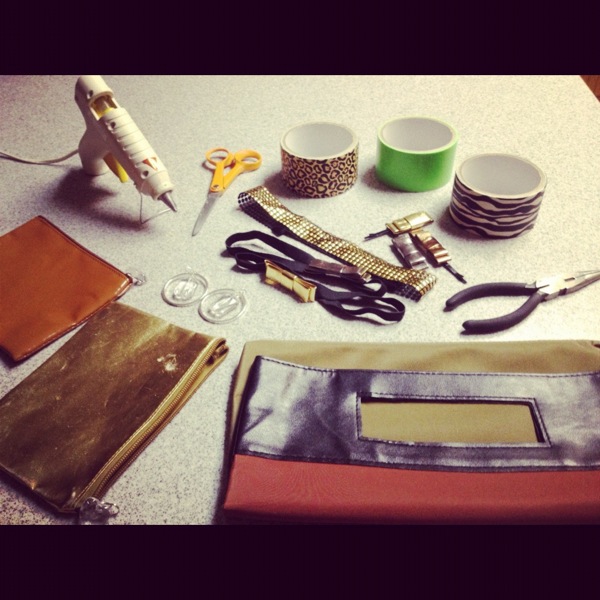
Here’s what you need:
1. Your bag to recover…I find that something with sharp anges (like square or rectangle) work best, anything with a rounded edge will be a bit more difficult
2. Printed duct tape…you can find this at any craft store! Pick a print or colour you like. I snagged mine at the dollar tree!
3. Hot glue gun, needle nose pliers, scissors
4. Any old earrings, brooches, or headbands to add pizazz!

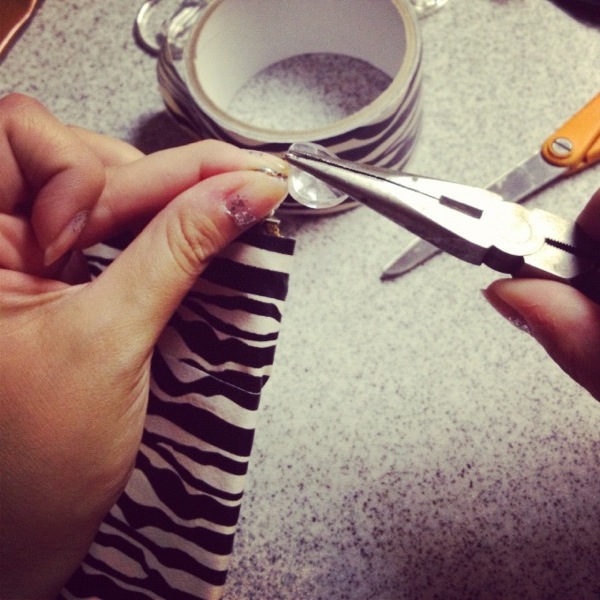
Align the tape on the top outer edge and wrap around the entire bag until you end up back where you started. Then cut with scissors. I like to do the top and bottom first, so I can see how many pieces of tape will be needed for the middle. That way I don’t end up having to trim at the bottom, I just layer them. Start with each new piece of tape on the same side each time so that bag has a seam down only one side.
My makeup bag had an ugly heart shaped plastic thing that I wanted to remove and replace. If yours doesn’t, no big deal…you can also use the pliers to add a charm or ring et cetera.
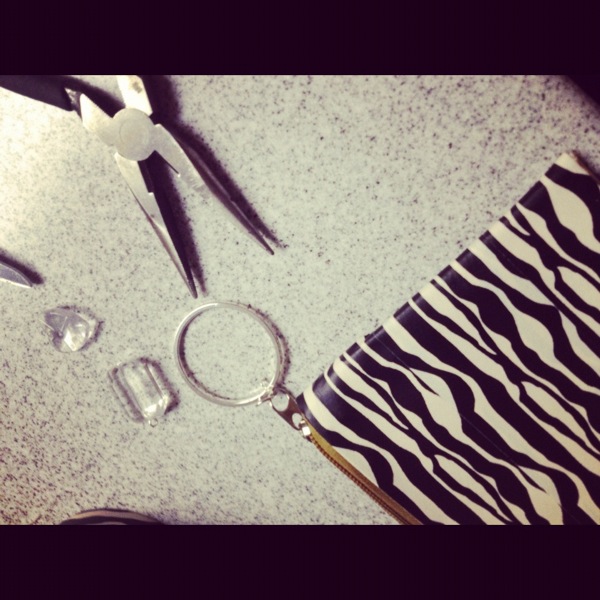
I used an old earring to replace the charm. An old earring or necklace piece would work amazingly!

Glue anything you’d like to your bag! I had a studded headband and some bows that I used. This neon green tape really looks like duct tape…so the clutch has an urban vibe that I loved! I noticed that the other prints had a smoother texture and looked a little more refined. So pay attention to your tapes when you pick one out. I honestly like both textures and finishes!
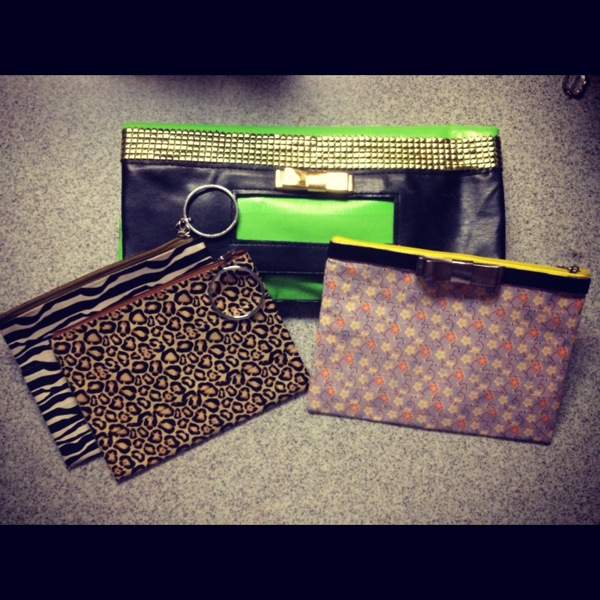
Here’s how mine turned out! I did two small makeup bags and one clutch…I then remembered that my friend Malisa gifted me some super cute craft tape with a floral print so I did another makeup bag and added the bow headband to it! I love how they turned out!
Give this a shot and let me know how it turns out!
Cheers to DIY, the Dollar Tree, and Duct Tape,

August 29, 2012
Skin care is by far the most important thing when it comes to beauty. Someone once told me that makeup is who you want to be, but skin care is who you are. As of late the trend is for skin to actually look like skin…and while foundation does wonders, doesn’t it make more sense to invest the time, money, and care into your complexion? You only have one face!

Honestly, my skin care routine changes depending on the season, what’s given to me, and what my budget is…but here are the things I’ve been using over the last 3-4 months. I should note that all of these products have lasted me a minimum of 3-4 months, some even as long as a year goes by before its time to replenish!
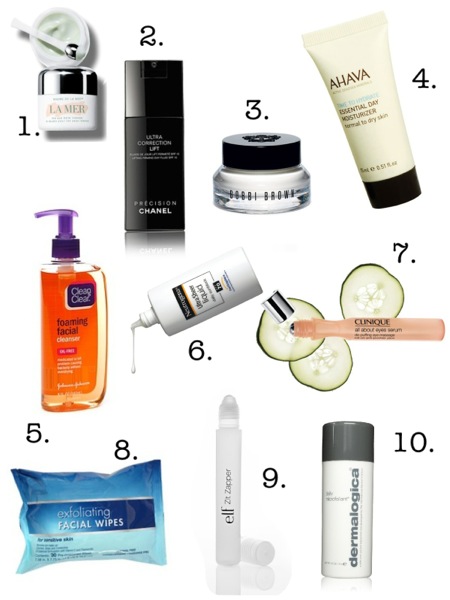
1. La Mer The Eye Balm Intense: $165 of pure decadence. My eyes feel so smooth and moisturized with this! Tackles puffiness, lines, wrinkles, and clarity.It’s like gold (and is priced like it too!) so I only use it at night…I only have about 3 more nights left of this. Yikes!
2. Chanel Ultra Correction Lift Fluid: $150 Has SPF 15 and a great lightweight texture. Moisturizing and reparative. I use this during the day under my foundation.
3. Bobbi Brown Hydrating Eye Cream: $46 This is my daytime eye cream. The perfect level of hydration without messing with my concealer.
4. Ahava Essential Day Moisturizer: $39 Says its for normal to dry skin. I’m oily though and this feels rich to me, so I use it at night.
5.Clean and Clear Antibacterial Face Wash: $4 Gives me that squeaky clean feeling I love and kills all the nasty breakout causing yuck on my face.
6. Neutrogena Ultra Sheer Liquid Daily Sunblock: $12 Want to stave off wrinkles and pigmentation? Then be religious about using sun protection! Almost all signs of aging are due to environmental damage…remember that!!
7. Clinique All About Eyes Serum: $28 Eye puffiness is the bane of my existence. This rollerball of cool soothing depuffing goodness is my lifeline!
8. Facial Wipes: $1 I get these at the Dollar Store! They have basic ingredients and help remove my makeup so that my face wash and other skin care really gets to do its job!
9. ELF Zit Zapper: $1 Every morning and night any blemishes or pores that give me trouble get a dose of this! Salicylic acid and tea tree oil dry out and soothe the problem spots! There are a lot of more expensive blemish treatments out there, skip them! This has the same active ingredients.
10. Dermalogica Daily Microfoliant: $50 Mix this rice based powder with a little water to make a paste or add to your facewash for gentle exfoliating action! I keep mine in the shower. This product has totally changed my skin I love it!
What skin care are you crazy about right now?
Cheers to Skin that Looks Good, Feels Good, and IS GOOD!

August 24, 2012
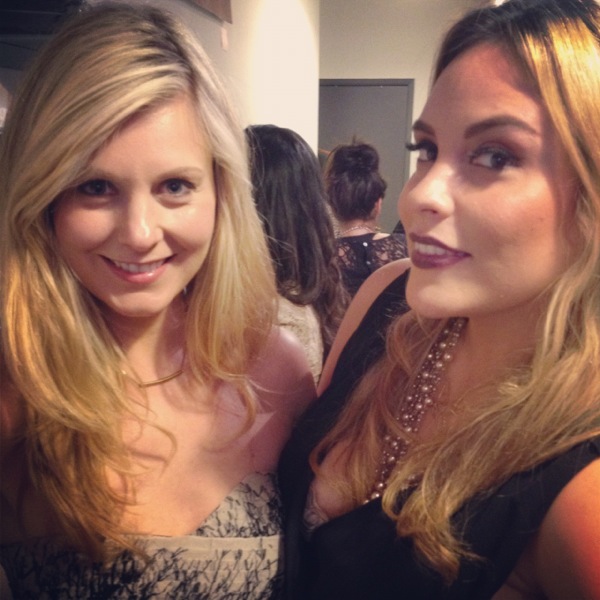
This week I had the immense pleasure of attending the VIP Adesign Brush Party at The Specialists Salon in San Francisco hosted by Erica Carr! Not only was I there to experience and review the Adesign Brushes as an artist, but I also was invited to cover the event as a blogger…if you follow me on Twitter or Instagram you saw a bit of the play by play of the night (You don’t?! Let’s change that! @polishandpout). Here’s a peek into how this amazing night went…
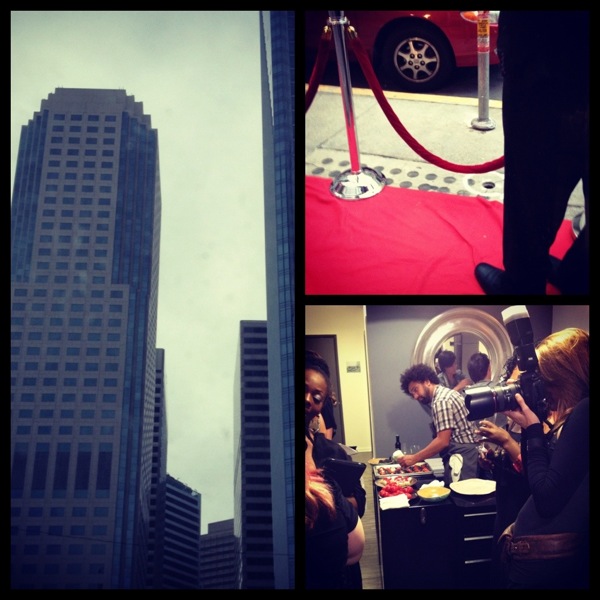
The soiree was in one of my favorite places…San Francisco! Red carpet? Yes please!
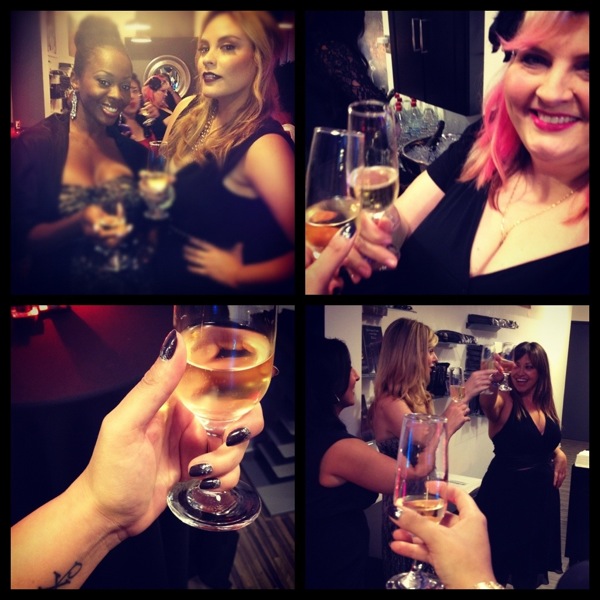
Clockwise from top left: Me and fellow beauty blogger Renee Hamilton, New friend and fellow artist Trisha, Pre-party toast, Cheers!

Bubbly is nice and getting to see other artists is always fun…but the main reason we were there was of course for the brushes! We all had the chance to try the Adesign brushes out first hand on each other.
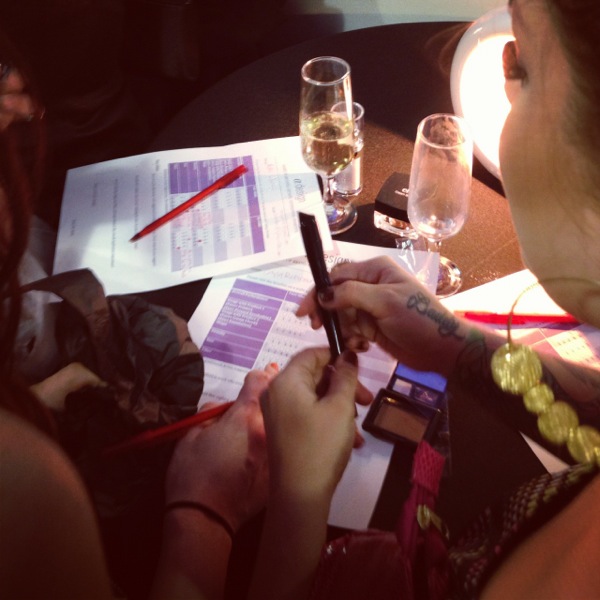
Two of the brushes there for our review have not even hit the market yet! One face and one eye brush…such innovative shapes! How incredible it was that Adesign wanted to include the artistry community in their product development! If the feedback is good…we may see these brush shapes hitting the shelves!

Adesign Brushes is a private label brand. They develop brushes for companies like Smashbox, Sephora, and Laura Mercier. I went home with around 7 brushes and cannot wait to use them extensively this month and give a full in-depth review soon! So stay tuned!

From the left: Beauty Director for Adesign Brushes Shana King, our hosts Erica and Lulu, and Anisa herself (the President of Anisa International, the company who owns Adesign).
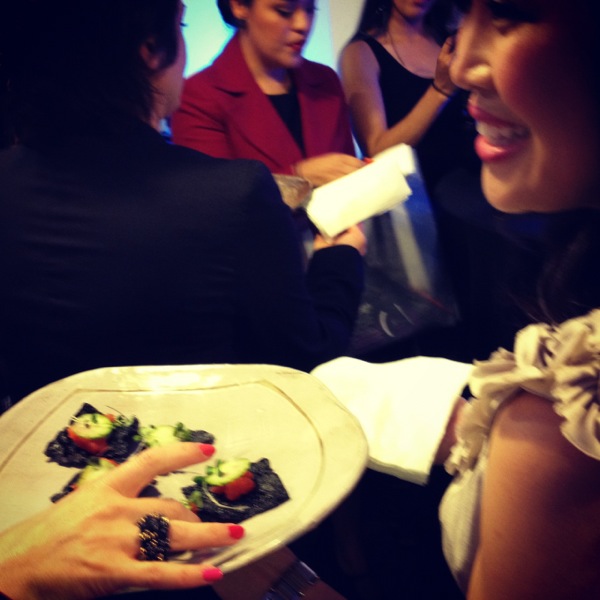
Yum! The appetizers were divine! Such a fun night…having so many amazing artists in one place is a rare treat! I am so thankful for the new friendships and connections that were made last night!
Me and Beauty Expert Shana King…she is lovely yes? I must say, her complexion was immaculate!
Cheers to Bubbly, Beauty, and Brushes,

Beauty, Celebrity, Fashion, Haul, industry professional, Makeup, Musings, Pro event, Product review, Products, Shopping, Trend
August 24, 2012
Here are some of the things that have been in my shopping cart as of late…mostly July and August. Some of these things I’ve been buying for years, others I just discovered! The prices vary greatly…honestly I use what I like and what works, sometimes that means combining expensive and affordable! Whatever works

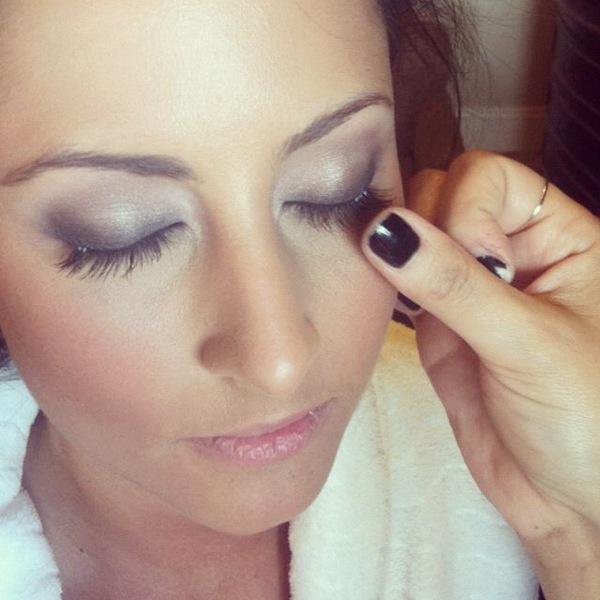
Ardell Individual Lashes: a long time fave of mine! I wear these everyday and use them on all my brides! They look so plush but are believable at the same time! I had someone ask me the other day if I had started using Latisse. I prefer to adhere these with Dark Tone Duo glue. You can find these for under $5 at Target. I mostly use the “short” length.
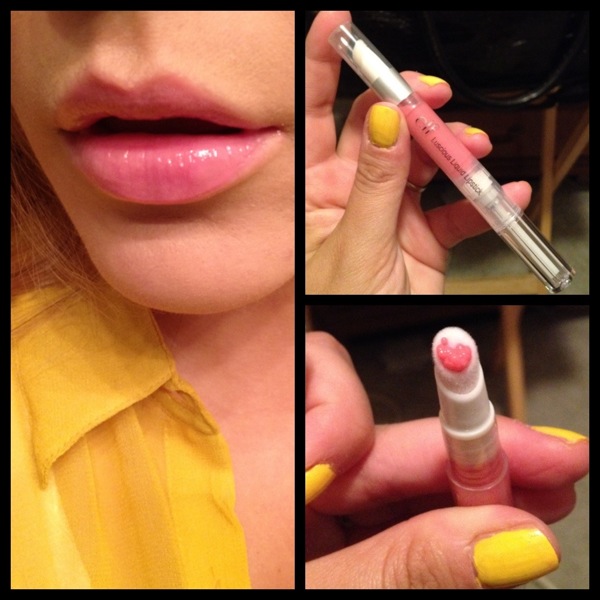
ELF Liquid Lipstick in Perfected Pink: only $1 at Target! Glossy finish, but not sticky! Love how smooth it is…and this shade works for everyone!!!!
Dior Airflash: $65 at Nordstrom. Pricey yes. But perfection has to cost something! This is literally photoshop for your face. Looks lovely by itself and is lighter than air. Or buff it on top of your liquid makeup for that extra perfect doll-like pore-less look! When I want my skin to look immaculate this airbrush like spray foundation is my go-to. Started using this 5 years ago and it was love at first sight!

Rimmel 8 hour wear Kate Moss Lipstick: around $4 at Target. I know, I know, I keep brining this formula up but I REALLY love it! Wears so long and feels great. Shade #8 is a pinky mauve. Good bridal shade.

Urban Decay Primer Potion: Usually $18 at Sephora. I tried this originally when I purchased my first Naked palette and I really like it. Helps shadow go on smooth and wear longer. I snagged mine on sale at Nordstrom Rack for $8!

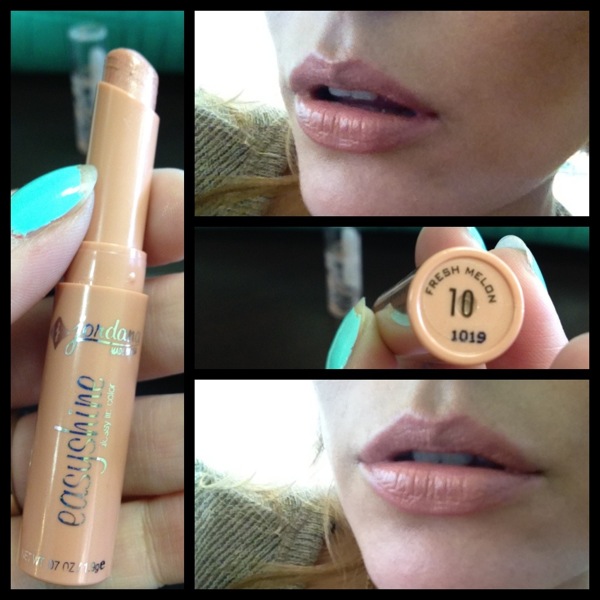
Jordana Easyshine #10 Fresh Melon: $1.25 at drugstores (I snagged mine at my local Savemart grocery!). Feels great, smells yummy, and looks so lovely! What a deal!
Rimmel 8 hour wear Kate Moss Lipstick: around $4 at Target. Yep another shade I love in this collection. A true nude. Perfect to pair with a dramatic eye. Be light handed when applying though so as to not erase your mouth completely!

Total cost of my shopping cart? Around $90…granted the foundation is around two-thirds of that so all in all 7 items for that much is not too shabby! Have you tried any of these products? Tell me your thoughts!
Cheers to Pricey Foundations, Cheap Lippys, and Using What Works for You,

August 20, 2012
I’ve been mixing polishes as long as I’ve been painting my nails…and no I don’t mean that I make polish from scratch, but that I actually mix them together. And I make a mean nail polish cocktail if I do say so myself!

Colors are in one minute and out the next! Or a slightly different version of a shade comes out that I must have…so concocting my own new shades keeps me from wasting my entire paycheck on polish!
A while back friend and fellow blogger Malisa Price came over and we whipped up a batch of Tiffany Blue for her trip to NYC! You can see her lovely digits, what we mixed, as well as a peek at my hubby playing mario kart on her blog here.
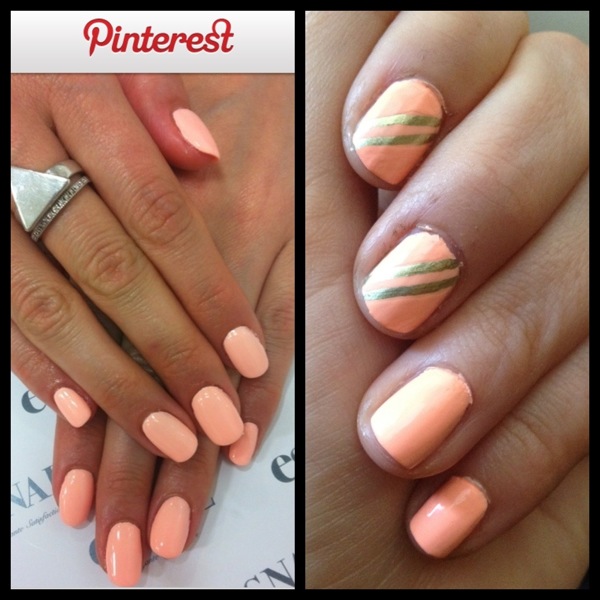 I recently saw an amazing pic on pinterest of a neon peach that sent me running for my polishes to see if I could replicate it. I think it turned out great! Here’s how I achieved it:

Orange, yellow (for added brightness) and white will give you peach. Since this is neon peach though, I opted for neon yellow and neon orange!

Approximate ratio: 50% white 30% orange 20% yellow
Mix a little inside a cap or on a plate if you’re just painting your own right then, or take a half used bottle of white and mix directly inside if you think you’ll want the color again!
I find that owning a couple bottles of white is the key to being a successful polish mixologist! White makes any color seem bright or turns a regular shade into a softer or more pastel color.
So Cheers to White, Neon, and Nailpolish Cocktails,

July 30, 2012
Say bienvenue to our friend Maya! She’s a double threat: a professionally trained and accomplished makeup artist AND a licensed cosmetologist who is amazing at styling hair!
I’m not sure if it’s the Mona Lisa smirk she always has on her face, or her sultry French accent…but we just love her!!
She’s lived in places like France and India and traveled the world sharpening her art and skill, studied under renown artists, and worked for lines such as Dior and Laura Mercier…here’s a peek at what products are her fav’s right now!
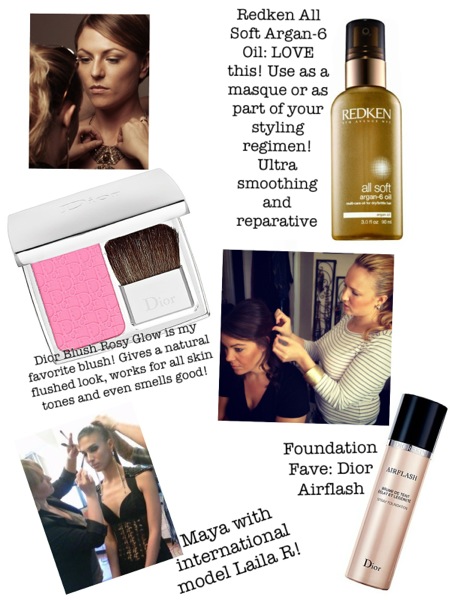
photo credits: top Paul Ferradas, bottom Jeremy Montemayor
Should you ever book P&P for your wedding or special event you’ll most likely meet her in person, as she often joins our beauty adventures! From Suburban Mothers to International Models, Maya has done it all! We are so excited whenever she joins us!
Chin Chin (Cheers!) to Mothers, Models, and Maya,

Beauty, Beauty Spotlight, Hair, industry professional, Makeup, Photoshoot, Product review, Products, Shopping, Trend
May 29, 2012
BB Cream…I’m sure by now you’ve all heard of this innovative product…and if you’re like me, you’ve had some questions! (Umm like, what does BB stand for?) Today I have the pleasure of being on Smitten With Pretty where I will be giving you the whole BB Cream Breakdown: what is it, what makes it special, and who should buy it! So make sure to stop by Smitten With Pretty so you can get the 411!

I have definitely been on the BB cream bandwagon for some time now…testing and trying and comparing. I wanted to know what all the fuss was about! So here are the ones I’ve tried so far (in the order I tried them) and what I think about them…
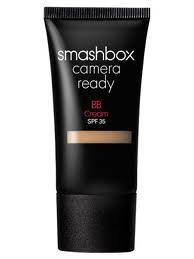
1. Smashbox $39: I liked it. “Hmm…so this is BB Cream, huh!” Felt nice, covered well for something that doesn’t call itself a foundation, and it’s oil absorbing properties were a pleasant surprise! Didn’t feel slick or overly shiny like I do with tinted moisturizers. Great to know that despite the SPF it is camera friendly. I was intrigued to try other brands to compare…
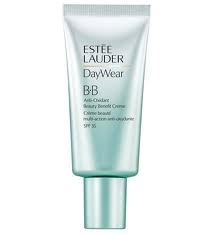
2. Estée Lauder DayWear $38: A little sticky, didn’t spread as nicely as the one by Smashbox. “Perhaps I bought too dark of a shade?? I think I’ll go back to using the Smashbox one.”

3. Clinique $37: “Hellooooo BB cream I officially love you!” Covers amazingly, anti aging benefits too? Yes please! I didn’t feel the need to wear foundation and loved that it was actually bettering my skin. Stays put all day. Instant love!
–insert me trying the Lauder one again, “I’m a little more tan now, maybe I’ll like it? Nope.” Even more dissatisfied after trying the Clinique.
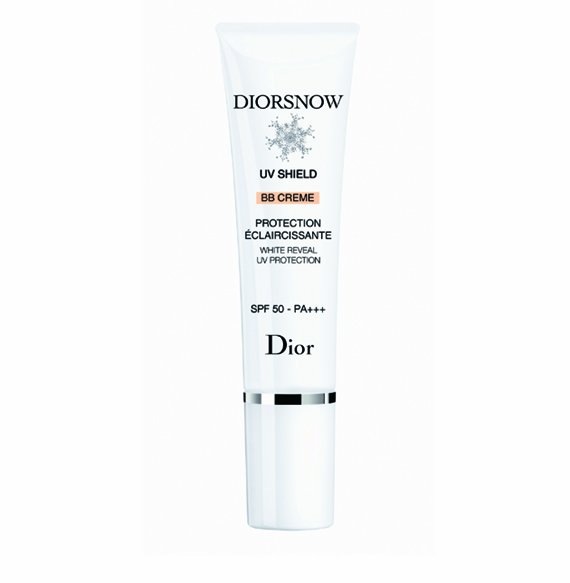 4. Diorsnow $60: “Dior you never let me down!” Texture was great, I love that it’s in the Diorsnow line (corrects tone) and the SPF 55 packs a wallop! Only currently available in one tinted shade tho. So if you have deeper skin it’ll look ashy. And if you’re tan, your face will look lighter than your body. So for most this will not be a stand alone product, you’ll want to use it under foundation. But if your fair complected, it’s perf! Consider this your sporty BB, your go to the gym or hiking or beach makeup option! I’m curious to try their Hydralife BB now…
–insert me trying Lauder again, ” I will like this, I will like this! Ugh, no I feel splotchy and like it just doesn’t settle right!” Boo! I really wanted to like you! BUT what I will say is that I think a dryer or more mature skin may really like it. Just not right for me I guess.
–Continued to alternate between the Clinique and Dior. Oh ya what about Smash? Used it again for a couple days…nice! I still think Clinique is better tho.
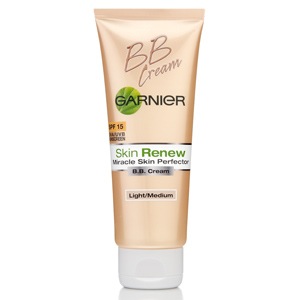
5. Garnier $12: “Ok my drugstore dare, what do ya got? Hmm…” Not bad, definitely a good budget friendly option. But not as good as the others I tried. More sticky, not as great of coverage. Reminiscent of tinted moisturizer–insert Lauder flashbacks–So comparable to Lauder’s I suppose.
Well, there is my honest detailed journey with BB cream…which took well over 2 months by the way! I definitely liked Clinique the best, and loved the Dior for those extra sun-filled days. When it’s all said and done, I’d say BB is a must for everyone! Make it your Summer best friend (It’ll probably end up being your favorite for every season! It will be for me!). You just can’t beat the benefits!
Cheers to BB Cream, Best Friends, and Benefits,

May 18, 2012

